Timestamp #184: Smith and Jones

Doctor Who: Smith and Jones
(1 episode, s03e01, 2007)


It’s a coincidence, but what a fitting story to chronicle just after Apollo 11’s fiftieth anniversary.

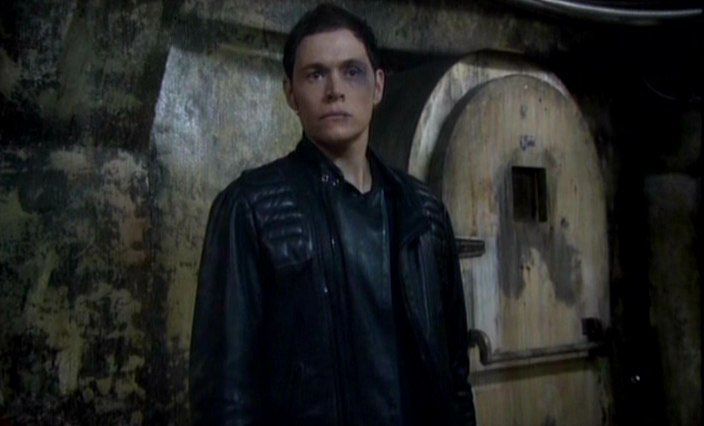
Martha Jones is on her way to work when her mobile rings several times, each caller talking to her about her brother’s twenty-first birthday. In the midst of all these calls, she’s interrupted by a certain Time Lord who demonstrably takes off his tie. Once at the hospital, Martha bumps into a helmet-clad motorcycle rider in black, changes clothes, and tends to her patients as a medical student.

After dealing with a patient experiencing a salt deficiency, she spots two more motorcycle riders before moving on to her second patient: John Smith. The man has two heartbeats and is complaining of abdominal pain. Martha examines him and each of the medical students talks about the rise of static electricity as they move on to the next patient.

Later on, Martha talks to her sister on the phone and discovers that the storm outside is focused directly over the hospital. As John Smith walks by, the rain changes direction – straight up! – and the building rumbles as lightning strikes. Looking outside, Martha discovers that the hospital has been moved to the surface of the moon.

That cause a bit of consternation among the occupants. Okay, more like a riot.

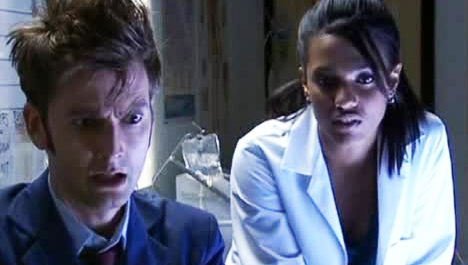
Martha and her co-worker, Julia Swales, take stock of the situation. As Martha remarks that the building isn’t airtight – they should have died from asphyxiation long ago – John Smith congratulates her on her intuition and invites her to join him. They stand on a balcony in the Earth-light, breathe deep, and discuss extraterrestrials on Earth. From Big Ben to the Christmas invasion and the Battle of Canary Wharf (where Martha lost her nearly identical cousin, Adeola), Martha believes in aliens. John Smith introduces himself as the Doctor and apologizes for not saving Martha’s cousin. That event is still fresh in his mind.

Then they meet the Judoon.

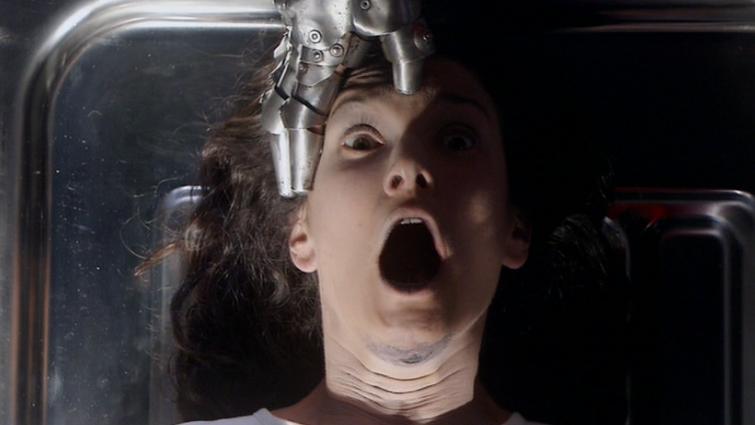
Huge cylindrical ships land nearby and an army marches on the hospital. Meanwhile, the lady with the salt deficiency introduces Mr. Stoker, the medical student supervisor, to her friends in the motorcycle helmets. She also uses a bendy straw to start drinking his blood.

The Judoon storm the hospital, revealing themselves as rhinoceros-faced aliens, and use a universal translator to learn English. They catalog everyone they meet as human, complete with an X on each captive’s hands. Meanwhile, the Doctor tells Martha that the Judoon are police-for-hire, and if they find a non-human criminal hiding in the hospital, they will execute everyone inside as an accomplice. One patient tries to stop the Judoon with a vase to the head and he is immediately executed for assault.

Justice is swift.

The Doctor, being non-human, skulks away with Martha and tries to hack the computer system with the sonic screwdriver. He tells Martha that he spotted alien power cores a few days back and checked into the hospital as a patient to look around. Martha decides to ask Stoker for help in finding anyone with unusual symptoms, finds Florence enjoying her blood beverage, and the chase is on.

The Doctor and Martha take refuge in a radiology suite and the Doctor ambushes one of the motorcycle gang with an X-ray machine. He blasts the creature – a Slab, leather through and through – with 5000 times the radiation of a normal X-ray. He absorbs the rest of the roentgen (gamma) radiation and dumps it into his shoe, then ditches the other one to balance himself out. Barefoot on the moon, the Doctor finds that his sonic screwdriver has been destroyed before realizing that Florence can now pose as human thanks to her hemoglobin smoothie.

Sure enough, she’s soon cataloged as human.

The other Slab searches for the Doctor and Martha while she asks the Time Lord about traveling companions. They’re ambushed by Judoon who catalog the Doctor as non-human – Martha is truly surprised – and they run to the floor below. Since the Judoon are methodical, they won’t revisit a floor they’ve already audited. The pair find the exsanguinated Stoker, discover that the oxygen supply is starting to dwindle, and separate as the Judoon (surprisingly) storm the floor. The Doctor kisses Martha before running for the MRI suite where he finds Florence modifying the imager to fry every biologic within 250,000 miles. She’s intent on using the Judoon ships to escape.

The Doctor poses as a human and verbally spars with Florence. He mentions that the Judoon are changing their scans so Florence refreshes her disguise by drinking the Doctor’s blood. The Judoon barge in and scan the Doctor, declaring him deceased. Martha scans Florence, revealing her as non-human. Florence, a plasmavore, sets her MRI plan in motion before being executed (along with the Slab) and the Judoon leave.

Meanwhile, the hospital is about to explode.

Martha returns to the Doctor and performs a modified version of CPR, bringing him back to life. With oxygen levels critically low, the Doctor stops the MRI by pulling the plug and then carries Martha to a window as the Judoon lift off. Before they clear the moon’s gravity, they reverse the teleport process and return the hospital to Earth.

In the chaos that follows later, Martha watches as the Doctor enters the TARDIS and dematerializes. She goes home and gets dressed for her brother’s party, an event where Martha is mocked for her moon story – the public cover story is that everyone was drugged – before her family storms off. She spots the Doctor and follows him to the TARDIS. He offers Martha the chance to join him and she eventually joins him.

The “bigger on the inside” moment completely blows her mind.

The Doctor mentions his former companion, Rose, and tells Martha that she is definitely not replacing her. Martha replies that, despite the earlier kiss, she’s only interested in humans. The Doctor sets a course and the TARDIS hurtles away through the vortex.


The thing that impresses me most about this episode is the chemistry between Freema Agyeman and David Tennant. The spark is immediate and coupled with the pacing and the dialogue, this story is just fun. Martha is likable and smart, and she plays well with the Tenth Doctor’s zaniness. The downside, of course, is that the hints of a future romantic relationship are far too strong. We just left that party in Pete’s World.

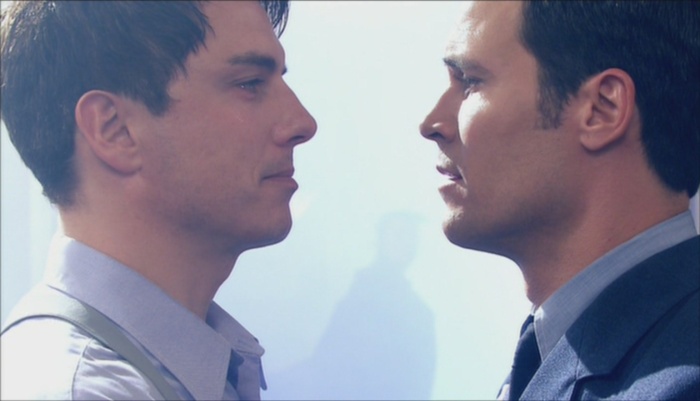
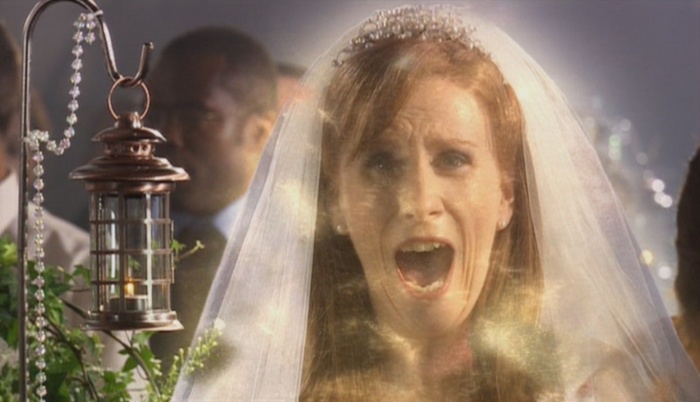
The whole Saxon thread is back with this story after being teased in The Runaway Bride and Captain Jack Harkness. This season’s “Bad Wolf” gives us the added benefit that the mysterious stranger believes in life among the stars. We also get some callbacks as the Ninth Doctor’s sonic is destroyed – the last time we lost a sonic screwdriver like that was in the Fifth Doctor‘s era, and it was like losing “an old friend” –  and the Tenth Doctor muses about his love of bananas.


Rating: 5/5 – “Fantastic!”


UP NEXT – Doctor Who: The Shakespeare Code


The Timestamps Project is an adventure through the televised universe of Doctor Who, story by story, from the beginning of the franchise. For more reviews like this one, please visit the project’s page at Creative Criticality.


Timestamp #SJA1: Invasion of the Bane

Sarah Jane Adventures: Invasion of the Bane
(1 episode, New Year Special, 2007)


The triumphant return of Sarah Jane Smith.

Maria Jackson and her family are moving into their new home on Bannerman Road. After watching an advertisement for Bubble Shock soda, Maria briefly meets Sarah Jane Smith and finishes moving boxes into the house. It turns out that Maria’s mother has recently divorced her father, so it’s just Maria and her father Alan in the house.

Later that night, Maria sets up her room while the soda commercial plays again. She turns out the lights and goes to bed, but she awakens around 2:30 am to a bright pink light pulsing from Sarah Jane’s residence. Maria investigates and finds Sarah Jane communing with a floating alien that gives her a glowing stone device. Maria runs home in fear.

The next morning, she obliquely asks her father about seeing strange things. Their neighbor Kelsey Hooper stops by to say hello, and the girls decide to go into town after brief introductions with Alan. Further introductions are made as Alan meets Sarah Jane, but Sarah Jane seems rather intrigued by the girls and rushes off.

Kelsey gives Maria the lowdown on Sarah Jane: She’s a journalist who rushes around like a madwoman. The girls board a bus dedicated to the Bubble Shock soda and take a tour of the bottling facility. Sarah Jane rushes the gate and sneaks in behind them, taking some readings on a wristwatch device. The girls go through a supposed security scanner, but the data it takes is transmitted to a strange science experiment behind the scenes.

Sarah Jane continues to sneak around, using her sonic lipstick to open a locked door. She’s captured soon after and taken to visit Mrs. Wormwood, the woman who was working on the Frankenstein experiment. Sarah Jane interviews Mrs. Wormwood, drawing parallels between Wormwood’s operation and the Book of Revelation.

Meanwhile, the girls continue their tour and receive free samples, but Maria rejects the soda. Sarah Jane is also offered a sample, and she also rejects it. The company is very aggressive about wanting every person on Earth to drink their product, adding special emphasis on the ingredient Bane.

Sarah Jane smells an alien influence. She’s also a bit put off when Wormwood suggests that Sarah Jane’s life alone has been wasted. If she only knew the truth. When Sarah Jane leaves, Wormwood signals her assistant to kill the journalist, but Sarah Jane escapes. Meanwhile, Kelsey leaves the tour group and tries to use her mobile phone, but the signals awaken a creature and set off alarms throughout the facility. As everyone evacuates the premises, Maria goes in search of her friend.

Kelsey is soon found by the tour guide. The man smashes her phone and declares that the creature is his mother. In fact, it is the mother of them all. Maria tries to make a call and sets off the alarms again, this time causing a feedback pulse that awakens and frees the young boy medical experiment, known as The Archetype.

The Archetype finds Maria and they work together to elude the factory personnel by hiding in the ladies’ restroom. Sarah Jane Smith finds them soon thereafter, but when Wormwood’s team arrives they are gone. Sarah Jane, Maria, and The Archetype escape, but Kelsey is left behind with Wormwood. Maria confronts Sarah Jane about the events at the factory and those of the previous night, but when Sarah Jane tells her to go home, she leaves in tears.

Wormwood reviews her scans of Sarah Jane Smith and finds residual artron energy, the results of traveling through spacetime. When Kelsey remarks that Sarah Jane lives on Bannerman Road, Wormwood reveals her true form and the girl faints. Wormwood analyzes Kelsey’s knowledge and sends Davey the tour guide (and a recently mindwiped Kelsey) to Bannerman Road.

Sarah Jane talks with The Archetype, who claims to be everyone, but their discussion is interrupted by a male voice from upstairs. Sarah Jane scans the boy to find that he is a human boy but is only 360 minutes old and has no bellybutton. Meanwhile, Kelsey arrives back at Maria’s house and Davey assaults Sarah Jane’s home. The girls find out that Davey is there and they rush to help only to find a tentacled creature that pursues them inside. Sarah Jane and the kids rush upstairs to safety. Sarah Jane uses some kind of aerosol to repel the creature and make it transform back into Davey. Davey runs off, Sarah Jane analyzes the remnants, and Kelsey snoops around in the attic.

Sarah Jane reveals her secret to the kids in the room surrounded by alien artifacts, pictures of the Brigadier and K9, and artwork depicting the TARDIS. She tells them of the Doctor and her travels, and how after she met him the second time, she dedicated herself to investigating alien influences on the planet Earth. Speaking of K9, the daft little metal dog, he’s working to seal a black hole before it destroys the planet. The portal between K9’s work and the attic is a concealed safe in the wall.

Back at the factory, Davey pays the price for his failure: He is eaten by the Mother. Sucks to be him.

Sarah Jane deduces that The Archetype is an alien experiment. As Sarah Jane and Maria develop a friendship, they discover that the soda (particularly Bane) is alien in origin. In fact, it is part of the creatures that they have been dealing with. Sarah Jane calls on Mr. Smith, her supercomputer, to hack into Wormwood’s office for a one-on-one video discussion. Wormwood is unwilling to bargain and declares war on humanity by using the Bane in everyone’s systems to transform them into the newborn Bane.

Sarah Jane, Maria, and The Archetype rush to the factory to find a solution. Sarah Jane sonics the gates to trap the soda zombies but the main gates to the factory are deadlock sealed, so she uses the Bubble Shock bus to break through the walls. Wormwood introduces Sarah Jane to the Mother and then explains that The Archetype is a combination of the strongest elements of each scanned visitor to the factory. The intent is to use the boy to fine tune the soda formula so that every human would drink it, but since he’s no longer needed, Wormwood issues a kill command in the boy’s DNA.

Maria fights back using her mobile phone, but the Mother swipes it away. The Archetype produces the communication device that Sarah Jane received the night before and programs it with the specific frequency of the Bane’s communications. Using that painful distraction, the humans run and the factory explodes behind them. The Mother is presumed dead, but Wormwood as escaped while vowing vengeance.

Everyone returns home to find that the world is restored. Alan meets The Archetype who Sarah Jane declares to be her adopted son. Sarah Jane and Maria reconvene later and deliberate over the boy’s future. Mr. Smith created official adoption documents, and Sarah Jane finishes them with a proper name: Luke.

There’s a nice touch here with nods to the Brigadier and Harry Sullivan while trying to name the newest member of the Smith family.

Sarah Jane waxes philosophically about her travels with the Doctor as the adventure comes to a close.


This is a wonderful pilot episode for the return of Sarah Jane Smith. It’s fantastic to see her continuing as a journalist with the added expertise of her travels with the Doctor. Knowing that this new series is designed with kids in mind, I find that the Bannerman Road Gang is easily relatable and adds a sense of innocence to the adventure. It’s almost as if Sarah Jane has become a mix of the Doctor and Torchwood, but with a much lighter tone.

It was nice to see Samantha Bond (Miss Moneypenny from the Pierce Brosnan era of James Bond, as well as Lady Rosamund from Downton Abbey) and I did love her turn as a villain, even with the over-the-top scenery-chewing performance. I also couldn’t help but draw a parallel between Luke Smith and Kyle XY, what with the lack of bellybutton as a tying characteristic.

One thing that I’m not a fan of is the tilted camera angles used in the factory. There are better ways to use the style and to inspire unease in the audience.


Rating: 5/5 – “Fantastic!”


UP NEXT – Doctor Who: Smith and Jones


The Timestamps Project is an adventure through the televised universe of Doctor Who, story by story, from the beginning of the franchise. For more reviews like this one, please visit the project’s page at Creative Criticality.


Timestamp: Torchwood Series One Summary

Torchwood: Series One Summary


Torchwood was dark and gritty, but its core message emphasized humanity, compassion, and companionship.

The first series took full advantage of its post-watershed television position, complete with adult themes, nudity, and mature language. The franchise itself is hit and miss with fans because of these elements, but the core mission of the first chapter in the show’s run is something that we should all pay attention to. Each of the characters, including Suzie, tried to balance the darkness and secrecy of their clandestine jobs with the need to talk about it with anyone who would understand. This common thread wove around each of Torchwood Three’s team members and slowly pulled them apart.

That is until the tension snapped them back together with the mutual understanding of where they stood and what they needed to do.

The stories may have varied in quality and entertainment, but the message that we all need empathy, compassion, and friendship to help us make it through the darkness makes Torchwood‘s first series worth the journey.

Now, it’s obvious that we can’t make a direct comparison between Torchwood and Doctor Who. The themes are similar, but the content and feel are markedly different. But we can look at the twenty-nine season/series grades so far to get an idea of how it fits within the Timestamps Project’s scope.

Torchwood Series One earned a 3.8 average. There are six seasons of Doctor Who, all of them from the classic era, that met that bar: The Seventh, the Tenth, the Thirteenth, the Fourteenth, the Twenty-Fifth, and the Twenty-Sixth.

Of course, we will be able to compare each series of Torchwood as they are reviewed here.


Everything Changes – 4
Day One – 4
Ghost Machine – 2
Cyberwoman – 4
Small Worlds – 3
Countrycide – 5
Greeks Bearing Gifts – 4
They Keep Killing Suzie – 3
Random Shoes – 3
Out of Time – 4
Combat – 3
Captain Jack Harkness – 5
End of Days – 5

Torchwood Series One Average Rating: 3.8/5


The Doctor Who universe continues to grow from here. Since I’m approaching the revival era from a (mostly) chronological order, our next stop is the first episode of the Sarah Jane Adventures. That series is all new territory for me since I haven’t seen a single episode.

After that, we’ll dive headfirst into the Series Three and meet Martha Jones.


UP NEXT – Sarah Jane Adventures: Invasion of the Bane


The Timestamps Project is an adventure through the televised universe of Doctor Who, story by story, from the beginning of the franchise. For more reviews like this one, please visit the project’s page at Creative Criticality.

Timestamp #TW13: End of Days

Torchwood: End of Days
(1 episode, s01e13, 2007)


The last big fracture that brings a family together.

Gwen and Rhys have a rare moment to themselves, but Jack calls with an untimely but important interruption: UFOs have been sighted over the Taj Mahal, police are clashing with soldiers from the English Civil War, and people believe they are signs of Armageddon.

Ianto recites biblical verses (what he calls Daniel 12:10 is really Daniel 12:8-9), and Jack brings news that everything worldwide is linked to Owen’s breach of the Rift. Institutions around the world, including UNIT, have their eyes on Torchwood. Owen and Tosh are dispatched to a quarantined hospital, and PC Andy Davidson calls Gwen with word of a Roman Soldier in lockup. Gwen and Jack drug the soldier and lock him away in the Hub. Gwen also sees a vision of Bilis Manger that apologizes to her.

Owen and Tosh find evidence of bubonic plague, the Black Death, at the hospital. Owen is rattled since he brought this upon Cardiff, and he channels that frustration into the medical staff. Meanwhile, Tosh sees her mother who brings an ominous message: Darkness is coming and Tosh must open the Rift to stop it.

At the Hub, Ianto brings word that the weevils are swarming. Once he’s alone, he also sees Lisa again, and his vision tells him to open the Rift.

I’m going to say that opening the Rift is a bad plan.

When Owen and Tosh return to the Hub, Jack unleashes on Owen for meddling with the Rift. The two men quarrel, resulting in Jack firing Owen. He also tells everyone else that they can follow Owen if they want, and Owen reminds Gwen that he’ll likely be Retconned within the next twenty-four hours and walks out.

Jack and Gwen visit Bilis at his clock shop, A Stitch in Time. Bilis reveals that he can step through time and see the whole of history, but his curse is that he doesn’t belong anywhere within it. He says that the only way to solve the fracturing of time is to fully open the Rift. He then disappears, only to leave a message for Gwen: Rhys is going to die horribly at some point in the future.

Gwen rushes back to her flat to find Rhys cleaning the oven. He won’t come with Gwen, so she stuns him and takes him to the Hub. He’s understandably upset, but she asks him to trust her. She returns to the operations area and talks with the team, with whom she has shared the vision. When the power goes out, Gwen and Jack run for the cells. With the power off, the cell doors have opened, and Rhys meets Bilis. Bilis stabs Rhys multiple times and vanishes as the power comes back. Jack and Gwen find Rhys, but it is too late. Gwen’s screams are heart-wrenching and soul-shattering.

Meanwhile, Owen is drowning his sorrows at a bar when he sees a vision of Diane. She tells him to open the Rift. It’s still a bad plan.

As the team mourns around Rhys in the examination area, Jack consoles Gwen as she lashes out at him. Owen rushes in, but while Tosh is happy to see him, Gwen is furious. Owen announces his intention to open the Rift, and everyone but Jack follows him to help. Jack tells them that it’s a trap, threatens to shoot Gwen, and insults each of them: Tosh and her fling with Mary; Owen and his death wish; Ianto and his Cyber-girlfriend; Gwen and her affair with Owen.

Gwen punches Jack and Owen kills him with his own gun. The team is shocked, but then starts gathering retinal images to unlock the subroutine to open the Rift. It’s at that point that Jack snaps back to life. The team evacuates the Hub only to find Bilis healding the arrival of Abaddon, an enormous vision of the devil that is stampeding through the city. It was cast out of time, and anyone in its shadow immediately dies.

Jack tells Gwen to take him to an open space, intent on feeding Abaddon with his all-you-can-eat life smorgasbord. Jack stands in the shadow, writhing in pain, and a bright blue light arcs from his chest to destroy the beast and seal the Rift. Gwen grieves over the dead body of Captain Jack Harkness.

The events reset the timeline with one exception: Jack is still dead. Owen, Ianto, and Tosh are resigned to his fate, but Gwen won’t give up. She sits with him for days despite the team’s growing worry about her. Ianto breaks down and cries into Jack’s coat, and Tosh nearly convinces Gwen to let Jack go.

She kisses Jack and starts to walk away when he wakes up, weak but alive. He gets dressed and reunites with the team, all of whom are happy to see him in their own way. Jack even forgives Owen and embraces him as the team’s black sheep weeps.

Later on, Jack and Gwen discuss the Rift. It’s due to become more volatile, and Jack tells Gwen what vision would have convinced him to open it during the crisis: “The right kind of Doctor.” He walks out to find the tank with the hand bubbling and glowing. He also hears the faint sound of the TARDIS materializing, to which he snatches up the tank and runs, leaving Gwen confused as the team returns with coffee.

Something has taken him. Jack is missing.


This story ties all of the threads together that have been strung across the last twelve episodes. Every one of our main characters has been broken in one way or another, and it’s this trauma that finally unites them for a common cause as a dysfunctional family. It brutally unearths everyone’s secrets for the bright light of day, and that honesty is healing.

The story twists and weaves in one way while being direct in others, linking the Torchwood series definitively with Doctor Who, and not just in the final moments. It was well-crafted and exhilarating, and a fantastic way to close this chapter.


Rating: 5/5 – “Fantastic!”


UP NEXT – Torchwood: Series One Summary


The Timestamps Project is an adventure through the televised universe of Doctor Who, story by story, from the beginning of the franchise. For more reviews like this one, please visit the project’s page at Creative Criticality.


Timestamp #TW12: Captain Jack Harkness

Torchwood: Captain Jack Harkness
(1 episode, s01e12, 2007)


An eye-opening tale of star-crossed lovers.

Jack and Tosh arrive at a derelict dance hall called The Ritz to investigate 1940s music that has been drifting out of the premises at random. Pushing past the Vote Saxon posters, the duo dance in the dust before finding the music. They are transported back in time, presumably thanks to the Cardiff Rift. While Jack is happy to be there, they are trapped in 1941.

Back at the Hub, Owen wakes up to find Ianto monitoring Rift activity. Of course, Ianto can’t reach Tosh, so he calls Gwen. Owen analyzes the data, still maudlin about Diane’s disappearance, and Gwen investigates The Ritz. When Gwen calls for Jack, he can hear her voice but doesn’t get to her in time.

Tosh and Jack find themselves at a party on January 20, 1941, right in the midst of the London Blitz. Trying to blend in, they meet with an American captain who saves Jack and Tosh from a fistfight.

The American is Captain Jack Harkness.

Torchwood Jack is stunned but eventually comes up with an alias: Captain James Harper. He tells Tosh that he took the captain’s name as a disguise when the man died the next day in a training exercise. Torchwood Jack and Tosh start to work on the second half of an equation that will bridge the Rift and send them home. They transfer the equation from Tosh’s dying laptop to paper, but are interrupted by the manager, Bilish Manger. He has a Polaroid camera, which shouldn’t exist yet, and a file labeled Torchwood.

He’s also in the present and admits Gwen into the building to continue her investigation. She checks in with the Hub and learns that Manger exists in both time periods.

Tosh and Torchwood Jack return to the party. Tosh chats up another airman to get the local coordinates while Torchwood Jack gets to know the real Jack. Tosh also encounters a bit of racism – she’s Japanese, and the Japanese are one of the enemies in World War II – but Torchwood Jack is able to cover for her. Tosh sneaks back upstairs and uses the Polaroid to photograph the equation. She’s interrupted by Manger, so she only gets part of what she needs, so she finishes the equation with her own blood and seals it in a can to hide for the future.

Back in the present, Ianto and Owen spar over their lost loves and the equation. Owen is dead set on opening the Rift and bringing Diane back. He tries to use the rift manipulator but finds that a piece is missing. Owen leaves to search Manger’s office for clues as Gwen finds the can. Owen finds the missing piece and returns to the Hub.

Torchwood Jack is falling for Real Jack, only to be interrupted by Real Jack’s girlfriend Nancy. Torchwood Jack urges Real Jack to kiss her goodbye as she leaves the party, but the American captain only finds his situation worse when Nancy professes her love for him. Jack confronts Jack and exchange war stories to make their respective points. As the bombs begin to fall, everyone takes cover.

Real Jack confides in Torchwood Jack that he is scared. They sit down for a private talk as the bombings stop and the partygoers return to their revelry. Real Jack heeds Torchwood Jack’s advice to spend more time with Nancy, to treat that night as if it were his last, but later returns to spend those moments with Torchwood Jack. They hold hands before being interrupted by another couple looking for Lover’s Corner.

Owen continues his work and breaks into Jack’s safe to find the manipulator’s blueprints. Ianto takes the blueprints, but Owen overpowers him. Ianto returns with a gun, eventually shooting Owen in the shoulder to stop him. The bullet is too late. The manipulator activates as Owen slips into unconsciousness.

Torchwood Jack watches the party, telling Tosh about how the real captain will die the next day. He also explains how he was brought back from death and apologizes for dragging her into this. While Torchwood Jack mourns for the pending loss, Tosh looks on as Real Jack makes his decision. Jack takes Jack’s hand, leads him to the dance floor, and they share a dance before the Rift bursts through the door. They share a kiss as the partygoers watch in astonishment, then the wayward members of Torchwood Three return home.

They meet up with Gwen and return to the Hub. Owen performs surgery on himself to remove the bullet as Ianto searches for signs of Manger. Tosh joins Jack in his office and together they raise a glass to the memory of the real Captain Jack Harkness.


First things first, if we presume that this story and the Ninth Doctor tale that introduced us to Jack are happening at around the same time, then there are (at least) two versions of that character roaming about in that time.

The Jack story is quite touching, from Jack finding a moment of love with the man whom he replaced to Tosh getting to know her boss in a fantastic change of pace for the character. I mean, look, Tosh has a role in the plot! Yes! This also is a crazy story in terms of time travel for both Jack and Tosh. Tosh’s actions are quite straightforward, echoing other time travel adventures where the stuck-in-the-past hero has to send a message to his/her support team in the future in order to be rescued. Jack’s temporal threads are a bit more complex: Jack took the Captain Harkness identity as a matter of convenience, then travels back parallel to his own timeline and interacts with the man he replaced. The implications and possibilities could have spun wildly out of control.

There is the question of the dance and the kiss. From what I gather, homosexuality was still illegal in England and Wales until the Sexual Offences Act 1967 was passed, and that did not apply to the armed forces. In reality, Captain Harkness would have likely been either imprisoned or rebuked for sharing the moment with Jack, and probably wouldn’t have been allowed to fly his mission the next day. Since the Torchwood Jack Harkness still exists, it’s reasonable to assume that either the event was washed away as a mass delusion – two people did disappear in a mysterious burst of light – or it was a moment of poetic license for the sake of drama.

Either way, I consider it a minor quibble. It was a beautiful moment for Jack, even if actor Matt Rippy didn’t seem to be totally into the role.

Owen’s story is one of obsession and subversion of power. He wants nothing more than to get love back in his life, and he’s willing to tear time and space apart to make it happen. Even a gunshot wound to his shoulder won’t slow him down. I’m interested in how it will play out with the season finale next.


Rating: 5/5 – “Fantastic!”


UP NEXT – Torchwood: End of Days


The Timestamps Project is an adventure through the televised universe of Doctor Who, story by story, from the beginning of the franchise. For more reviews like this one, please visit the project’s page at Creative Criticality.


Timestamp #183: The Runaway Bride

Doctor Who: The Runaway Bride
(1 episode, Christmas Special, 2006)


It’s the balance between character chemistry and chewed scenery.

Starting with that RTD Earth-zoom shot – you know the one – we meet bride-to-be Donna Noble as she’s walked down the aisle on Christmas Eve. As she approaches her groom, she’s transported away in a cloud of gold energy and appears on the TARDIS right where we left the Tenth Doctor, orbiting a supernova, at the end of Doomsday.

Donna immediately confronts the Doctor, demanding to know where she is. The Doctor is confused since she doesn’t belong on the TARDIS, and Donna thinks it is a practical joke by her friend Nerys. Donna opens the doors in an attempt to flee but stops cold at the sight of outer space beyond the TARDIS’s walls.

Then she finds out that the Doctor is an alien. Mind blown.

The Doctor investigates Donna while she demands to be taken back to the church. She spots one of Rose’s shirts and wants to know how many women the Doctor has abducted, but his attitude shifts to a combination of somber and angry as he replies that he lost her. Back on Earth, the church is in chaos as the Doctor drops Donna near Oxford Street. Donna has her “bigger on the inside moment” while the Doctor tends to the TARDIS, and she sets out on foot. The Doctor pursues, adamant that he’s not a Martian, and the pair have considerable difficulty hailing a taxi.

Especially since neither of them has any money.

Donna uses a sonic-screwdriver hacked pay phone while the Doctor stands in line for the automatic teller machine. He sonics some cash and then notices a trio of sinister Santas, including one that just drove off with Donna. She figures out that the Santas are the bad guys after she is abducted, and the Doctor runs for the TARDIS. He materializes on the roadway, flies alongside the taxi, and rescues Donna while driving the time capsule with a length of twine. The whole sequence is solid edge-of-your-seat action.

The TARDIS touches down on a rooftop and, in a burst of smoke, takes some time to cool down. The Doctor and Donna talk about her wedding and time machines, and the Time Lord gives her a ring that acts as a bio-damper to confuse the Santa-bots. They also talk about the events of last Christmas, during which Donna was hung over so she missed the whole affair. The Doctor muses about Rose for a moment before turning back to the mystery at hand.

Donna works as a secretary at a local security firm where she met Lance, head of Human Relations and her husband-to-be, as he offered her a cup of coffee. They went out for a while before they decided to get married (after Donna pestered him for a really long time). The Doctor takes her to the wedding reception, which Donna is furious about since they’re partying without the bride. Donna’s mother Sylvia counters, prompting a furious storm from the assembled guests, and Donna silences them with a quick cry. The party carries on and the Doctor investigates H.C. Clements.

It turns out that the security firm was owned by Torchwood before the institute was decimated. The Doctor asks the wedding videographer if he caught Donna’s disappearance on tape, and figures out that she was infused with Huon particles. Unfortunately, those particles cannot be shielded by a bio-damper and the Santas are on the march. The building is surrounded, and the Doctor sees that the Santas are using the Christmas trees as weapons. The ornaments explode, providing a diversion as the Santas take aim on the Doctor. The Doctor replies by plugging his sonic screwdriver into the DJ’s mixing board and blowing the robots apart.

The Doctor realizes that the Robot Santas aren’t being controlled by the Sycorax this time. He analyzes one of the robot heads and tracks the controlling signal to a star-shaped spacecraft in orbit. Lance gives Donna and the Doctor to H.C. Clements – Donna missed the Torchwood event as well – and the Doctor tracks the Huon particles to a secret sub-basement. Those particles, which haven’t been seen since the Dark Times, connected Donna to the TARDIS since the time capsule is the only other place where they exist. The trio take Segways to a door marked with the Torchwood logo, and the Doctor ascends to the Thames Flood Barrier. The secret base is underneath the landmark river.

They find a series of water capsules in a lab. Someone has been using the river to create the particles and store them in liquid form. The Doctor explains that the Time Lords stopped using Huon particles because they were deadly, and he promises to help rid Donna of them. They’re interrupted by a legion of robots and a sinister voice belonging to a half-spider half-humanoid being, the Empress of the Racnoss. The Racnoss were supposed to have gone extinct during the Dark Times.

They also find a pit dug all the way to the center of the Earth. Chekhov’s pit, perhaps? Spoiler: Not quite.

Above the pit is a giant web, inside which is the corpse of H.C. Clements. The Doctor and Donna try to distract the Empress as Lance sneaks up with an axe, but Lance’s identity is soon revealed. He made her coffee everyday, spiking it with Huon particles while tolerating her obsession with pop culture. He’s been promised a chance to see the stars, and that was enough to betray Donna. The Empress decides to dispose of the Doctor, but he reverses the particle activity and draws the TARDIS around them so they can escape.

The Doctor sets a course back in time as Donna grieves about Lance’s betrayal. They arrive at the creation of the Earth, making Donna the first human to ever see it. Together, they watch as the Racnoss starship arrives, acting as the nucleus for the planet’s formation. At that moment, the TARDIS rocks and is pulled forward to the present day as the Empress floods Lance’s body with Huon particles. To avoid a direct return to the lab, the Doctor smacks the extrapolator and shifts the TARDIS into an abandoned corridor. Unfortunately, they are both soon trapped by the robots.

The Empress extracts the Huon particles from Donna and Lance, projecting the energy into the pit and awakening the sleeping Racnoss below. She then releases Lance as food for her growing horde as her spaceship descends and attacks the city. The Doctor arrives and saves Donna before offering the Empress one last chance to save her people by surrendering. The Empress, of course, declines, and the Doctor warns her that what follows is her own doing.

The Doctor disables the robots before telling the Empress where he’s from. It turns out that the Time Lords were responsible for the extinction of the Racnoss, so the name Gallifrey sparks fear in the Empress. The Doctor uses the explosive ornaments to breach the Thames walls, flooding the complex while the Last of the Time Lords watches with sinister intent. Donna brings him back to his senses as the Empress transmats back to her ship.

On the roads above, tanks roll in and – under orders from Mr. Saxon, who we saw referenced last in Love & Monsters – destroy the ship. The Doctor and Donna surface to find the threat over and the Thames drained. They take the TARDIS back to a nearby road and the duo say goodbye. The Doctor uses temporal energy to start a Christmas snow before offering Donna a chance to travel with him. She declines, despite the adventure they just shared, but she encourages him to find someone because they can help balance the darkness in him.

The Doctor briefly tells Donna about Rose before taking off for his next adventure.


For a fun Christmas tale, this one does the trick. Donna and the Doctor together are amazing, playing off each other in pseudo-confrontational snappy dialogue as they work together to solve the mystery. The source of that threat, on the other hand, was way over the top: The Racnoss Empress chewed the scenery into splinters.

The Doctor is taking some time to mourn for Rose. It seems like just the right amount instead of going to the extreme with a depressed and/or mopey Doctor. He also knows when to set aside his grief to save Donna’s life and stop the Racnoss from destroying the Earth. I also really enjoyed the discussion about the Doctor needing a companion to balance him and rein him, particularly in the post-Time War trauma that the character is experiencing.

Following the episode airdates, we go back to Torchwood at this point and will remain there until the end of the show’s first series.


Rating: 4/5 – “Would you care for a jelly baby?”


UP NEXT – Torchwood: Captain Jack Harkness


The Timestamps Project is an adventure through the televised universe of Doctor Who, story by story, from the beginning of the franchise. For more reviews like this one, please visit the project’s page at Creative Criticality.


Timestamp #TW11: Combat

Torchwood: Combat
(1 episode, s01e11, 2006)


The first rule of Weevil Fight Club…

This adventure starts with Jack pursuing a weevil. It evades him, apparently immune to the weevil spray, and runs past where Gwen and Rhys are having a tense dinner. Rhys has none of it, but Gwen leaves with Jack after he curses at her. The pair track the weevil to a parking deck, but the being is apprehended by masked strangers in a white van.

The next morning, the team analyzes a wave of weevil attacks. There has been a surge of injuries at the local hospital and Tosh can’t track the van from the night before. Meanwhile, Owen is drowning his sorrows over Diane at the bar. He gets in a fight with the bartender’s jealous boyfriend – a man whom he easily bests – in between bouts of ignoring calls from work.

Tosh confides in Gwen about Owen’s relationship with Diane: Tosh is upset and Gwen is oblivious. In the holding cells, Jack and Ianto watch as a weevil howls. They are supposedly somewhat telepathic, and something is inducing psychic pain in this one. Tosh finds the van on CCTV, prompting Jack and Tosh to investigate the docks. They find a male corpse, presumably attacked by a weevil, and a call on his cell to stay out matters that they don’t understand.

Owen finally rolls back in and conducts the autopsy. The victim was attacked by humans before the weevil attack. Ianto also has no luck tracing the victim’s cell records. Gwen and Owen go out to notify the next of kin, and they have a heart-to-heart about their affair that doesn’t end well. Owen walks back to the Hub just in time to receive orders for an undercover assignment. He meets with real estate agent Mark Lynch as a businessman looking for space at the docks. He places a sniffer device on Lynch’s computer so Tosh can download the hard drive. After Owen leaves, Lynch does a web search on Owen and his jellied eel business. He ends up confident that Owen is the real deal.

Jack sends Gwen home to patch things up with Rhys. As soon as she gets there, Rhys heads out with his friends to the bar. Gwen is left home alone.

Jack and Ianto interview a weevil victim at the hospital, but the victim doesn’t want to discuss the matter. He’s afraid that someone will kill him if he talks, so Jack decides to release the captive weevil – he’s nicknamed it Janet – with a tracker to monitor its movements. Janet gets snatched by the white van moments later, and the team finds the tracker on a fence.

Owen and Lynch meet up for drinks. Unfortunately, it’s the same bar with the jealous beau. Fortunately, Lynch helps Owen defeat the thugs. The duo return to Lynch’s place. After the fight, Lynch is aware the Owen isn’t who he claims, but he still confides in Owen that something is coming. Owen later sneaks into a locked room and comes face-to-face with a chained-up weevil. Lynch catches up with Owen, uses the creature as a punching bag, and eventually shows Owen the entire operation.

Rhys returns home and shares a drink with Gwen. Gwen confesses her affair, an act that devastates Rhys but one that he won’t remember since Gwen spiked his drink with Retcon. Gwen begs him for forgiveness, but Rhys slips under the drug’s spell before offering it. She takes pizza to the Hub, but everyone else is out. She’s alone once again, but luckily she’s around as the corpse’s phone rings with a text message: “CF10 6BY.” She quickly figures out that it is a location and passes it on to Jack.

That location? It’s the same place where Lynch and Owen are. It’s a weevil fight club.

The person who stays in the cage with the weevil longest wins and the warm-up is men fighting with each other. The corpse in the Hub refused to leave the cage and ended up mauled to death. Lynch forces Owen into the cage with Janet – let’s be fair, Owen is more than willing to jump in regardless of Lynch’s threats – and Janet recognizes him. Owen tells Janet to attack just Torchwood Three arrives. They tend to Owen’s wounds and disperse the crowd as Lynch locks himself in the cage with Janet. The weevil tears Lynch to shreds.

Jack visits Owen in the hospital with a bag of grapes. Owen tells Jack that he didn’t want to be saved. Jack tells him to be back at work the next day. When he reports in, Owen has a moment alone with Janet and the other weevil. They hiss and growl, but Owen musters a sinister snarl that sends the weevils cowering into the corner.

Owen leaves with a satisfied smirk.


There is a lot to unpack here. I mean, okay, sure… they did Fight Club with weevils. But going deeper, there’s so much more with our main characters here. Owen and Gwen are two sides of the same coin, explaining why they ended up having an affair together, and they’re both torn apart by their respective loneliness. Owen takes it to one extreme by attempting suicide by weevil, and Gwen takes it to another extreme by drugging her boyfriend in a twisted attempt at forgiveness.

And this is the point where I lost a ton of respect for Gwen. Sure, she’s in a tight place with no good solution, but her move here was pure selfishness and vanity. Instead of coming clean and healing the rift in her relationship with him, Gwen continues to what’s best for her instead of what’s best for them.

I don’t know that she deserves forgiveness at this point. As an outside watcher, I’m having trouble seeing how to forgive the character myself.

The other big character moment here is how Jack handles each subordinate’s crisis. In Owen’s case, Jack effectively tells him to “man up” and get back to work. In Gwen’s case, he gives her time off and forces her to pursue reconciliation. It’s inconsistent in approach but says a lot about how Jack sees each of his employees.

Speaking of, Tosh and Ianto are (once again!) lost in the wake of the drama. That’s unfortunate.


Since this era of Doctor Who is rife with spinoffs, the Timestamps Project is proceeding in airdate order (for the most part). As such, we’re headed back to the Tenth Doctor for a Christmas Special before coming back to close out Torchwood‘s first series.


Rating: 3/5 – “Reverse the polarity of the neutron flow.”


UP NEXT – Doctor Who: The Runaway Bride


The Timestamps Project is an adventure through the televised universe of Doctor Who, story by story, from the beginning of the franchise. For more reviews like this one, please visit the project’s page at Creative Criticality.


Timestamp #TW10: Out of Time

Torchwood: Out of Time
(1 episode, s01e10, 2006)


Lessons learned from the most unexpected people.

The team patiently awaits a plane called the Sky Gypsy at a local airport. The twist on this arrival is that it hails from 1953, and the passengers – pilot Diane Holmes, Emma-Louise Cowell, and John Ellis – are surprised that they have flown through the Cardiff Rift. The accidental time travelers are taken to the Hub and debriefed, but the news is hard to take. So is the revelation that they can never return home.

The newcomers learn about how their families fared, and they’re fascinated and appalled by modern items such as automatic doors, televisions, DVDs, lads’ mags, and tea bags. Torchwood Three takes on the task of caring for the travelers until they can adapt to the 21st century. Jack befriends John, Gwen looks after Emma, and Owen tends to Diane.

Diane wants to keep flying – aviation is in her blood – but her license expired long ago. Between her independence and desire for chivalry, she and Owen strike up a relationship. And by relationship, I mean Owen is typical Owen and Gwen has been replaced in the casual sex department. Their relationship builds, but Owen and love are no replacement for the open sky. She leaves him a note and heads for the airport. After a goodbye kiss, Diane takes to the sky once again in the Sky Gypsy, firm in her belief that the Rift will take her home. Owen softly cries as she disappears into the clouds.

Emma’s parents have died during her journey, and after getting a cheerful start with a couple of roommates (and a small altercation with an overprotective John), Gwen takes her home. Emma sleeps on the couch, gets an eyeful of Rhys, and poses as Gwen’s cousin from out of town. The trio goes out to a nightclub, but Emma gets some mixed signals about how relationships work in the modern era. Emma later gets a job at a shop in London, and although Gwen wants her to stay in Cardiff, she changes her mind when Rhys discovers that Emma and Gwen are not related. Emma moves on to London, but the damage is done between Gwen and Rhys.

John was a traveling salesman who wants to reconnect with his family. Specifically, he wants to find his son, Alan, his only surviving relative. Sadly, he is devastated to find his son suffering from Alzheimer’s disease and barely able to make connections to his own past. Jack feels for him since there is no enemy to fight and no clear way to solve the problem. John is watching the end of his family line rushing right toward him. John steals Ianto’s keys and drives to his former home. John sees no other way out besides suicide, and even Jack can’t talk him out of it. Together, they sit in an enclosed garage with the idling car and John dies from carbon monoxide poisoning. Jack is shaken because John was a kindred spirit, a fellow man out of time, and now the captain is alone once more.

Miles apart, all three of our heroes reminisce over the last week and how their lives have been changed.


For the three travelers, the adaptation to modern life over one week is both adorable and tragic. The wonder of the new world in their eyes is fun to watch, but it’s also overwhelming. The way that it affects Jack, Gwen, and Owen is wonderful and adds just a bit more dimension to their characters. Jack Harkness’s story in this episode was particularly touching.

The parallels to Countrycide are evident: Sure, there are no backwoods cannibals here – in fact, there is no enemy at all in this story – but the drama that doesn’t rely on Doctor Who tropes is exceptional. The science fiction is limited to time travel that we don’t see in action, and the superhuman abilities are limited to Jack’s passive ability to withstand carbon monoxide poisoning. We also see Owen and Gwen’s affair, which started in Countrycide, starting to fall apart here.

We also continue the Torchwood tradition of post-watershed f-bombs. Hey, it’s another Countrycide parallel!

On the downside, Tosh and Ianto were minimally used in this episode. That’s the second story in a row, and a trend that I hope gets reversed.


Rating: 4/5 – “Would you care for a jelly baby?”


UP NEXT – Torchwood: Combat


The Timestamps Project is an adventure through the televised universe of Doctor Who, story by story, from the beginning of the franchise. For more reviews like this one, please visit the project’s page at Creative Criticality.


Timestamp #TW9: Random Shoes

Torchwood: Random Shoes
(1 episode, s01e09, 2006)


Instead of Love & Monsters, we get Love and Ghosts

Eugene Jones, a man who monologues about science, wakes up in the middle of the road. He wanders a few feet to find Torchwood Three investigating his dead body, a victim of an apparent hit-and-run. He apparently knew the team and was interested in their work. His mobile phone rings and the team leaves (with Eugene’s ghost) to tell his mother the bad news.

During the drive, Eugene reminisces about his childhood and how he froze during a math competition. While he was down, his science teacher showed him an eye that fell from the sky. His father left home and Eugene obsessed over the eye, resulting in an interest in UFOlogy and (subsequently) Torchwood Three.

The team notifies Eugene’s family and investigates his belongings. Some of the alien artifacts are fraudulent, but Gwen notes the stand where the eye should be. They leave with a box of things to research and return to the Hub. While the team gets to work, Eugene takes a tour of Torchwood’s headquarters, including a particular focus on a certain severed hand. Gwen begins the autopsy but is interrupted by news of a driver who admitted to the crime. Eugene faints at the autopsy, wakes up later, and goes for a long walk.

Gwen feels that there is something more to the goings-on, but she can’t put her finger on it. She offers to return an overdue DVD to the video store, but when she finds the store is closed, she stops at a local diner and goes through Eugene’s mobile. She finds pictures of random shoes, and after Eugene arrives, she phones someone called Gary on his suggestion. Gary’s call goes to voicemail.

Gwen returns the DVDs and reluctantly pays the £34 in late fees. A discussion with the clerk at the store plants seeds of doubt in Eugene’s head. Gwen’s next stop is Eugene’s former employer, a telemarketing firm, as she tries to match the shoes in the pictures. A pair of Converse All-Stars belong to Gary, who hadn’t seen Eugene on the day he died. She also meets Linda, a friend of Eugene’s, who is broken up by his death. She agrees to meet with Gwen later. Gwen looks over Gary’s desk and finds a flyer similar to one in Eugene’s belongings.

Over lunch, Linda fills in some missing details. A few weeks back, Eugene was depressed. He offered to help Linda move to Australia to start a new life, and tried to fund it by selling the alien eye on eBay. It reached a peak of £15,005.50. The story is interrupted by Eugene’s mother who wants Gwen to come by.

Gwen and Eugene’s mother watch the video of the mathematics competition. Gwen learns of how Eugene received the eye from his former science teacher, and together everyone learns that Eugene’s father is now working in a garage across town instead of living the fantasy life in America. Eugene remembers why he sold the eye: After discovering the lie, he realized that he’d been chasing fantasies his whole life, so he chose to get rid of them.

Gwen decides to go interview Eugene’s father but changes her mind when Eugene pleads with her not to. She returns to the Hub and learns from Jack about the Dogon sixth eye, an item that allows its user to see his past and put it in perspective. She convinces Jack to let her track this down and he gives her the weekend to do so.

Her first stop is the black hole conference at Aberystwyth University. She finds Gary and learns that he had artificially inflated the eBay bids to cheer his friend up. The £15,005.50 bid was real, however, and Gary admits that he met with Eugene before he went to make the exchange. Gary doesn’t know who the shoes belong to, but he is sorry for his part in all of this.

Later that night, Gwen sorts through the belongings back while Eugene muses about his fragmented memories. He also admits to loving Gwen, and although he can minimally affect the environment around him, Gwen goes to bed ignorant of his presence. The next morning, Gwen continues to follow the clues. She ends up at a diner called Happy Cook which sparks another memory in Eugene. His friends were the buyers: The £15,005.50 bid was theirs, but the one before theirs was real. In his frustration, Eugene took photographs of their shoes before a fight ensued. During the scuffle, Eugene swallowed the eye to protect it before they all ran out.

As Gwen interviews the server, Gary and Josh come in and eventually tell Gwen their side of things because Gary misses his friend. Eugene had just kept running, high on the effect of the eye, but didn’t look before crossing a road and getting struck by a car. Gwen finally calls Eugene’s father and tells him the bad news.

Gwen, Gary, and Eugene’s family attend Eugene’s funeral. Eugene’s father makes amends and Eugene sees him as a normal man. He also wishes that he had been able to spend more time with him. After the funeral, Gwen receives a paper bag containing the eye. Back at Eugene’s home, Eugene wonders why he’s still around. The Torchwood SUV pulls up and Gwen passes off the eye before watching Eugene’s family reunited. She’s nearly run down by a speeding car, but Eugene is able to push her out of the way.

He’s fully visible to everyone around for this final moment. He says his farewells and vanishes in a bright ascending light.


The most obvious connection here is Love & Monsters. The big difference despite the very deep similarities is that Love & Monsters was a fun romp where this one dragged. On the upside, however, this Gwen-centric episode highlighted her skills in a part police procedural, part ghost story adventure. It also continues to highlight Gwen’s quest for personal connections in a life that demands secrecy, but the pounding of that particular drum is getting tiresome.

This episode is pretty much a Doctor Who story that fell through the cracks and landed in a different series without the TARDIS or the Doctor.


Rating: 3/5 – “Reverse the polarity of the neutron flow.”


UP NEXT – Torchwood: Out of Time


The Timestamps Project is an adventure through the televised universe of Doctor Who, story by story, from the beginning of the franchise. For more reviews like this one, please visit the project’s page at Creative Criticality.


Timestamp #TW8: They Keep Killing Suzie

Torchwood: They Keep Killing Suzie
(1 episode, s01e08, 2006)


Suzie Costello: Master of Long-Range Planning.

Torchwood Three arrives on the scene of a grisly murder and meets Detective Kathy Swanson. The double homicide is framed by one word on the wall, written in blood: TORCHWOOD. Jack is immediately intrigued, and although there appears to be no link between the killer and the victims, the killer has Compound B67 in his blood.

What is that, you say?

Compound B67 is retcon, the amnesia pill that Torchwood uses to clear memories. The killer is one of the people that had their minds wiped. While the team investigates, Gwen recommends using the resurrection gauntlet to interrogate the victims. After all, if Torchwood caused the deaths, they should clean up the mess.

The first victim, Alex Arwyn, wastes his time screaming for his mother. The second victim, Mark Brisco, tells them that the killer – a man named Max – belonged to the Pilgrim organization. Mark also identifies a woman who was close to Max. Her name was Suzie Costello.

Yeah. That Suzie Costello.

Tosh researches Pilgrim, a religious support and debate group run by Sarah Brisco, and all of the victims so far are linked as members. The team digs into Suzie’s belongings – Torchwood retains possession after a team member dies – and finds evidence linking her to Pilgrim. They then use the gauntlet to resurrect her. Gwen has trouble bringing her back because she lacks empathy for the woman who tried to kill her. They deduce that she’s too far gone, but Owen suggests the Life Knife, a blade made of the same material as the gauntlet. Jack plunges it into Suzie’s chest and the woman bursts back into the world of the living.

Suzie’s shock prevents her from giving any information, but by some strange events, she’s still alive beyond the normal time limit for the gauntlet. In fact, she remains alive for more than three months. When the team tries to interrogate her about Max, she’s less than cooperative. She eventually reveals that she gradually overdosed Max, giving him one pill a week for two years while talking to him about Torchwood.

There’s that common theme of this season again.

Jack refuses to let Suzie see her family again. Resigned to her fate, she identifies a survivor: Lucy McKenzie. The team tracks Lucy to the Wolf Bar while Suzie watches from Tosh’s station in the Hub. The team misidentifies a man as Max, but the real killer shows himself and ends up on the business end of Jack’s stun gun. Max is confined in the Torchwood cells, but he only responds to the name of the organization. Quite violently, in fact, but for only ten seconds at a time.

Meanwhile, Gwen discovers that Suzie’s father has cancer. Gwen blames Jack for letting Suzie use the gauntlet, a device that could have reversed her father’s condition. Jack refutes her, and the argument is interrupted by Owen with news that Suzie is draining Gwen’s lifeforce. While the team learns this and Jack resolves to kill Suzie, Gwen springs Suzie for a little road trip. When they attempt to pursue, the base goes into lockdown.

Gwen takes Suzie to Greenleaves Hospital, during which time they discuss Jack’s immortality. Meanwhile, the team links the lockdown to Max, who is currently reciting Emily Dickinson’s The Chariot. The poem is an implanted Trojan horse, set up long ago by Suzie to force Torchwood to resurrect her. Ianto connects his mobile phone to the Roald Dahl Plass water tower and Jack calls Detective Swanson for help. He asks her to read a book of poetry by Dickinson. When the poetry fails, Tosh suggests using the ISBN instead, and that is the magic key. The base restarts and the team mobilizes.

As Gwen and Suzie arrive at the hospital, Gwen collapses as she slowly develops a self-inflicted gunshot wound to her head. Suzie kills her father and then takes Gwen to Hedley Point, intent on escaping via ferry. Jack and Owen catch up in the Torchwood SUV and Jack shoots Suzie, but Suzie won’t die. Jack empties his gun into Suzie to no avail, then realizes that the gauntlet is the link. He orders Tosh and Ianto to destroy it, but before they do Suzie reveals that there is something in the darkness beyond death. It is moving and it is coming for him.

The gauntlet is destroyed, Suzie finally dies, and Gwen lunges back into life.

Back at the Hub, Jack and Ianto put Suzie back into cold storage. They flirt back and forth before locking Suzie away, but Ianto reminds Jack that gloves often come in pairs.


The themes keep running through this season. Suzie has the same desire to connect with someone about Torchwood, but the twist is that she’s also a bit of a sociopath. This addition seems like an unnecessary one, but it also closes the loop surrounding Suzie’s mysterious actions in the pilot episode. She also sheds a bit more light on Jack’s history and his ruthlessness when it comes to his employees.

Finally, it paves the way forward toward a “Big Bad” for the season. Something’s coming from the realm of death, and Jack’s inability to die seems to be tied to it.


Rating: 3/5 – “Reverse the polarity of the neutron flow.”


UP NEXT – Torchwood: Random Shoes


The Timestamps Project is an adventure through the televised universe of Doctor Who, story by story, from the beginning of the franchise. For more reviews like this one, please visit the project’s page at Creative Criticality.