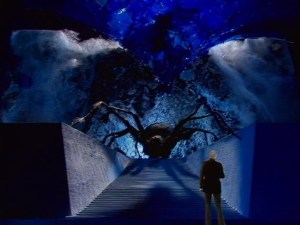
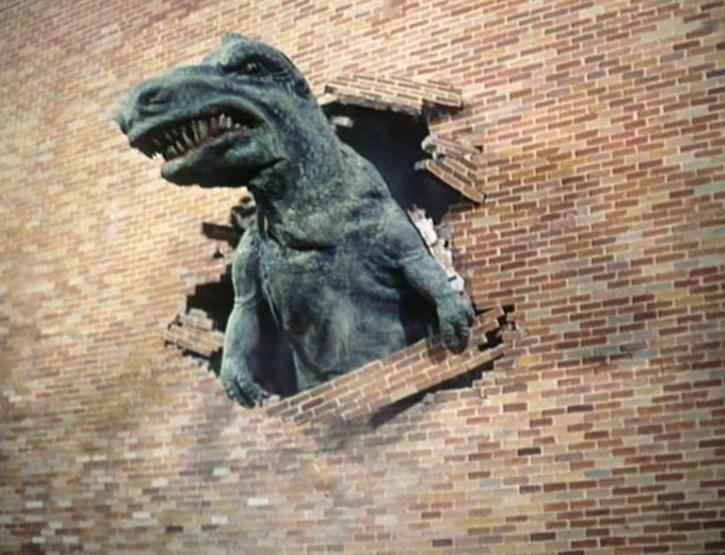
Timestamp #SJA12: Enemy of the Bane

Sarah Jane Adventures: Enemy of the Bane
(2 episodes, s02e06, 2008)


Double the trouble.

Rani’s mother Gita is working late on a special floral commission. Her mysterious client turns out to be Mrs. Wormwood, who ends up paralyzing Gita in an attempt to draw out Sarah Jane Smith. On Bannerman Road, Luke has been having nightmares about Mrs. Wormwood and his origins.

Sarah Jane consoles Luke about his nightmares, though he counters that he’s never dreamed before. They’re interrupted by Rani and news of Gita’s disappearance, which Sarah Jane decides to investigate despite zero evidence of alien interference. Luke, Clyde, and Sarah Jane visit the flower store and find Mrs. Wormwood’s check, an intentional clue that they take for Mr. Smith to analyze.

The supercomputer unravels an address masked in the check’s account and routing numbers. Sarah Jane leaves to investigate, reluctantly taking Rani with her and providing a history lesson for the teenager. Once they arrive, they find Gita and Mrs. Wormwood. The former Bane operative has extensive knowledge of the Bannerman Road adventures, and she asks for Sarah Jane’s help. Mrs. Wormwood took responsibility for the Bane’s previous failure and they’re hunting her.

The Bane attack and the group runs away, Mrs. Wormwood defending them with her phonic disruptor. Sarah Jane is briefly captured, but Mrs. Wormwood saves her life before they all escape to Bannerman Road. Gita recovers and Rani takes her home. Sarah Jane brings Mrs. Wormwood to her home, shocking Luke and Clyde.

In the attic, Sarah Jane asks Mr. Smith to watch the Bane operative while she explains herself. Mrs. Wormwood tells a tale of an ancient immortal, Horath, that tried to take over the galaxy but was defeated three thousand years ago. Unable to destroy him, Horath’s captors separated his body and consciousness and placed them at opposite ends of the galaxy. The Bane have located Horath’s consciousness, but to find the body, the team needs to find the Tunguska Scroll.

That artifact is located in UNIT’s Black Archive, a secure storehouse of dangerous alien artifacts.

Sarah Jane confines Mrs. Wormwood to a containment field before making contact with an old friend: Retired Brigadier Sir Alistair Gordon Lethbridge-Stewart. Sarah Jane and Rani ask the Brig if he can help them break into the Black Archive. He drives the women to the Black Archive and is intercepted by his UNIT liaison. Once he ditches the major, he gives Rani and Sarah Jane access while he stands watch. In short order, they make a Tooth and Claw joke, steal the scroll, and make a hasty escape despite tripping the alarms.

Clyde remains behind to keep Luke away from Mrs. Wormwood, but Luke’s temptation is too strong. He talks to her about his origins and his social isolation. The Bane attack the house and Luke sets Mrs. Wormwood free so they can escape. The boys are separated from Mrs. Wormwood, and she makes contact with Commander Kaagh. The Sontaran has Horath’s consciousness, and Mrs. Wormwood is overjoyed that her revenge against Sarah Jane Smith is at hand.

Luke and Clyde are surrounded by Bane. To Kaagh’s surprise, Mrs. Wormwood recharges her disruptor and blows the two attackers into goo just as Sarah Jane, Rani, and the Brig arrive. The entire lot takes refuge from UNIT in Gita’s flower shop and Luke’s two mother figures have a small heart-to-heart before tensions rise again.

Mrs. Wormwood summons Kaagh. The Sontaran destroys the sonic lipstick and Sarah Jane deduces that he is holding the consciousness. Mrs. Wormwood takes the scroll, threatening to kill all of them to get it. She also coerces Luke into joining them, using him as leverage to prevent Sarah Jane from interfering. Mrs. Wormwood knocks all of them out with her disruptor before leaving.

Mrs. Wormwood, Kaagh, and Luke arrive at yet another factory – this one shelters the Sontaran’s space pod – and activate the scroll with the consciousness. Mrs. Wormwood reveals that Horath is a cybernetic intelligence instead of a biological being, and suggests that Luke’s intelligence could make him a superior leader of the galaxy. Luke ignores the offer and swipes the scroll, getting only a short distance before being stopped. Kaagh nearly shoots him, but Mrs. Wormwood assumes her Bane form and steps in front of the Sontaran’s gun and stuns the soldier into submission.

Meanwhile, Major Kilburne snoops around Bannerman Road, posing as Sarah Jane’s nephew. The Bannerman Road gang arrives home and attempt to locate Luke and the villains, only to be ambushed by the major. The Brig uses a weapon in his cane to stun the officer, who is now revealed as a Bane agent. Sarah Jane and Clyde use Mr. Smith to track the Bane to a stone circle in Whitebarrow, and they borrow Gita’s van to drive there.

When Mrs. Wormwood and Kaagh arrive at the stone circle, they find it guarded by a force field that blocks offworlders from crossing into it. Mrs. Wormwood uses Luke to breach the perimeter and place the scroll at the heart of the circle. The portal to Horath begins to open, and Mrs. Wormwood attacks Kaagh before offering Luke unlimited power at her side.

The Bannerman Road Gang arrives as the portal opens. Clyde tends to Kaagh as Luke rejects Mrs. Wormwood. As Mrs. Wormwood turns on Sarah Jane and her friends, Kaagh asks Clyde for help to regain his honor. The Sontaran rushes the Bane, plunging them both into the portal as it closes, trapping them. Sarah Jane pulls her spare sonic lipstick and destroys the scroll, ending the threat.

Back at Bannerman Road, the team reflects on how amazing the universe can be as they bid farewell to the Brigadier, once again united as a family.


In one fell swoop, this finale knocks out two major SJA villains, reinforces the major theme of the show, and swings around mythology by bringing back a long-time favorite and adding a major component that will come back in a few years time.

The return of Brigadier Sir Alistair Gordon Lethbridge-Stewart was beautiful and is a great capstone to his forty-year legacy in Doctor Who, from The Web of Fear to Battlefield. Before this episode, it had been nineteen years since his last appearance, and this one is special because it is Nicholas Courtney’s final televised appearance in the role. He died in 2011, roughly two years after this story.

His views on UNIT say a lot about the evolution of the organization, as well as the views on the military and human rights between the 1970s and the early 2000s. Remember, good science fiction serves as a lens on the human condition, and Doctor Who is one of the best in that regard.


Rating: 4/5 – “Would you care for a jelly baby?”


Keeping in mind that the Timestamps Project is following the franchise chronologically at this point…

UP NEXT – Doctor Who: The Next Doctor


The Timestamps Project is an adventure through the televised universe of Doctor Who, story by story, from the beginning of the franchise. For more reviews like this one, please visit the project’s page at Creative Criticality.


Advertisement

Timestamp Special #8: Death Comes to Time

Doctor Who: Death Comes to Time
(5 episodes, 2001-2002)
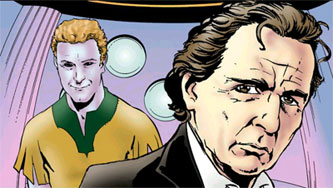
 

One more round with Sylvester McCoy before returning to the canon timeline.

After a brief introduction filled with metaphor and symbolism, we are witness to a massive and bloody battle in space. General Tannis decimates the fleet and destroys the city of Annit, obliterating nine million people before Admiral Mettna surrenders unconditionally. Thus begins the Canisian invasion of the Santine Republic. The admiral is killed despite her surrender, the Santinian president is assassinated by Tannis himself, and the Republic falls.

As Tannis begins his reign of terror, the Seventh Doctor and his companion Antimony arrive. Antimony knocks out the guard as the Doctor meets Senator Sala, the leader of a blossoming resistance. The Doctor takes the survivors away and works out a plan with them to stop the threat. When the Doctor spots burning trees, he realizes that someone wants to contact him and the travelers depart.

Elsewhere, a being identifying himself as a “God of the Fourth” arrives on a spaceship, enthralls the guards, and rescues a prisoner.

That prisoner is Ace.

Her mysterious benefactor is named Casmus, and he rescued her in order to teach her. He’s very much a Yoda to her Luke Skywalker.

As the Doctor and Antimony travel to the Temple of the Fourth on the planet Micen Island, the Doctor has a premonition which he ascribes to a nightmare. In the temple, they find statues of long dead Time Lords with an inscription: “We serve the many, for the many are One, until twilight falls and death comes to Time.”

The Doctor is met by a fellow Time Lord named the Minister of Chance, and he is the one who sent the fiery message. The Minister informs the Doctor that two Time Lords, the Saints Antinor and Valentine, have been murdered on Earth. The Minister fears a greater evil at work, and he takes over the Santine crisis while the Doctor investigates the threat to their kind.

Tannis punishes his guards for their failures: The lost resistance group nets one guard a bullet while Ace’s disappearance results in her guard Golcrum being exiled to the barren world of Animapersis. As he muses on how even Time Lords die, he reveals bigger plans in motion.

The Doctor and Antimony arrive at a radio telescope analysis center as the Time Lord delivers a lesson in temporal philosophy and mentions an encounter with an allosaurus. They meet with Dr. Kane, who explains that Valentine and Antinor were killed by animals, presumably a dog or large cat. The Doctor asks her what they were investigating, discovering that black holes are being created and expanding at a drastic rate. The fabric of space-time has been torn.

Antimony investigates the crime scene and encounters two policemen, Campion and Speedwell. They grill him before meeting with the Doctor, and Speedwell is called away to another animal attack in the East End. The Doctor accompanies the officer, but Antimony is left behind in handcuffs. The Doctor finds bite marks on the woman’s neck, her corpse drained of blood. They also find the body of a policeman and a bar with twenty additional corpses. A dark figure flees the scene, and back at the laboratory, Antimony encounters Campion in a similar state, and discusses the event with a dispassionate Kane.

Across the universe, Ace wakes from a dream about the edge of a whirlpool and a friendly yet dangerous man. Casmus teaches her how to remember dreams – perceptions uncluttered by shadows of matter – and tells her that they will soon visit the Kingmaker at Mount Plutarch to test her abilities. On Santine, the Minister of Chance arrives, dodges Tannis’s troops, and meets with the leaders of the resistance.

Back on Earth, the Doctor and Speedwell find more corpses and note that there are two distinct styles of killing. Some are for feeding, but others are were just in the way and used as a distraction. The pair dive into a manhole and track down the killer, the vampire Nessican. The police officer’s gun proves useless since severing the spine is the only way to kill a vampire. Nessican attacks the Doctor, but the Time Lord had eaten garlic so his blood poisoned the vampire. The pair get a call pointing them back to Kane, and they arrive at the lab just in time to kill her too. With her dying moments, she tells the Doctor that the tear in time is the work of a Time Lord.

Before his death, Nessican sent a message to Tannis: Earth is rich in resources and defenseless. Tannis is overjoyed by this report.

The Minister of Chance takes Senator Sala to the Canisian army. Captain Carne, the detachment commander, suspects a trap but accepts the gift and sends her away to be tortured. He also plans to kill the Minister at a later time. On the Canisian homeworld, Premier Bedloe and Tannis announce the defeat of the Santine Republic. Simultaneously, Tannis’s troops have surrounded the city and taken Bedloe’s child hostage. When Bedloe confronts the general, Tannis explains that he intends to use the leader as a front while Tannis conquers the universe. Premier Bedloe is left in the care of Major Bander with orders to kill the leader on command.

The Doctor analyzes the black holes and realizes that the tears in space-time could only be caused by another Time Lord misusing his powers. Antimony wonders whether it could be the Minister of Chance, but the Doctor thinks otherwise, planning to strike on Alpha Canis while the Minister occupies Tannis on Santine.

Sala is tortured and returned to her cell with the Minister. The Time Lord heals her wounds, enabling her to infiltrate the base and find the other political prisoners. The Minister sets a trap for Carne.

As Ace and Casmus travel to Mount Plutarch, her lessons continue. There is no true chaos in the Universe, just an order of greater complexity than can be easily perceived.

When the captain interrogates the Minister, he is told that the Santine resistance plans to attack a prison at Luria. The reaction reveals that the prison really exists, which they had not known with certainty. They spring the trap by threatening to inform the general’s incoming envoy – the Fleet Pilot – that Carne revealed the secret, so Carne shows them a prison map in exchange for their silence. The Minister tells him where the resistance intend to attack, then uses a word of power to crash the planetary computers. In the confusion, the Minister and Sala flee while Carne deals with his own skeptical troops.

The Minister has a lot of strange powers that seem overboard for Time Lords.

The Doctor and Antimony arrive on Alpha Canis, and the Doctor explains why they can’t just kill the general outright. The Doctor plans to turn Premier Bedloe against Tannis, and he surrenders himself to the authorities under the pretense that he has kidnapped Bedloe’s children. The Doctor’s ruse works out, but his presence is reported to Tannis. Bedloe questions the Doctor personally, and the Doctor strikes a deal to rescue the children from the general’s personal villa in exchange for Tannis.

After dispatching Captain Carne, the Fleet Pilot reports the Minister’s activities to Tannis. The general orders the Time Lord located so he can deal with the threat personally. Elsewhere, Ace and Casmus stargaze while the human woman realizes that she will never have normal relationships with other humans again. She now has a special relationship with time and is introduced to the loneliness of being a Time Lord.

Nice. She’s being trained as a Time Lord.

The Doctor and Antimony break into the villa, rescue the child, and return him to Bedloe. Unfortunately, their deal is broken when Tannis strikes a new bargain with Bedloe.

On Santine, the Minister of Chance and Sala try to find their way back to the resistance. Sala asks about his name, which he explains is given perhaps by what they did but is unpronounceable by her tongue. In the end, she just calls him “Snake”. The path is treacherous and she is still weakened from the interrogation, so the Minister uses his healing power once again. When she questions why the Minister doesn’t use his powers to save everyone’s lives, he explains that she cannot understand his people’s position. They are soon intercepted by a resistance member and share the intelligence about the Lurian prison camp.

Ace is subjected to a test known as the “Cavern of Infinite Death”, wherein she must pass through the cave on the stalagmites without touching the red liquid covering the floor. Ace gives it the old college try, but falls in nonetheless. When she panics, Casmus reveals that the liquid is benign. The lesson: Soon she will be able to break the rules of the universe, but such power can easily be misused even with the best intentions.

In this particular story, Time Lords guard time and can manipulate it with a thought. The power is that over creation itself, and the place of a Time Lord is only to fight evil, not destroy it with a single stroke.

This is rather intriguing.

General Tannis threatens to shoot the Doctor or Antimony, and then reveals his secret: He is a Time Lord. Of course, unlike the Doctor, the Minister, or any of the other Time Lords, he wants to use his powers to rule the Universe. The Doctor tells Antimony to run, but the companion refuses, and Tannis suggests that Antimony sees the Doctor as his father. The next big reveal: Antimony is a robot, which Tannis displays by shooting the companion multiple times. Having seen so many companions leave or die, the Doctor built a companion who would always stay with him. Unfortunately, while Tannis taunts the Doctor, the general shoots Antimony in the head and leaves the Doctor to watch his companion die.

Tannis returns to Santine and discusses the Minister with his Fleet Pilot. Tannis realizes that the Minister cares for Sala, and he explains why he’s concerned about the Time Lord. One time, Tannis dropped a plague on a particularly obstinate planet to exterminate the population, but three days later, the plague was gone and the population was unharmed. Later, Tannis discovered a cult dedicated to a god they called “Manaster,” whom the general presumed was the Minister.

The Santine resistance mount their attack on the Luria prison, but Tannis traps them with a fleet and orbital fire. Sala pleads with the Minister to use his powers to save them, and he refuses until Sala is killed. The Minister loses his self-control and unleashes a hellish rage upon Tannis’s ships. Despite his extensive losses, Tannis orders retreat and decides to visit Earth.

Finally arriving at the home of the Kingmaker, an old woman who watches over the Time Lords, Ace is tested with a mission to Animapersis, the same world where Golcrum was exiled, a planet ravaged by biological and psychic warfare. She is tasked with restoring the planet to its rightful inhabitants without abusing her new powers. She is given a TARDIS and a wand, the latter of which she is told can manipulate time, but is warned against using. Casmus promises to wait for her, but the Kingmaker knows his time is nearing an end.

Ace arrives on Animapersis to find a cave filled with terrified survivors. She declares that she intends to defeat the ghosts and reclaim the planet, and a young woman named Megan offers to guide her to the nearby crater.

While he waits for his student, Casmus is visited by Tannis. The general explains that he has killed off the rest of the Time Lords and set the Doctor and the Minister at odds against each other. Tannis demands to know where the girl from his ship is located, and Casmus tells him that she is on Animapersis. Casmus toys with Tannis, explaining that the more important discussion is what Ace has become. She means something to both Casmus and the Doctor, which is why Tannis wants her dead.

She is a Time Lord not because of anatomy or appearance, but because of what she embodies and does. She is the envoy of a new age.

On Animapersis, Ace and her companion reach the edge of the crater and descend into its depths, facing the entrancing whispers of the spirits within. The spirits threaten to take Ace’s TARDIS and terrorize the universe unless she gives them Megan. Ace is overwhelmed and collapses, awakening on her TARDIS with a strange but talkative man who we know as Golcrum. The survivors are missing, and Ace realizes that she has killed the spirits and survivors with her newfound powers.

The Doctor visits Mount Plutarch, distraught and pleading with the Kingmaker for help in stopping Tannis. Since the general has not broken any laws of time despite amassing power and weapons, the Kingmaker refuses to interfere. She also points out that Tannis is the mirror of the Doctor’s power, and that the Doctor was summoned here to destroy the Minister for his violations.

Ace and Golcrum return to Casmus’s garden to find her mentor dead. The Doctor reunites with his former companion and brings word that Tannis killed Casmus. In turn, she reveals what she did on Anamapersis. The Doctor consoles her with the revelation that it was a test, and that every person there was an illusion. It was a Kobayashi Maru-style scenario designed to instill a memory of failure in recruits and remind them of the scope of their power, a power that that Ace does not yet possess. She mentions the wand, but the Doctor has her look at it again with new eyes. The wand is nothing more than a fancy stick.

The Doctor and Ace formulate a plan to stop Tannis: Ace and Golcrum head for Earth to intercept Tannis while the Doctor deals with the Minister. On the Canisian homeworld, the Doctor finds a village in flames. He confronts the Minister on a nearby mountain, pleading for help against Tannis. When the Minister refuses to help, the Doctor revokes the Minister’s ability to travel via TARDIS, a move that opens the former Time Lord’s eyes and guilt.

On Earth, in the NASA mission control room, the operators (does anyone else want to beat Bob with Ace’s stick?) are startled to find a fleet of spaceships approaching the planet. The President of the United States is informed, and Tannis offers an ultimatum: Surrender or he will bomb London. While the President stalls, the Prime Minister calls with word of countermeasures. The bomb explodes inside the gunship’s hold and a fleet of shuttles emerges from behind the moon, commanded by none other than Brigadier Lethbridge-Stewart with Antonín Dvořák’s epic Symphony No. 9 (New World): IV. Allegro at his wings.

Tannis orders a ground invasion, descending on Stonehenge to begin a march on London, but they are confronted by Lieutenant Colonel Speedwell (who was previously undercover, I suppose) and the might of UNIT. As the battle rages, Tannis abandons his troops and searches for the Doctor. He finds Ace first and starts beating her, but the Doctor intercedes. Tannis knows that, under the law, the Doctor cannot use his powers to stop him, but the Doctor surprises Tannis with a flash of blue behind his eyes. With a choice between abusing his powers or leaving Tannis to abuse his own, the Doctor decides to unleash the might of the Time Lords, an act that destroys Tannis and kills the Doctor.

As UNIT celebrates their victory over the invasion, Ace brings word to the Brigadier of the Doctor’s fate. She travels to Mount Plutarch where the Kingmaker confers the full power of the Time Lords upon Ace, marking the beginning of a new age.


This story was an amazing extension of the mythology constructed in the classic era, presenting a natural path of evolution for the Time Lord civilization. If it were placed in the franchise’s continuity, it would act like a world-breaking tale that could potentially reboot everything and carry it forward with fresh eyes.

And, oh, would I love to see more adventures with Ace in her new role, because she is amazing.

But it would also mean the end of the Doctor, and presumably, the end of the series under the title Doctor Who. In that regard, I’m glad we didn’t get that path going forward.


Rating: 4/5 – “Would you care for a jelly baby?”


UP NEXT – Doctor Who: The Movie


The Timestamps Project is an adventure through the televised universe of Doctor Who, story by story, from the beginning of the franchise. For more reviews like this one, please visit the project’s page at Creative Criticality.


Timestamp Special #7: Dimensions in Time

Doctor Who: Dimensions in Time
(2 episodes, 1993)


Celebrating thirty years.

Starting off with a little backstory, this was shown as part of the 1993 Children in Need telethon over two nights. Both parts were bracketed by host Noel Edmonds, and the first part involved a short intro sketch with Jon Pertwee in character as the Doctor. Sadly, this was his last on-screen performance before his death.

On to the story…

The Rani is traveling with her companion, previously having captured (busts of) the First and Second Doctors in an attempt to assemble a menagerie of sentient life-forms to control the universe. That’s kind of her thing, really. Her companion checks off a Cyberman and a Time Lord from Gallifrey, noting that they need a human from Earth to complete the collection.

Elsewhere, the Fourth Doctor (in his Eighteenth Season garb) issues a warning to all of his other incarnations. It appears that he’s too late as the Rani takes aim on the TARDIS and knocks the capsule off course. Instead of landing in China, the Seventh Doctor and Ace materialize on the docks at the Cutty Sark Gardens, circa 1973. As Ace calls for help, the Seventh Doctor transforms into the Sixth Doctor, and both of them are instantly transported to (the fictional) Albert Square. The Sixth Doctor remarks that they have “slipped a groove” in time, and somehow he knows who Ace is.

This timey-wimey-wibbly-wobbliness will drive the rest of the adventure.

As Ace spots a clothing stand and a discount on a jacket from Sanjay and Gita (of The EastEnders), the Sixth Doctor discovers that they are now in 1993. The slipped groove has also slipped them two decades into the future. Just as he begins to question things, the slip happens again, leaving behind the Third Doctor and Mel. The Third Doctor believes that someone is rooting through his timeline and extracting previous incarnations and companions. The pair stop and ask two shop owners (Pauline Fowler and Kathy Beale from The EastEnders) what year they are in, and they are shocked to discover that they are in 2013.

The slips come fast and furious now, bouncing between 1973, 1993, and 2013, all in an attempt to separate the Doctor from the TARDIS and seal all of the Doctors together. One slip occurs, revealing the Sixth Doctor and Susan Foreman, the latter of whom is eager to find her grandfather, Ian, and Barbara. Another slip brings Sarah Jane and the Third Doctor back together. The next reunites the Fifth Doctor, Nyssa, and Peri, and this time they’re under attack from the Rani’s menagerie because our heroes (in all their guises) are too close to the truth.

They face off against a host of villains from the last thirty years (including an Argolin, a biomechanoid, a Cyberman, a Mentor, an Ogron, a Sandminer robot, a Sea Devil, a Tetrap, a Time Lord, a Tractator, a Vanir and a Vervoid, and even Fifi), and after they attempt to warn Pat Butcher (The EastEnders) of the danger – a futile effort, it seems – they are trapped by the Rani outside the Queen Victoria (once more, The EastEnders).

The Fifth Doctor psychically summons the Third Doctor in his place, an act that replaces Nyssa and Peri with Liz Shaw. Liz attempts to disarm the Rani, but then flees after Mandy (The EastEnders) distracts the villain. Mike Yates arrives in Bessie and shoots the gun out of the Rani’s hands, offering the Doctor a way out. Together they flee to a helicopter and the Brigadier.

Another slip occurs, exchanging the Third Doctor for the Sixth as they reach safety. As another slip occurs, the Rani and her companion set course for the Greenwich Meridian to find their missing human specimen. In a garage, the second Romana is flushed out of her hiding spot by Phil and Grant Mitchell (you guessed it, The EastEnders), who point her to their doctor, Harold Legg. As she passes the Queen Victoria, the Rani captures her.

In 1973, the Third Doctor and Victoria Waterfield discuss the nature of the Rani as they return to the TARDIS. Time slips once again, and the Seventh Doctor lands in 1993 and encounters Leela, who has escaped the Rani after being cloned in the form of the second Romana. This is the key that the Doctor needs, since the Rani now has an extra Time Lord brain imprint instead of the human one she needed. The Seventh Doctor, Ace, and K9 rig up a device to overload the time tunnel, capturing the Rani inside while breaking the other Doctors free.

Triumphant, the Seventh Doctor and Ace board the TARDIS for their next adventure, confident in the fact that the Doctor(s) are difficult to get rid of.


This was fun but chaotic, and a decent nod to the franchise on its thirtieth anniversary.


Rating: 3/5 – “Reverse the polarity of the neutron flow.”


UP NEXT – Doctor Who: Death Comes to Time


The Timestamps Project is an adventure through the televised universe of Doctor Who, story by story, from the beginning of the franchise. For more reviews like this one, please visit the project’s page at Creative Criticality.


Timestamp #156: Battlefield

Doctor Who: Battlefield
(4 episodes, s26e01-e04, 1989)


The final classic season begins with an old trope and an old friend. We begin with retired Brigadier Lethbridge-Stewart shopping for trees with his wife, reminiscing on his days with UNIT. Elsewhere, a familiar-looking sword glows with unearthly light as Brigadier Winifred Bambera and her UNIT soldiers conduct military exercises in the country.

On the TARDIS, the Doctor is tracking a distress signal from Earth that has saturated all of time and space, across the boundaries that divide one universe from another. The TARDIS arrives at the source of the signal, three years in Ace’s relative future. Ace and the Doctor hitchhike with archaeologist Peter Warmsly after the new Brigadier bypasses them. As they drive to a nearby battlefield dig, several armored knights crash land from space. The Doctor and Ace infiltrate the UNIT nuclear missile site with old identification cards, one belonging to Liz Shaw. Bambera confiscates the passes, but one soldier remembers the Doctor from Lethbridge-Stewart’s days.

A space knight investigates the TARDIS exterior while the Secretary General calls Lethbridge-Stewart to tell him about the Doctor’s arrival. Bambera takes the Doctor and Ace to a nearby hotel where they can find accommodations. She then spots the TARDIS and walks into the middle of a battle between the space knights.

At the hotel, Ace meets Shou Yuing, a fellow explosives enthusiast, while the Doctor converses with blind psychic innkeeper Elizabeth Rowlinson. Bambera (and Warmsly) end up at the hotel as Lethbridge-Stewart dons his uniform one more time.  The Doctor and Warmsly talk about the scabbard, which has psychic energy and is linked to a strange woman in a crystal ball.

The battle propels the knight into the hotel’s brewery, driving our heroes to investigate. They find the knight, who is a human named Ancelyn who claims that the Doctor is Merlin. The distress call was Excalibur’s Call and placed the planet in the middle of a war that doesn’t belong in this dimension. As the quartet tries to leave, they are ambushed by Bambera (who tries to apprehend them) and the enemy knights (who try to kill them).

The Doctor tries to negotiate, but Bambera is quick to the trigger. The enemy leader is Mordred, and he warns the Doctor of his mother’s (Morgaine, who has waited twelve centuries) coming reckoning. The enemy retreats, the Doctor’s party retires to the hotel, and Bambera and the knight do the ritual dance of dominance.

Using a brother sword to Excalibur, Mordred conducts a ritual to link his home dimension to modern Carbury. The scabbard on the wall launches toward the lake, Mordred is swimming in Highlander-era fantasy, and Morgaine crosses into our dimension. She calls to the Doctor telepathically, and when he refuses her, she declares war on their “last battlefield.”

In the morning, the Doctor and Ace visit Warmsly’s dig, finding a marker that reads “dig hole here” in the Doctor’s handwriting. Ace blows open the hole and they descend into the ground. As Brigadier Lethbridge-Stewart arrives in Carbury, Morgaine attacks his helicopter. The pilot sets it down successfully, although Lieutenant Lavel is injured, and Lethbridge-Stewart sets out for help. He soon encounters Morgaine and her army, and after a discussion, they part ways honorably. Lethbridge-Stewart commandeers Shou’s car.

In the underground tunnel, Ace and the Doctor enter a strange room that obeys the Doctor’s commands. He presumes that the place was built by Merlin, and that he could possibly be Merlin in his own future. The facility is really a spacecraft for traveling between dimensions, and it contains King Arthur (in suspended animation) and Excalibur. Ace accidentally draws Excalibur, releasing an automated defense system. Ace runs the wrong direction and ends up trapped in an airtight chamber that fills with water. The Doctor manipulates some controls and continues to battle the defense system as Ace is ejected to the surface of the lake, echoing the Lady of the Lake legend as she emerges with Excalibur. She passes the sword to Ancelyn, Bambera, and Warmsly as Shou and Lethbridge-Stewart arrive.

In a touching reunion, Lethbridge-Stewart goes into the ship and saves the Doctor, and the duo return to the surface. Meanwhile, Morgaine orders her troops to find Excalibur and kill any who stand in the way. At the inn, Mordred taunts the innkeepers and lusts after Lieutenant Lavel as his mother arrives. Morgaine kills Lavel after extracting military knowledge from her mind, and rewards the innkeepers for their treatment of her son by restoring Elizabeth’s sight.

The hero party returns to the hotel – the women and modern military leaders bristle under Lethbridge-Stewart’s ways – surviving an assault along the way. There, they find that the locals are being evacuated, though Warmsly and the Rowlinsons require a little psychic convincing from the Doctor, but Ace and Shou slip away in the organized chaos. The Doctor and Lethbridge-Stewart hit the road (in Bessie!) to find Ancelyn and Bambera and defend the missile convoy. They leave Ace and Shou at the hotel, armed with a piece of chalk to draw a circle of protection. The former Brigadier also reveals some new hardware from UNIT, including armor-piercing rounds for Daleks, gold rounds for Cybermen, and silver rounds just because. Ace and Shou draw the circle and take refuge as an ethereal darkness falls around them, and Morgaine tries to draw them out with psychic games before summoning a demonic creature.

The missile site is a battlefield with UNIT facing Mordred’s troops. As Ancelyn and Mordred engage each other, the Doctor stops the confrontation but is surprised to learn that the battle was a distraction to allow Morgaine to seek the sword. She stands over Ace and Shou with her summoned creature, the Destroyer. Mordred offers a trade – the captives for Excalibur – but the Doctor succumbs to rage and threatens to decapitate Mordred if Morgaine does not surrender. Morgaine calls his bluff and the Doctor yields, but Lethbridge-Stewart steps up in his stead. Morgaine is unswayed, restarting the battle as the Doctor and Lethbridge-Stewart put Morded in the car and race to the hotel.

Morgaine figures out that she cannot breach the chalk circle, but the Destroyer can. All it needs to is to be freed from its silver shackles. The Destroyer brings the hotel down around the ladies, and Mordred escapes. Morgaine flees with Excalibur and the Destroyer, receiving news that her army has been decimated. The Doctor and Lethbridge-Stewart pursue Morgaine into her portal, and Ace follows with the box of silver bullets shortly afterward. Lethbridge-Stewart is tossed aside by the Destroyer but the Doctor reclaims Excalibur. Morgaine frees the beast as an angry Mordred arrives, and the two return to their realm. The Doctor, Lethbridge-Stewart, and Ace regroup, and the Doctor prepares to face the Destroyer with the silver bullets. Lethbridge-Stewart stuns the Doctor, claiming that he is more disposable than the Time Lord, and faces off with the Destroyer. Three shots of silver later and the creature explodes, but Lethbridge-Stewart escaped with a promise that he is done with all of this.

Morgaine and Mordred kidnap Bambera and attempt to launch the nuclear missile. In the spacecraft, the Doctor, Lethbridge-Stewart, Ace, and Ancelyn restore Excalibur and try to release King Arthur, but a note from the Doctor reveals that the king died in battle. The good news is that they can still stop the missile. The Doctor faces off against Morgaine and appeals to her honor, compelling her to stop the missile’s countdown. She wants to face Arthur in combat, but news of his death devastates her.

Ace jubilantly destroys the spacecraft and the Doctor renders Mordred unconscious. Mordred and Morgaine are turned over to UNIT as our heroes retire to the Lethbridge-Stewart estate. The ladies take Bessie on an adventure while the men are left to chores and cooking supper.


This was a good (if final) adventure in the classic era with the Brig, and I enjoyed the references from his era to tie the legacy together. He’s back in fantastic form here for his finale, and it really buoys up a story that could have otherwise drown in tried and once true but now tired story tropes. I mean, I groaned when I saw that this was an Arthurian myth tale, and some of the obvious symbolism (Ace as the Lady of the Lake, for example) drew more of them from me.

I did love seeing Ace bond with Shou over their common attraction to explosives. I also love McCoy’s flourishes and gags that counter his growing darkness. Finally, in a reach back to near the beginning of the franchise, I did enjoy seeing Jean Marsh back in action once again. This time she was Morgaine, but way back when she was once Sara Kingdom.

I settled around a 3.5 rating for this one, and I look forward, so this story takes advantage of rounding up.


Rating: 4/5 – “Would you care for a jelly baby?”


UP NEXT – Doctor Who: Ghost Light


The Timestamps Project is an adventure through the televised universe of Doctor Who, story by story, from the beginning of the franchise. For more reviews like this one, please visit the project’s page at Creative Criticality.


Timestamp #130: The Five Doctors

Doctor Who: The Five Doctors
(Twentieth Anniversary Special, 1983)


“I am being diminished, whittled away piece by piece. A man is the sum of his memories you know, a Time Lord even more so…”

After a heart-touching introduction by the First Doctor, we find the Fifth Doctor – To save on confusion, I’m going to call them by number right out of the gate – putting the finishing touches on a brand new control console, and I actually kind of like it. The team is relaxing at the Eye of Orion, taking some time away from the rush of their recent adventures. The tranquil atmosphere has something to do with a bombardment of positive ions, and the Doctor agrees with Tegan that they can vacation for a little while.

Elsewhere, a black-gloved hand fiddles with controls and activates a scanner. On the screen is none other than the First Doctor (though not quite the genuine article due to an obvious need for recasting). A black Phantom Zone-like two-dimensional triangle swoops down and scoops up the Time Lord, an act that causes the Fifth Doctor considerable pain. The First Doctor is reduced to an Eaglemoss figurine and placed on a crystalline display.

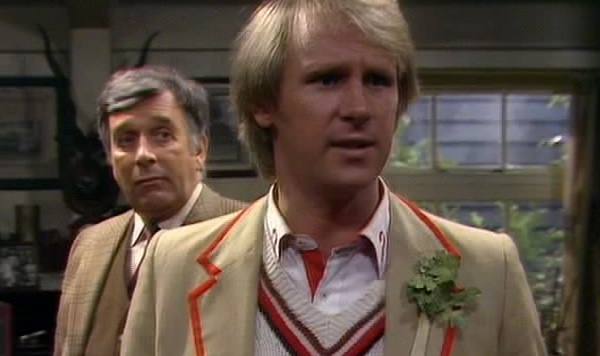
Next up, we’re taken to UNIT HQ where Brigadier Lethbridge-Stewart is talking to his replacement, Colonel Crighton, when the Second Doctor arrives. The Time Lord has arrived to attend the Brig’s farewell speech and is unhappy with the renovations at UNIT HQ. He and the Brigadier take a walk, reminiscing over the Yeti, the Cybermen, Omega, and the Terrible Zodin (okay, not so much that one) before they too are swept into the Phantom Zone and turned into toys.

On to the Third Doctor, who is trying to outrace the spinning triangle in Bessie. He fails.

Tegan and Turlough escort the Fifth Doctor to the TARDIS, where he tells them that he must find his older selves to stop whatever is chewing at his soul. Meanwhile, back on Earth, Sarah Jane and K9 puzzle over the danger that the robotic dog detects. Sarah Jane ignores his concerns and heads to the bus for her daily schedule. She’s later consumed by the mysterious triangle.

The Fourth Doctor and Romana are punting down the river at Cambridge, just like they did in Shada. It’s a clever re-use of footage, really. Anyway, they are also taken, which causes the Fifth Doctor to collapse, but not before he sets the coordinates. The Fifth Doctor fades in and out before the TARDIS lands, and the mysterious figure adds models of Tegan, Turlough, and the Fifth Doctor to the display.

On Gallifrey, the Inner Council has convened, comprised of a newly-regenerated President Borusa, High Chancellor Flavia, and the Castellan. Shockingly, they admit the Master for a conference. The Inner Council offer a pardon for his long list of crimes and a whole new regeneration cycle in exchange for one act: He is to rescue the Doctor.

Surprise!

The First Doctor wanders an angular cave of mirrors, joined in a surprise appearance by Susan. (There were cheers from this Whovian. I’ve missed her.) The pair run as a Dalek (we haven’t seen them in a while!) rounds a corner and opens fire. The place is known as the Death Zone, an arena-like place on Gallifrey where beings from across the universe were sent to battle for amusement before the time of Rassilon. The Council sent two representatives who did not return. They attempted to send the Doctor, but all of his incarnations have vanished from the timeline. All of them (except the Fourth because Tom Baker had reasons) have been deposited in the Death Zone. Inside the Zone, the First Doctor and Susan trick the Dalek into a mirrored dead end. It fires and the reflected beam destroys the creature, revealing the mutant within the armored casing. Through a hole in the wall, they see the tower of the Death Zone and decide to investigate.

Elsewhere, the Second Doctor and the Brigadier tangle with Cybermen and the Third Doctor reunites with Sarah Jane as he rescues her from a terrible fall. As the First Doctor and Susan wander, they find the Fifth Doctor’s TARDIS and meet Tegan, Turlough, and the Fifth Doctor. The First Doctor spearheads introductions all around and then tasks Tegan with fetching refreshments. She objects, but the Fifth Doctor asks her to humor the oldest of the Doctors. After all, he used to get a bit tetchy. Meanwhile, the Master is sent into the Zone with the Seal of the High Council (to prove his credentials) and a transmat recall device. He is soon found by the Third Doctor and Sarah Jane, but the reunion is broken up by laser fire. The Master runs one direction while the Third Doctor and Sarah Jane go another, but without the aid of Bessie who took a direct hit to the engine.

The Fifth Doctor sets the TARDIS coordinates for the Dark Tower, a place that supposedly holds the tomb of Rassilon and is the current destination for all of the Doctors and companions. The Fifth Doctor, Susan, and Tegan set out on foot to disable the force field around it so the First Doctor and Turlough can move the TARDIS to its doorstep. Meanwhile, the Second Doctor and the Brigadier go in through the cave system beneath the tower, the Third Doctor and Sarah Jane encounter Cybermen, and the Fifth Doctor’s team encounters the Master. The last event is watched by a squad of Cybermen, who rush the Time Lords and stun the Master. The Fifth Doctor sends Susan (who twists her ankle) and Tegan back to the TARDIS before using the transmat recall to return to the capitol. The First Doctor decides to take up the Fifth Doctor’s task, and Tegan joins him. Amusingly, the First Doctor still has a great deal of resentment at being addressed as “Doc.”

The Fifth Doctor confers with the Inner Council about who has control of the time scoop and the Cybermen. He uncovers a homing beacon inside the recall device, surmising that someone led the Cybermen to the Master to attack the Doctors. Borusa has the Castellan, who originally gave the device to the Master, arrested and his office and quarters searched. Meanwhile, the Master makes an arrangement with the Cybermen, who then converge on the TARDIS.

The Third Doctor and Sarah Jane encounter a Raston Warrior Robot, a perfect killing machine, halting their progress until it passes. Luckily, the Cybermen approach and engage the Raston, providing a diversion for our heroes to escape (with the Raston’s supplies). In the caves, the Second Doctor and the Brig find a Yeti, which they evade before finding a door to the Dark Tower. It is unlocked, so a trap must lie beyond.

In the Citadel, a chest containing Black Scrolls of Rassilon, forbidden knowledge from the Dark Times, is found in the Castellan’s quarters. The Castellan is taken away for interrogation but is shot dead (without regeneration) en route. The Fifth Doctor is forbidden by Borusa from returning to the Death Zone. Flavia is tasked with taking care of the Fifth Doctor, and they discuss the possibility that the Castellan was not the traitor.

At this point, all three entrances to the Dark Tower are in use. The Third Doctor and Sarah Jane zipline across to the upper entrance, the Second Doctor and the Brigadier are in the basement, and the First Doctor and Tegan use a biometric entry coder to open the front door. The Master follows through the main entrance with the Cybermen. Interestingly, the First Doctor does not recognize his former classmate. The Master tricks the Cybermen into a death trap, but the CyberLeader survives until the Master tricks and kills him with a Cyberman blaster. The Master passes the trap, followed by the First Doctor and Tegan who survive by using π. Stay in school, kids… math can save your life.

The Third Doctor and Sarah Jane descend toward the Tomb of Rassilon, but the closer they get, the more psychic energy pushes back on Sarah Jane. The Third Doctor scouts ahead and finds former companions Mike Yates and Liz Shaw. Similarly, the Second Doctor encounters Zoe Heriot and Jaimie McCrimmon, but in both cases, the former companions are only specters designed to impede progress toward the heart of the tower. Once the Doctors understand that the companions are mere illusions, they disappear with chilling screams. The First Doctor is unaffected since, at his age, he has nothing left to fear.

The First, Second, and Third Doctors, along with their current traveling companions, finally arrive at the tomb. After a series of reunions, the Doctors decipher the Old High Gallifreyan language of mathematical symbols to discover that whoever wears Rassilon’s ring shall achieve immortality. The First Doctor is troubled by the last line in the text: “To lose is to win and he who wins shall lose.” The Master arrives shortly afterward and threatens the Doctors, but he is sucker-punched by the Brigadier and tied up by Tegan and Sarah Jane.

The Fifth Doctor goes to confer with Borusa, but the president is nowhere to be found. The Doctor discovers that the Harp of Rassilon is a musical key. The key unlocks a chamber where the figurines (including one of the Master) are being overseen by Borusa, the true mastermind of this scheme. The president is not satisfied with leading Gallifrey for all of his lifetimes, but instead want to be immortal and President Eternal. He plans to use the Doctors to clear the path and traps, leaving the way open for him to claim the prize. When the Fifth Doctor refuses to help, Borusa uses the power of the Coronet of Rassilon to compel his cooperation.

Politicians, right?

The Third Doctor reverses the polarity of the neutron flow on the control console, and with the forcefields down around the Tomb of Rassilon, the TARDIS engages autopilot and moves to the tomb with Susan and Turlough. The movement is just in time as the Cybermen detonate a bomb to destroy the TARDIS, but they miss. Soon, the Fifth Doctor and Borusa arrive via transmat to claim the prize. The first three Doctors combine their psionic powers to break the telepathic hold, and as the Fifth Doctor is freed, the voice of Rassilon issues a challenge to Borusa. The First Doctor convinces Rassilon to surrender the ring to Borusa, and the president’s desire is granted: The faces that line the plinth come to life, for they are those who have previously sought immortality, and Borusa becomes one of them.

Rassilon offers immortality to the Doctors, but they decline in exchange for the chance to go back to their respective timestreams. The Fourth Doctor is restored to Shada, and the Master is restored with the promise that his sins will find their punishment in due time. As the Doctors says their farewells, the First Doctor (smugly) explains that he convinced Rassilon to give Borusa the ring because he finally understood the riddle: It was a trap set by Rassilon to weed out the more selfish of their people because they were a danger to civilization. Each set of Doctors and companions boards the TARDIS in order and the TARDIS splits through a form of temporal fission to return them their proper homes.

Chancellor Flavia arrives and tells the Doctor that he is due back to the Citadel. Since Borusa has been disqualified, the High Council has decided that the Doctor shall resume his duties as Lord President. He orders Flavia back to the Citadel, telling her that she has full authority until he arrives in his TARDIS. After ushering Tegan and Turlough aboard, he sets a course and dematerializes, stunning his companions by announcing his intention to not take office.

“You mean you’re deliberately choosing to go on the run from your own people, in a rackety old TARDIS?”

“Why not? After all, that’s how it all started.”


All in all, this was a wonderful story to celebrate a significant milestone. I was curious, so I looked at scripted entertainment television across the United States and United Kingdom and came up with a short list of shows to reach twenty years by 1983: Coronation Street, Guiding Light, As the World Turns, General Hospital, The Wonderful World of Disney, Romper Room, Search for Tomorrow, Captain Kangaroo, and The Edge of Night. There were also a couple of semi-scripted children’s shows like Blue Peter and The Sooty Show, but the fact remains that, in a world dominated by soap opera longevity, Doctor Who was the only science-fiction drama reach that mark.

Yeah, they deserved this party.

I was very pleased to see so many of the companions back in action, even if their cameos were short. While I would have loved to see Liz, Zoe, and Jamie get into the mix, the saying holds true that too many cooks spoil the broth. It was clever, however, to subvert nostalgia with the canonical circumstances of The War Games. I appreciate that level of attention to detail.

I did miss having Tom Baker in the mix, which would have drawn The Five Doctors down to four if it hadn’t been for Richard Hurndall. From what I gather in fan circles, his involvement as the First Doctor is sometimes disparaged, but I thought he did a fantastic job. Mixing his performance with the archival footage at the beginning (effectively bringing us two First Doctors) was a nice touch and a beautiful tribute to the beginnings of this franchise.

Finally, that wonderful musical mix over the end credits to tie the eras together: C’est fantastique.


Rating: 5/5 – “Fantastic!”


UP NEXT – Twentieth Series Summary


The Timestamps Project is an adventure through the televised universe of Doctor Who, story by story, from the beginning of the franchise. For more reviews like this one, please visit the project’s page at Creative Criticality.
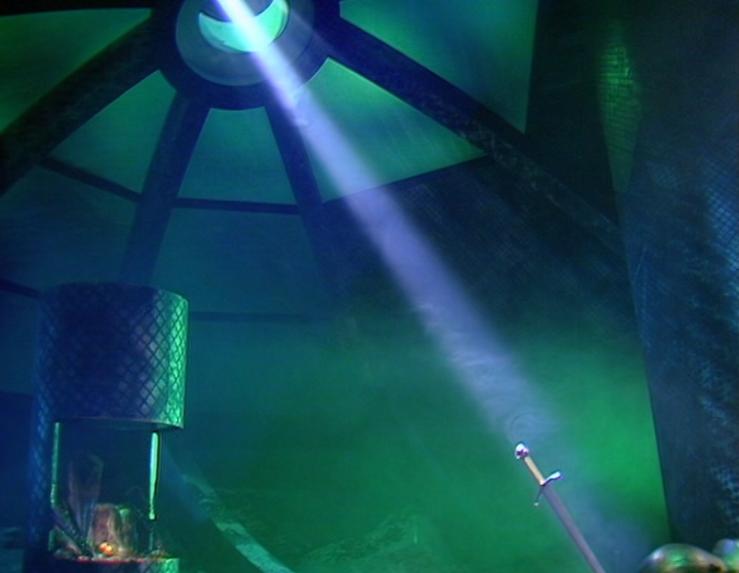
Timestamp #126: Mawdryn Undead

Doctor Who: Mawdryn Undead
The Black Guardian Trilogy, Part I

(4 episodes, s20e09-e12, 1983)


The Key to Time comes home to roost.

A schoolboy named Turlough steals (and totals) the Brigadier’s car, offering quite the introduction to a new companion. He has an out of body experience after the crash, though both he and his classmate Ibbotson will be fine. The Brig, on the other hand, is incensed. After all, it was a rare 1929 Humber 16/50 Open Tourer (Imperial Model).

The out of body experience is courtesy of the Black Guardian, who seeks revenge against the Doctor after their last encounter. As Turlough recovers at the school, he discovers a crystal that links him to the Black Guardian, and we learn that he is not native to Earth. Under the Guardian’s influence, he leaves the infirmary (with a reluctant Ibbotson) and boards a transmat capsule.

Speaking of, our heroes are moving through time and space. Tegan is recovering from her experience with the Mara, Nyssa has a new wardrobe, and the TARDIS gets knocked off course. They nearly collide with a nearby spacecraft before materializing inside it, and the travelers find that the ship is abandoned. In fact, Tegan makes a Mary Celeste quip, continuing a Doctor Who tradition. The crew sought refuge on Earth as the ship swung through an elliptical flight path, which it does every six years. As the travelers attempt to leave – the TARDIS is trapped there by the plot – Turlough arrives on the ship and sneaks into the TARDIS. Everyone eventually converges on the phone box, and the Doctor takes Turlough back to Earth to disable the trap, leaving Tegan and Nyssa behind. As the Doctor works on releasing the transmat beam, Turlough nearly kills him with a rock, but the plot is foiled as the transmat device inadvertently explodes. Turlough is knocked back and the TARDIS materializes and vanishes.

Turlough and the Doctor are intercepted by the Brigadier, who doesn’t recognize the Doctor at all. The Doctor chalks up the memory lapse to his regeneration, but the Brigadier’s memory is still a blank. Meanwhile, Nyssa and Tegan explore the area and find a transmat capsule. Inside, they find a severely burned version of the Doctor who asks to be taken to the TARDIS.

The Doctor accompanies the Brigadier to the officer’s quarters. They discuss prior adventures, all of which seems to jog the Brigadier’s memory as he flashes back to the Second Doctor and a Cyberman, the Third Doctor’s awakening and regeneration, his brief encounter with the First Doctor, the Yeti,  an Axon, a Dalek, and his first and last encounters with the Fourth Doctor. Sadly, he’s also suffering from a nervous breakdown. As they share tea, the Doctor mentions Tegan and the Brigadier remembers a Tegan from several years ago. Turns out, they are the same person.

Putting the pieces together, we find that Nyssa, Tegan, and the TARDIS are in 1977, but the Doctor is trapped in 1983. Tegan elicits the help of the 1977 Brigadier while the burned Doctor supposedly regenerates into a new form called Mawdryn (cloaked in the Fourth Doctor’s maroon overcoat) and orders Nyssa to take the TARDIS to the abandoned starship. When the 1977 Brigadier arrives, they group finds a scream-worthy Mawdryn with his brain exposed. Mawdryn continues the ruse of a failed regeneration and eventually convinces the companions to return to the starship.

In 1983, the Doctor realizes that the events of 1977 may be the reason for the Brigadier’s breakdown. After finding the Guardian’s crystal, the Doctor also determines that they must intercept Turlough before the boy determines how to operate the transmat capsule. Together, they fix the homing beam, but it soon self-destructs. Luckily, the Brigadier has a homing device that was a gift from Tegan, and the Doctor uses it to take all of them to the starship via the transmat capsule. There’s a minor caveat: If Brig-83 and Brig-77 were to meet each other, the results would be catastrophic. As Tegan would say, ZAP!

The Doctor and Brig-83 find a room with stolen regeneration technology, and the Doctor presumes that Mawdryn (whom he refers to as the “creature”) wanted to regenerate, which poses a whole bushel of questions about using Time Lord technology to regenerate non-Gallifreyans. Meanwhile, Turlough works his way to the TARDIS and discovers a room of beings in the same state as Mawdryn.

Through a confusing series of events, Brig-83 encounters Mawdryn and hooks him up to the regeneration machine, Brig-77 encounters the rest of Mawdryn’s people, the Doctor reunites with Tegan and Nyssa, and Turlough returns to the TARDIS. The Doctor and Nyssa meet up with Brig-83 and get the story from Mawdryn, discovering that they are mutants who tried to use regeneration technology but instead ended up immortal and in continuous agony. Tegan arrives just before the rest of Mawdryn’s people, and the mutants beg for the secret to end their pain. Unfortunately, if the Doctor gives them that energy, he will expend all of his remaining regenerations and will die. The Doctor refuses, and the mutants scheme.

The Black Guardian realizes that the Brigadier’s presences may jeopardize his plans, so he orders Turlough to detain one of them. Soon enough, Brig-77 is locked away and Turlough returns to the TARDIS. The Doctor orders Turlough to take Brig-77 to the transmat capsule as Brig-83 returns to Earth on the TARDIS. The Doctor is forced to return to the starship, however, as the mutants have infected Nyssa and Tegan with their malady, which is exacerbated by time travel. The Doctor attempts to reverse the polarity of the neutron flow to escape the warp ellipse that confines the starship, but the attempt turns them into (rather adorable) children. The Doctor reverses it again and returns to the starship just as Brig-77 tries to leave (unsuccessfully) via transmat.

The Doctor has no choice but to sacrifice himself to end the loop. Everyone converges on the regeneration laboratory and Brig-83 begins the procedure. It is interrupted by Brig-77 who, by touching Brig-83, releases a large temporal energy wave. Nyssa and Tegan are cured, the Doctor is saved, and Mawdryn’s people are freed of their undead existence. The travelers return to the TARDIS and both Brigadiers are returned to their proper times, although Brig-77 won’t remember anything until he encounters the Doctor in 1983. The abandoned starship self-destructs, ending the loop for good.

And then there’s Turlough, who has stowed away on the TARDIS. He asks to join the Doctor’s crew, and the trilogy continues.

I admired how heroic the Doctor was. It added a certain degree of power to the story that we haven’t seen in some time. I also loved how the companions were able to carry a substantial part of the story. It was also nice to see the Brigadier again, despite the obvious internal continuity issues (First, Tegan didn’t give him the tracker. Second, there’s really no reason why he shouldn’t have been able to rationalize this adventure with everything he knows about the Doctor.) and the entire UNIT dating controversy. I know that I’ve been hard on him in the past, but he’s softened on the Doctor over time.

Overall, this was an entertaining and well-written story that handled split time periods quite nicely.


Rating: 4/5 – “Would you care for a jelly baby?”


UP NEXT – Doctor Who: Terminus


The Timestamps Project is an adventure through the televised universe of Doctor Who, story by story, from the beginning of the franchise. For more reviews like this one, please visit the project’s page at Creative Criticality.

Timestamp #80: Terror of the Zygons

Doctor Who: Terror of the Zygons
(4 episodes, s13e01-e04, 1975)

Timestamp 080 Terror of the Zygons


A peaceful looking oil rig collapses into the ocean after a high-pitched chirping echoes throughout the structure. Welcome to Season 13 and the debut of the Zygons.

After receiving the emergency call from the Brigadier, the Doctor and his companions are back on Earth and walking through the countryside. The Doctor has embraced the Scottish theme of this story with a (unnamed) Tartan scarf and matching Tam O’Shanter hat, while his companions have adopted the typical hat and scarf. They hitch a ride to town with the Duke of Forgill, a local landowner who is upset about Hibernian Oil’s employees trespassing on his land, and meet up with the Brigadier and his Clan Stewart kilt.

You know, I’ve kind of missed him.

The Doctor is upset that he has been called back for a simple oil problem, hardly an emergency in his book, but agrees to help nonetheless. Harry goes to examine the injured rig crew in sickbay, Sarah Jane goes to interview the locals, and the Doctor joins the Brigadier to investigate the oil company. As Sarah Jane interviews Angus, the inn’s landlord, a Zygon eavesdrops on their conversation through an unknown bug. Angus thinks the Tulloch Moor is haunted, but Sarah Jane is not convinced.

While this is their first appearance in the franchise, I have seen the Zygons before in the new series. They really haven’t changed much over the years.

A survivor named Munro stumbles out of the ocean and Harry finds him. Caber, the Duke’s right-hand man, inexplicably shoots Munro and grazes Harry. The Doctor and Sarah Jane visit Harry in sickbay wher the Brigadier informs them of another oil rig collapse — the Zygons summoned a creature from the deep to destroy it — and the Doctor accompanies him as Sarah Jane tends to Harry. The Doctor examines part of the rig’s wreckage and discovers the imprint of a giant tooth.

Sister Lamont, the nurse who is attending to Harry is creepy. At first I thought she was a Ratched, but instead she’s a Zygon who attacks both companions. When the Doctor (who was on the phone with Sarah Jane when the Zygon struck) arrives the hospital, they companions are missing. The Doctor finds Sarah Jane in a decompression chamber and is trapped inside when he attempts to rescue her. He hypnotizes Sarah Jane to slow her breathing, then places himself into a trance as well. Meanwhile, Harry is taken to the Zygon ship, which is deep under the ocean. They crashed on Earth centuries before and waited for rescue, but their world was destroyed. The creature, a cyborg called a Skarasen, is their weapon and means of survival. If it dies, they die.

The Brigadier and his team are knocked out with poison gas, and the Doctor and Sarah Jane are rescued by Warrant Officer Benton. The trance was something he learned from a Tibetan monk. They return to the inn and discover that the same nerve gas that affected the Brigadier’s team also incapacitated the entire village. The Doctor receives a signal device, which controls the Skarasen, and the Zygons are upset by the turn of events. The take Harry to the chamber to become the pattern for one of the Zygon invaders.

The Brigadier’s team recovers and discovers one of the UNIT patrol soldiers who was killed by the creature. The Doctor goes to investigate and leaves Sarah Jane at the inn, much to the Zygon’s delight. Harry’s doppelgänger arrives, steals the device, and runs, leading Sarah Jane and some troops on a chase. She finds him in a barn, and he attacks her, but he falls on his pitchfork and reverts into Zygon form before dying. The Zygons disperse the corpse before Sarah Jane brings UNIT to see it.

Sarah Jane deduces that the Zygons are spying on UNIT, and the Zygons send the Skarasen to destroy them. The Doctor lures the beast away in a truck as the Brigadier tracks the signal’s origin. The Skarasen chases the Doctor, who has to run after the truck runs out of fuel and the tracker attaches itself to his hand. The Brigadier traces the signal to Loch Ness.

Ah, of course: Nessie is an alien cyborg.

Harry bursts into the control room and starts mashing buttons on the console, which conveniently results in the tracker falling off the Doctor’s hand. In a terrible special effects sequence, the Skarasen crushes the tracker, which stops the signal and makes the Zygons assume that the Doctor is dead. Meanwhile, Benton is searching the inn for bugs, and we figure out that the Duke’s prized deer head trophy is the transmitter.

After finding out where the signal came from, the Doctor asks Sarah Jane and the Brigadier to take him to the Duke’s castle. The Duke does not believe their tale, and he refuses to allow UNIT to use depth charges in the loch. Back at the inn, Angus discovers the deer head transmitter, and the nurse goes full Zygon on him and removes the eye. Benton and his team give chase into the woods, shooting at the Zygon as it flees, and report to the Brigadier that they have it cornered. The Doctor and the Brigadier leave Sarah Jane to investigate the Duke’s library as they rendezvous with Benton. The Zygon resumes its form as Sister Lamont, knocks out a UNIT soldier, and escapes. The Doctor discovers the missing eye and concludes that the Duke is a Zygon agent.

At the Duke’s castle, Sarah Jane discovers a hidden passageway behind the bookshelf and follows it straight to the Zygon ship. Shortly afterward, the Duke finds out about her intrusion. He and Caber help the injured Sister Lamont doppelgänger back to the ship, and the Duke orders Caber to find and destroy Sarah Jane.

Sarah Jane rescues Harry and they return to the Doctor and the Brigadier. The Doctor heads to the ship but is intercepted by Zygons and held hostage. The Zygons tell the companions that the oil rigs were only the prelude to the “big event”. UNIT begins shelling the loch and the Zygon ship surfaces and flies away. The Brigadier prepares to follow, but the companions suggest searching the castle for clues. Sarah Jane discovers that the Duke is the President of the Scottish Energy Commission, but Harry dismisses the information and they join the Brigadier for a trip back to London.

The Zygon ship lands at a disused quarry, but UNIT cannot track it due to a jamming signal. Broton, the Zygon leader and Duke doppelgänger, tells the Doctor that a refugee fleet is on its way to Earth, but in the intervening centuries, the planet must be rebuilt to suit them. After Broton leaves, the Doctor rigs some of the technology in his cell, which electrocutes him but broadcasts a tracking signal to UNIT. The Zygons leave the Doctor for dead, but he comes to, infiltrates the body print center, and frees the humans being held there. He then blows up the ship using the self-destruct mechanism, which is a bit bloodthirsty, but he did try negotiating first.

Broton, having left moments before, goes to place a tracker on the target so Skarasen can destroy it. The Brigadier and the companions figure out that the International Energy Conference is the target, and that the Broton can get in using the Duke’s credentials. They all reconvene there, and the Doctor confronts the Zygon. Sarah Jane summons the Brigadier, who shoots and kills Broton.

Hey, firearms finally worked!

The Doctor takes the tracker and rushes outside where he feeds it to the Skarasen. The creature returns to the river and swims back to Loch Ness, and thus we have the legend. The team returns to the TARDIS near the loch, and the Doctor offers them all a ride home, but only Sarah Jane joins him with one proviso: They are to return straight to London.

Yeah, right.

We finally say goodbye to Harry. I can’t say that I’ll miss him, but I can say that he’ll join the ranks of Steven Taylor as one of my least favorite companions.

As far as the story goes, it’s lackluster and all over the map. It’s an unfortunate case of style over substance: The Zygons and their ship were well done for the era, and the story plays on the prevalent oil-politics in the news, but it also heavily leans on Scottish stereotypes to drive the story, and I had a hard time getting around them. From the very first line haggis-laden line of the first episode, the story jumps from kilts to beards to bagpipes to second sight to the Loch Ness Monster, and it finishes on a joke about stingy Scotsmen.

Don’t get me wrong: It’s nice to visit Scotland again, but this doesn’t come close to the spirit of Jamie McCrimmon. It was a fun, but ultimately routine and forgettable romp.


Rating: 3/5 – “Reverse the polarity of the neutron flow.”


UP NEXT – Doctor Who: Planet of Evil


The Timestamps Project is an adventure through the televised universe of Doctor Who, story by story, from the beginning of the franchise. For more reviews like this one, please visit the project’s page at Creative Criticality.
 

Timestamp #75: Robot

Doctor Who: Robot
(4 episodes, s12e01-e04, 1974-75)

Timestamp 075 Robot


It’s never easy changing Doctors, but I think I’m going to like this one.

Things start out with another new title sequence, which is great, but I kind of miss the warp stars. The story itself kicks off with a delirious Doctor who mentions previous adventures as Lieutenant Harry Sullivan, UNIT’s staff physician, takes the Time Lord to the infirmary. Congratulations are also in order as Benton’s been promoted to Warrant Officer. That’s one big wetting-down party.

As the heroes get sorted out, a robot infiltrates a military facility. It kills a dog, so we know it’s bad, and steals top secret disintegrator gun plans. Back at UNIT, Sarah Jane asks the Brigadier for a pass to tour the Think Tank research facility, and as they leave the lab, the Doctor sneaks in, finds his TARDIS key in his predecessor’s shoe, and almost makes it into the TARDIS before Doc Sullivan catches him.

At this point, we get our first really good look at the Fourth Doctor. His eyes are wild and fun, and so it his youth. He reminds me so much of Christopher Eccleston’s Ninth Doctor.

The Doctor tricks Sullivan and ties him up before trying to leave in the TARDIS, but Sarah Jane stops him and discusses the need for him to investigate the mysterious theft. The Doctor, still unstable, almost shrugs off this duty, but he stops as he remembers the Brigadier and Sarah Jane. The Doctor tries various wardrobe options to match his new persona – including a Viking ensemble, a royal outfit, and a clown suit – before settling on his trademark scarf, coat, and hat. After that, the game is afoot.

Sarah Jane arrives at Think Tank for her tour, and the franchise continues to be progressive with a female director, Hilda Winters, at the facility. Sarah Jane doesn’t expect it, and mistakes assistant Arnold Jellicoe for the director. The Think Tank facility has a robotics division, but the only roboticist, J. P. Kettelwell, left in a very public spectacle. As Sarah Jane chases that lead, the Doctor, Sullivan, and the Brigadier set a trap at the next piece for the disintegrator gun. The robot avoids them by burrowing underneath and stealing the part.

Sarah Jane interviews the roboticist, but that lead is a dead end, so she sneaks back into Think Tank and discovers the robot in the lab. The facility’s director claims that the robot, Experimental Prototype Robot K1, is completely for show, and demonstrates that the robot cannot kill based on the prime directive that it can never harm humanity. The First Law of Robotics lives on, at least in a fashion. Sarah Jane is coerced by the director to keep her experience secret. Of course, the first thing she does is tell the Doctor and the Brigadier.

Winters and Jellicoe reset the robot again – hello, modified Zeroth Law! – and send it out after Cabinet Minister Joseph Chambers. The Brigadier decides to send Sullivan on a James Bond-style mission into Think Tank while the Doctor decides to interview Kettlewell. The robot breaks into Chambers’s home, kills him, and steals some documents. The Brigadier, the Doctor, and Sarah Jane discuss the incident and the Think Tank’s association with the Scientific Reform Society, a group that advocates societal rule by the scientific elite.

The robot visits Kettlewell in a disoriented state, explaining that his orders conflict with his prime directive and seeking help. Sarah Jane visits the Scientific Reform Society while the Doctor and the Brigadier investigate Think Tank. Director Winters claims that the robot has been dismantled, and the Doctor uses his scarf to sweep the floor for clues. They are escorted out just as Sullivan arrives disguised as a medical inspector. Kettlewell later calls the Doctor and informs him that the robot is there, but Winters and Jellicoe arrive first.

The dressing of the Scientific Reform Society was a bit on the nose with the Nazi-like uniforms, attitudes, and symbology. They are bad guys. Like, really bad guys.

The Doctor leaves a note for Sarah Jane and Benton, then takes Bessie to meet the professor. The Doctor encounters the robot, who attacks him under orders. The Doctor tries to escape, but the robot knocks him down. It is about to kill him when Sarah Jane arrives and intervenes. K1 recognizes her and enters its logic loop once again, but UNIT arrives and opens fire. It flees Kettlewell’s lab under UNIT assault, and the professor is found tied up in a storage locker.

Sarah Jane tends to Kettlewell, and he tells her of the robot’s construction. It is made from a living metal, but fear not, because Kettlewell has also discovered a virus that can destroy the metal. Kettlewell mentions that he is a member of the Scientific Reform Society, but that he only visited once. Together, they make a plan to sneak Sarah Jane inside.

We also find that a stunning plot convenience – the combined nations of Russia, China, and America have entrusted the locations and launch codes for their nuclear arsenals to Great Britain – is now the key to the entire conflict. The robot stole that information from Chambers, and now Winters and Jellicoe likely have it.

At the SRS meeting, Winters introduces K1 and Kettlewell as allies, which shocks Sarah Jane. Even more shocking is their betrayal, which the Doctor disrupts after incapacitating the guards with his antics and scarf. Kettlewell’s goals are simple: With the Society’s help, he can finally make humanity to stop ruining the environment.

Wait. That’s it? Okay.

Winters orders the execution of the Doctor and Sarah Jane, but the Brigadier and UNIT arrive in explosive fashion. Winters, Jellicoe, and Kettlewell escape with the robot and Sarah Jane, and the antagonists uncover Sullivan when he calls the Brigadier. The entire Think Tank is moved to an underground atomic bunker. UNIT tries to storm the site, but Winters deflects them with the automated defense system. She demands the Brigadier’s surrender within 30 minutes, otherwise she will destroy the world in a nuclear holocaust. Having none of it, the Brigadier sends Benton to destroy the machine gun emplacements, and the Doctor uses his sonic screwdriver to detonate the landmines and open the bunker door. Director Winters arms K1 with the disintegrator gun and sends it out to deal with UNIT, where it kills one soldier and destroys a (toy) tank. That effects cheat makes sense since they spent so much on the visuals and new titles.

The action sequences were nice, but the Doctor’s youthful charm and comedic antics were the highlight. They’re kind of refreshing after the seriousness of Pertwee’s Doctor.

Director Winters tasks Kettlewell with unlocking the launch codes and linking the missiles to a worldwide network. She starts the countdown to launch, but Kettlewell stops it and escapes with Sarah Jane and Sullivan. Sarah Jane tries to reason with the robot, and it almost works, but the programming forces it to fire on Kettlewell, and murdering its creator sends it into a logical shutdown.

UNIT invades the bunker, but Winters has already transmitted the launch commands. The director runs while the Doctor reprograms the computer and stops the countdown. Sarah Jane wanders off and is taken by the robot, who is trying to reason out its logical conflict and decides to destroy humanity per Kettlewell’s desire. On a positive note, it chooses to save Sarah Jane.

The Brigadier wishes that he could meet an alien threat that wasn’t immune to bullets – Thank you, Brig! – and Benton tells the team about the living metal and the virus. The Doctor and Sullivan head to Kettlewell’s lab to find the virus as K1 locks the bunker and restarts the countdown. The countdown is thwarted by the fail-safes for each superpower’s warheads, so K1 takes Sarah Jane to the surface. The Brigadier shoots K1 with the disintegrator, but the plan backfires as K1 grows to immense size.

Note: Insert shark to jump here. The Fourth Doctor can borrow the Ninth Doctor’s leather coat.

K1 King Kongs Sarah Jane to a rooftop for her safety, then engages the UNIT troops in a terrible special effects spectacular. The Doctor and Sullivan arrive with the virus, and drive Bessie to K1’s feet and deploy the virus. The virus shrinks K1, then dissolves it completely.

Back in the lab, Sarah Jane is upset over K1’s destruction. The Doctor offers her a jelly baby to snap her out of her reverie, and then offers to take her away in the TARDIS.

I love his quote here: “There’s no point in being grown-up if you can’t be childish sometimes.”

Doctor Sullivan arrives just as they were about to leave, and he invites Sullivan along. The “bigger on the inside moment” is priceless as the Doctor is off once again.

With the story and the acting alone, this serial was scoring as a high 4 until the entire super robot fight. Even after that, it’s still good. Baker is delightful as the Doctor, and his companions have great chemistry. I settled on a 4 before adding in the regeneration handicap.


Rating: 5/5 – “Fantastic!”


UP NEXT – Doctor Who: The Ark in Space


The Timestamps Project is an adventure through the televised universe of Doctor Who, story by story, from the beginning of the franchise. For more reviews like this one, please visit the project’s page at Creative Criticality.


Timestamp #74: Planet of the Spiders

Doctor Who: Planet of the Spiders
(6 episodes, s11e21-e26, 1974)

Timestamp 074 Planet of the Spiders


I don’t like spiders. I’ll try not to let that color my commentary.

Mike Yates, who we haven’t seen since his betrayal of UNIT and the Doctor, is recuperating at a Buddhist meditation center led by a man named K’anpo and his assistant, Cho Je. He finds a secret group in the basement that may be up to no good, so he calls Sarah Jane and they investigate matters. On the way back to the center, Sarah Jane is convinced of the fascinating tale when they get run off the road by an imaginary tractor. The leader of the secret group, Mr. Lupton, meets the cinematic standard of a villain since he physically abuses and bullies Tom, a man with a mental disability.

The Doctor is at a comedy show of some sort with the Brigadier. He’s there to see a psychic, Professor Herbert Clegg, who he invites to UNIT. Clegg is a very powerful clairvoyant, and he submits to some experiments to determine his full strength. One, for example, summons experiences from the sonic screwdriver and displays them on a monitor. During this evaluation, a package arrives from Jo Grant containing the crystal from Metebilis III, which is an odd way to re-gift a wedding present. Professor Clegg has a violent psychic reaction to the crystal, resulting in a fatal fear-induced heart attack. Simultaneously, Lupton’s group summons an intelligent and powerful spider from another dimension, and that spider merges with Lupton’s body. Sarah Jane and Yates witness this event, and she returns to UNIT and relays the tale to the Doctor.

The Doctor gazes into the crystal, sees the hermit who lived behind his childhood home, and relays the story to the Brigadier. Meanwhile, Lupton is driven by the spider to seek the crystal at UNIT HQ. He forces his way in and steals the crystal, which prompts an extensive chase. Lupton steals the Whomobile, so Sgt. Benton, Sarah Jane, and the Brigadier follow in Bessie, while the Doctor provides air support in a small, one-man helicopter. After the whole group breaks some local speed laws, a police officer joins the chase in a moment of levity. After they all stop at an airport, Lupton steals the helicopter, and the Doctor and Sarah Jane continue pursuit in the Whomobile, which (conveniently) can now fly. The ground chase gives way to a water chase involving a hovercraft and a speedboat, which results in a several rather obvious reveals of the Jon Pertwee’s stunt double. When the Doctor finally catches up to the speedboat, Lupton has vanished.

Take a moment and catch your breath.

Lupton apparates back to the retreat and is seen by Tommy, who only has eyes for the crystal and covets it for his collection of “pretties.” As the Doctor and Sarah Jane track Lupton back to the retreat, the Lupton-Spider calls home to the spider community on Metebilis III and conspires to take over Earth. The spider attempts to coerce Lupton through telepathic pain, but Lupton levels up and reverses the effect on the spider. Meanwhile, Tommy steals the crystal and hides it in his cupboard under the stairs.

I found the fact that he lives under the stairs to be quite interesting. It’s part of the Madwoman in the Attic trope, where the socially undesirable member of the house is locked away from public view to save face. In some cases, this person ends up being the hero of the story of a fulcrum to pivot the plot and enable the hero to save the day. Three of my favorite examples are Boo Radley in To Kill a Mockingbird, Scorpius in Farscape, and Harry Potter in the franchise of the same name.

Tommy takes Sarah Jane to look at the crystal, but Sarah Jane overhears Lupton and follows him to the basement. She asks Tommy to relay her plans to Yates and watches Lupton apparate to Metebilis III. She inadvertently follows him and gets captured by a group of humans who are subjects to the queen spider and her society of Eight Legs. The queen just happens to visit the village and Sarah Jane is discovered. The Doctor gives chase in the TARDIS and arrives just as the queen discovers Sarah Jane. The Doctor gets into a fight with the queen’s human guards, and is eventually incapacitated and left for dead as the queen and her retinue depart. During the fracas, Sarah Jane hides in the crowd.

Back on Earth, Tommy gets into an altercation with Lupton’s comrades. He returns to his cupboard and gazes into the crystal, which heals his brain. On Metebilis III, Lupton realizes that he is a only a cog in the overall Eight Leg machine designed to overthrow the queen. Sarah Jane retrieves a machine from the TARDIS to help heal the Doctor, but she is captured by the Eight Legs. One of the indentured humans uses the machine to help the Doctor as Sarah Jane learns the history of Metebilis III from a fellow captive named Sabor. The humans are descendants of a crashed spaceship, and the Eight Legs are spiders that were on the ship and were mutated by the crystals.

The Doctor investigates different types of stones around the human village and finds one that negates the energy attacks of the Eight Legs followers. He infiltrates the spider fortress and is captured, but escapes using techniques learned from Harry Houdini. As the Doctor makes his way to the lair of the Great One, the supreme spider, the queen takes Sarah Jane and confides in her that the queen wants peace with humanity. Sarah Jane agrees to get the crystal if the humans are all released.

The Doctor reaches the lair of the Great One, but she warns him not to go any further due to intense radiation. She wants the crystal, the last perfect crystal of power, but the Doctor doesn’t yield. The Great One telepathically forces the Doctor to march about like a tin soldier (to music very reminiscent of the march of the Cybermen), before releasing him so he can retrieve the crystal. He escapes with Sarah Jane, who has apparently learned how to apparate from the queen, and they return to Earth.

Lupton’s followers open the gateway to the spiders, who transport to Earth. The spiders attack Cho Je and Yate, and then possess the followers. They then attack the Doctor and Sarah Jane, who are saved by Tommy before being taken to K’anpo. During their discussion, K’anpo is very impressed with the Doctor’s knowledge of Tibetan customs, and the Doctor feels that K’anpo is familiar to him.

In the interim, the spiders track the crystal to Tommy, and they fire on him with their Force lightning energy beams. At this point, it’s painfully obvious how much padding this serial has. The recaps in each episode are pretty long, but the last one is the proverbial straw that breaks the camel’s back with significant re-editing to reveal things that would have spoiled the cliffhanger. I’m sure it was different back in 1974 when the break between episodes was a whole week, but when they’re watched back-to-back, the extensive recaps become painful. Regardless, this whole serial could be cut down into three or four episodes instead of six.

Anyway, the spiders track the crystal to Tommy because Tommy delivered it to K’anpo. At this point, we find out that Sarah Jane is under the control of the queen, who has tricked her to retrieve the crystal. K’anpo and the Doctor free her with the crystal, and the queen dies as she apparates back to Metebilis III. In a twist, K’anpo is revealed as the hermit from the Doctor’s childhood. He is a Time Lord as well, but chose not to follow the path of others like the Doctor, having regenerated and left Gallifrey to live in Tibet. Cho Je is merely a projection of K’anpo’s mind.

Here we are with some important mythology points: We learn the name for regeneration, as well as getting another reference to the Doctor stealing the TARDIS and running from Gallifrey.

The Doctor communes with K’anpo and realizes that he must take the crystal to the Great One. His greed for knowledge and his theft of the crystal set all of this in motion, and only he can stop it by facing his fears.

Outside, Tommy is resisting the spider lightning, so Lupton’s followers channel power from the spider council on Metebilis III and use it to attack Tommy. He resists the first blast, and Yates dives in to take the second. The followers burst into K’anpo’s chambers just as the hermit tells the Doctor how to apparate. The followers shoot K’anpo before running for the basement, but the Doctor is too quick for them. He returns to Metebilis III, but is betrayed by the villagers who are under the influence of the spider council. The Doctor easily convinces the council that he will return the crystal to the Great One alone, and they allow him to leave. Afterward, the Eight Legs kill Lupton for his insolence.

Back on Earth, Yates and Tommy have (conveniently) survived, the former being protected by his compassion, and the latter by his innocence. Given that the same blasts force K’anpo to regenerate into Cho Je, I think that Yates and Tommy should have died. It certainly would have given Yates a bit of redemption after his betrayal.

The Doctor enters the lair of the Great One, who desires the perfect crystal to complete a telepathic weapon that will saturate the universe with her mind. She takes the crystal and puts it in place, but the device overloads and destroys her and the Eight Legs civilization. The Doctor escapes, but is weakened from the large dose of radiation he absorbed.

Three weeks later, the Doctor is still missing. As the Brigadier and Sarah Jane discuss the Doctor’s absence, the TARDIS materializes. The Doctor falls out of the TARDIS, just as he did when he first arrived, after being lost in the time vortex. He has received a fatal dose of radiation and is dying. He says his goodbyes to Sarah Jane, and then regenerates.

Tucked into his farewells is the phrase “Where there’s life, there is hope,” which comes from the Roman play Heauton Timorumenos, but also has roots all over mythology. It’s a universal theme, and very relevant to the character of the Doctor, a being who brings hope everywhere he goes spanning lifetime after lifetime.

Overall, I had a hard time with this story. If it were presented on its own, I’d score it as a 2. It’s far too spread out and padded, especially in the recaps, but it gains some salvation in the ties into the franchise’s mythology, especially for reaching into our hero’s childhood once again. Adding a point for those ties and another for the regeneration handicap, and this one comes to a total of 4, but I still think that it’s a pretty bad way for the Third Doctor to end his era.


Rating: 4/5 – “Would you care for a jelly baby?”


UP NEXT – Eleventh Series and Third Doctor Summary


The Timestamps Project is an adventure through the televised universe of Doctor Who, story by story, from the beginning of the franchise. For more reviews like this one, please visit the project’s page at Creative Criticality.


Timestamp #71: Invasion of the Dinosaurs

Doctor Who: Invasion of the Dinosaurs
(6 episodes, s11e05-e10, 1974)

Timestamp 071 Invasion of the Dinosaurs


It’s an invasion! But you don’t know what’s invading until the second episode! Or until you read the title of this Timestamp!

Sorry for the spoilers.

Actually, it’s fairly clever to hide the plot device by changing the name of the first episode. I mean, it’s pretty fun to figure out why London is empty – a feat that had to be fun to orchestrate and film – except for UNIT, the regular army (led by General Finch), and looters avoiding the martial law imposed on the evacuated metropolis. It’s even more clever to make this the “real” timeline instead of an alternate or parallel timeline from the actual events. The history books never really explain the great British dinosaur invasion of Nineteen-Seventy-something-something.

The Doctor and Sarah Jane explore the area, get robbed, try calling the police, and get distracted as their robber’s car gets into an accident. That seemed like a particularly grisly scene for this show. As the pair keep looking about, they encounter more looters and a pterodactyl before being apprehended by the army.  In a humorous bit, they are designated as Prisoners 177781 and 177782 as they keep disrupting the booking process. Luckily, once they are on the official books, the Brigadier and Sgt Benton discover their status and send a dispatch to retrieve them.

Did I mention pterodactyl? Yeah, the city is being evacuated because of dinosaurs.

The travelers are sentenced to a detention camp, but before they depart, the Doctor stages a fight with a fellow prisoner, then subdues the guard before making a run for it. The duo are soon captured again and loaded into a truck for transfer, but the truck gets ambushed by a tyrannosaurus rex.

Unfortunately, the tyrannosaur’s appearance highlights just how terrible the dinosaur effects are.

The travelers escape and hide in a garage where they meet a medieval peasant – not a dinosaur – who believes that the Doctor is a wizard. He attacks the Doctor with a knife but then disappears back to his own time. Soldiers soon arrive, accompanied by the Brigadier, and the group returns to the temporary UNIT HQ where the Brigadier explains the situation. The Doctor theorizes that the dinosaurs are moving back and forth through time, but he doesn’t know who is controlling the process. The general, accompanied by Captain Yates fresh off leave after the adventure with the mine maggots, doesn’t believe any of it.

The Doctor and Brigadier go out to a dinosaur sighting where they find a stegosaurus. The dinosaur fades away into a time eddy, and the localized distortion makes time run backwards for the witnesses, which eliminates the memory of the transition. The Doctor works on a gadget to knock out a dinosaur and track the temporal distortions, which are the result of Professor Whitaker and fellow scientist Butler’s experiments.  Unfortunately, Yates is working with the scientists, and proposes that the Doctor could be helpful to them. Whitaker declines in order to protect the operation and directs Yates to break the dinosaur stunner. Yates accompanies the Doctor and Brigadier to a dinosaur sighting, and sabotages the stunner. A time eddy takes the apatosaurus away, but a tyrannosaur appears behind them.

In trying to escape the threat, the Doctor falls, and Yates rushes to his rescue, fixing the stunner and taking down the dinosaur. Yates berates the scientists for trying to kill the Doctor, but agrees to sabotage the Doctor’s efforts to track Whitaker. Sarah Jane, who is still a reporter, has also been working on finding him for months.

Yates continues to hinder the Doctor by breaking the tracker. Sarah Jane gets permission to photograph the T. rex, and it wakes up and chases her because General Finch has loosened its chains. The Doctor rescues her, and Sarah Jane begins her own investigation as the Doctor begins work on a smaller, portable tracking device. Sarah Jane’s investigation leads her to an ecologist Member of Parliament, Sir Charles Grover, who is the acting Minister with Special Responsibilities in London. When she presses her points, he drugs her. She wakes up on a spaceship three months away from Earth.

Wait, what? Where did that come from?

The spaceship is filled with minor celebrities and is bound for New Earth, a pure, younger version of the current Earth. There are over 200 people on the ship in stasis, and there are seven ships. I’m not sure that 1400 people are enough for a diverse gene pool, but the concept is there I suppose. Sarah Jane questions things, so the others send to the re-education program so she can be trained to think like them.

The Doctor drives his new Whomobile – Where is Bessie and what is this shark-jumper? – and tracks the temporal distortions to an abandoned Underground station. He discovers a hidden elevator and takes it down to the lab and heads toward the reactor. The scientists steer him back to the elevator by closing a series of doors (which make the sets shimmy), and then they set a pterodactyl on him. He fights it off and escapes.

The Doctor brings the Brigadier back to the station, but the elevator has been disabled. The two of them confer with MP Grover who tries to deflect them, and Operation Golden Age, a plan to establish a fresh start for humanity by rolling back time across the entire planet, now conspires to discredit the Doctor.  Whitaker comes out of hiding, pretends to be an innocent bystander in the affair, and asks the Doctor to meet him in the hangar. The scientists drop a stegosaurus in the hangar when the Doctor arrives, and Finch brings in the Brigadier to reveal the “true” perpetrator. The Brigadier places the Doctor under arrest, which helps the Doctor to uncover the UNIT mole when Yates will not help him escape. Sgt Benton, on the other hand, allows the Doctor to run so he can unravel the mystery.

Sarah Jane attempts to convince Mark, a fellow captive on the spaceship, that the whole thing is a elaborate ruse. He watches her depressurize and step out of the airlock without being harmed. As the Doctor evades capture by an army squad, Sarah Jane is captured by Finch after trusting him with what she’s discovered. MP Grover explains the plan to her, and then starts rolling back pockets of time. Coincidentally, this leaves the Doctor surrounded by dinosaurs. The dinosaurs fight each other in a bloodless battle (which is strange since the car accident victim in the first episode was a bloody mess), and the Doctor runs only to be apprehended by Finch and the Brigadier. The Brigadier asserts his authority to take custody of the Doctor, and they return to the temporary HQ where Yates holds everyone at gunpoint. He explains the plot to the Doctor, the Brigadier, and Benton, but is distracted by another soldier which allows Benton to disarm him.

Sarah Jane returns to the spaceship, convincing Mark that it’s all fake, and they set out to reveal it to everyone on board. They get locked away for disruptive behavior. Adam, the ship’s leader, calls MP Grover and explains the situation. Grover comes into the spaceship set in a spacesuit, and berates Sarah Jane in her cell. Adam overhears the discussion and frees Mark and Sarah Jane. Sarah Jane demonstrates that the airlock is not real, and the captives escape.

So, there’s only one ship. That’s 200 people. That’s definitely not enough for diverse gene pool.

Also, everyone we saw on the ship was white. Oops.

Anyway, the Doctor and the Brigadier infiltrate the underground lab. The Doctor goes in while the Brigadier calls for reinforcements, but Benton is held at gunpoint by Finch. Benton overpowers the general and dispatches the reinforcements. Everyone confronts Grover and the scientists, and Whitaker responds by throwing the switch. It freezes everyone except (conveniently) the Doctor, and he stops the process and reverses the polarity of the machine. Grover throws the switch again, but it sends Whitaker, Grover, and the machine back in time to their Golden Age, presumably as dino snacks.

The bad guys are put away, Yates is given the opportunity to resign quietly, and the Doctor convinces Sarah Jane to travel with him.

I loved the interaction between the Brigadier and the Doctor. We don’t see a lot of that, so it’s refreshing when it happens. I also loved how much of a hero Benton became with this story. Sarah Jane is a-maz-ing, and I’m so happy to see her character in these stories.

On the costume front, the Doctor’s green and brown outfit was a good break, but I really like this blue and gray wardrobe. He has a ruffled wardrobe for all seasons.

The story was good, but the effects and logistics sketchy at best. I settled on a 3.5, and, fortunately for this story, I round up.


Rating: 4/5 – “Would you care for a jelly baby?”


UP NEXT – Doctor Who: Death to the Daleks


The Timestamps Project is an adventure through the televised universe of Doctor Who, story by story, from the beginning of the franchise. For more reviews like this one, please visit the project’s page at Creative Criticality.