Timestamp #84: The Brain of Morbius

Doctor Who: The Brain of Morbius
(4 episodes, s13e17-e20, 1976)

Timestamp 084 The Brain of Morbius


Doctor Who meets Frankenstein.

A creature crawls across a Star Trek like planet’s surface, being pursued by a man with a hook for his hand. The hook-handed murderer, a being named Condo, takes the creature’s head to his master, Menhendri Solon. Solon chastises Condo for bringing him an insect head, which will simply not do. He needs a humanoid head.

The TARDIS arrives on the same planet, and the Doctor is angry because the Time Lords dragged them off course. Sarah Jane explores the area and finds an entire field of crashed spaceships, and she decides to look around as the Doctor sulks. Sarah Jane screams as she finds the insect’s body, which is actually one of the Mutts, and the Doctor runs to her aid. The Doctor recognizes the neighborhood and realizes that they are within a couple billion miles of Gallifrey. They head toward a nearby castle as a red-robed woman watches.

The Sisterhood of Karn? I’ve seen them before in the 50th anniversary celebration and a bit later in the Twelfth Doctor’s run. The observer was Ohica, and she reports the new arrivals to High Priestess Maren. Maren suspects that the visitors are linked to the slow death of the Sacred Flame, the source of the Elixir of Life that maintains their immortality. The Elixir is only known to the Sisterhood and the High Council of the Time Lords, but as the supply runs low, they believe that the Time Lords are coming for it. Supposedly, they use it to ease cases of trauma after regeneration.

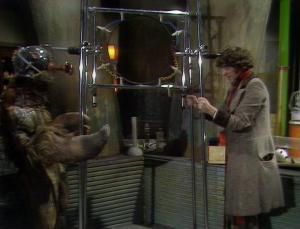
The Doctor and Sarah Jane arrive at the castle, and Solon is excited because he believes that the Doctor’s head is magnificent and superb. Creeeeeeeepy. The Doctor offhandedly remarks his previous heads, including the Third’s grey one (which Sarah Jane really liked). Solon entertains the travelers, and the Doctor investigates the man’s obsession with various heads.

Okay, look, this whole scene is really awkward. I mean, not just in the writing, but even in the acting, as if the players themselves wanted no part of it.

Condo brings wine and food for the guests, and the Doctor recognizes Solon as a famed neuroscientist who was rumored to join the cult of Morbius, a terrible renegade Time Lord. The Doctor connects all the dots as the drugs in the food and drink take effect on him. Condo takes the Doctor to the surgical area as Sarah Jane, who was faking anesthesia, makes her escape. As she explores the castle, she finds Solon’s Monster, a construct of various parts that is only missing a head.

The Sisters form a seeing circle and discover the TARDIS. They channel their power to teleport the TARDIS to Maren, and after she investigates it, her suspicions deepen that the Time Lords are indeed coming for the Elixir. The Sisters form another circle and teleport the Doctor to their location, inadvertently saving him from the operation. Solon hatches a plan to rescue the Doctor from the Sisters.

The Doctor awakens bound in ropes, and the Sisterhood demands that he confess to the plan. He obviously cannot, and discovers that Morbius was executed and disintegrated by the Time Lords for his crimes of rebellion against the Sisterhood and the alliance their two species share, but he determines that the renegade’s essence survived. Morbius revealed the secret of the Elixir to the cosmos, and they have been deliberately crashing passing starships to prevent anyone from stealing it. The Sisters prepare to burn the Doctor at the stake, and Solon and Condo burst in to save him.

The Sisters (Death! Death! Death! Death!) are pretty much like the Knights Who Say Ni (Ni! Ni! Ni! Ni!) at this point. I’m waiting them to demand that the Doctor bring them a shrubbery.

As Solon negotiates for the Doctor’s head, including offering Condo in exchange, Sarah Jane covertly cuts the Doctor free. The travelers run, but Maren blinds Sarah Jane with her power ring.

Condo angrily confronts Solon for his betrayal. The neuroscientist uses the always terrible “It was just a joke” excuse, but Condo is not swayed until Solon promises to replace the hook with a real arm. As Condo relents and leaves to find an extra arm, Solon sneaks away and consults with the disembodied voice of Morbius. He is interrupted as the travelers arrive and disclose Sarah Jane’s ailment. Solon invites them to the lab, determining that only the Elixir will restore her eyesight, and the Doctor resolves to retrieve it. Solon sends Condo to the Sisters with this knowledge, and Sarah Jane stumbles her way into the secret lab. There she discovers the voice of Morbius, which accuses her of being one of the Sisters. What she doesn’t know is that the voice comes from the renegade’s brain, enclosed in a jar.

<insert sigh here> Someone cracked open the Guide to Writing Horror for Science Fiction and started scribbling notes, didn’t they?

Carrying on…

Solon removes Sarah Jane and then endures a verbal whipping from the Time Lord in a jar. In true Evil MastermindTM fashion, he details his entire plan in a method that protagonist can overhear. Sarah Jane locks Solon in the room and stumbles out of the castle.

Maren distributes the Elixir of Life to the Sisters (from an obviously empty cup, which is one of my biggest pet peeves in film), but there’s only enough for five. The Doctor arrives, but is ambushed after receiving Solon’s note. He explains the situation, but Maren reveals that Solon lied and that the ring’s effect is temporary. Together, they deduce that Morbius could have survived execution, and the Doctor offers to help them if they help him. The Doctor investigates the flame, determines that some soot is choking the natural combustion, and frees it up with a firecracker. The Flame is restored, and they hatch a plan to stop Solon.

Let me get this straight. The Sisters are smart enough to competently negotiate with the Time Lords, recognize a TARDIS, and wield power rings, but they have no idea how their entire elixir production system works? I don’t quite buy it.

Condo finds Sarah Jane and returns her to Solon’s lab. Solon updates Morbius, but a slip of the tongue reveals the Doctor’s identity to the renegade, and Morbius is furious. He believes that the Time Lords have found him and will kill him, and pressures Solon to operate immediately with an artificial brain case instead of an organic head. Condor assists in preparation, but discovers his arm is attached to Solon’s Monster. He attacks Solon, and Solon shoots him. In the struggle, the brain jar is toppled. A frantic Solon presses a blind Sarah Jane into service and completes the operation, not knowing how badly the brain was damaged.

The Sisters arrive with a supposedly dead Doctor, and Solon leaves to answer the door as the Morbius Monster awakens. It doesn’t have any higher functions, so it attacks Sarah Jane (who just regained her eyesight), trashes the lab, and attacks Solon. It goes after the Doctor and Sarah Jane, but a fatally wounded Condor saves them, and the monster storms off into the night. Condor was a good and kind Igor. His death was a sad one.

Solon sets out after the monster with a tranquilizer, and they track it down as it kills one of the Sisters. Solon and the Doctor capture the monster, and Solon takes it back to the lab with the promise of disassembling it and returning the brain to Gallifrey. Solon tricks the Doctor and completes the operation, restoring Morbius to full capacity. The Doctor floods the lab with cyanogen gas, but only Solon is killed since the monster’s lungs are immune to the poison.

Morbius challenges the Doctor to a form of Time Lord wrestling called mindbending. The Doctor falls unconscious as a massive energy feedback drives Morbius from the lab, and the Sisters chase him with torches over a cliff. We don’t know if he survived the long fall and regenerated, and I’m skeptical since “no body, no death”. The Doctor is fatally injured from the mindbending, and Maren provides her share of the Elixir and sacrifices herself to save him. Ohica is left in charge of the Sisterhood with a fresh package of fireworks as the Doctor and Sarah Jane move on to the next adventure.

Okay, first, let’s knock out the questions. During the mindbending, the question was raised of how long the Doctor has lived. There were eight other faces after rolling back through the Third, Second, and First Doctors. Within the scope of the mythology, who were they? They can’t be the Doctor, since Hartnell’s incarnation was clearly defined as the First. So, are they Morbius’s former regenerations?

Also, why did the TARDIS explode out of Karn instead of dematerializing like normal? Was it because of the somewhat unnatural change in position from landing to take-off courtesy of the Sisterhood?

Finally, the overall feeling of the story. There are so many tropes here, and while it was nice to get the backstory on the Sisterhood of Karn, the basis for their existence is really quite shallow. This story overall seemed like an exercise in getting the puzzle pieces down and connecting the dots, and while it flowed well, it didn’t hold my interest as well as some of the other stories in the Fourth Doctor’s run. It just felt, in a tip of the hat to the pseudonym that wrote it, bland.


Rating: 3/5 – “Reverse the polarity of the neutron flow.”


UP NEXT – Doctor Who: The Seeds of Doom


The Timestamps Project is an adventure through the televised universe of Doctor Who, story by story, from the beginning of the franchise. For more reviews like this one, please visit the project’s page at Creative Criticality.


Timestamp #83: The Android Invasion

Doctor Who: The Android Invasion
(4 episodes, s13e13-e16, 1975)

Timestamp 083 The Android Invasion


London: Are they there yet? It looks like the right place and the right time, but appearances can be deceiving.

The Doctor has a new coat, and our heroes are being followed by a twitchy UNIT soldier as they explore the area. They encounter four figures in spacesuits who start shooting from their fingertips, and, of course, they run. Sarah Jane nearly bolts off a cliff, but the Doctor saves her. The twitchy soldier isn’t so lucky as he runs headlong to his doom.

Or does he?

There’s a body, which is a sure sign of death – well, usually – but that corpse’s wallet is full of shiny new coins, all from the same year. They discover a strange pod near the soldier, and then get shot at again by the trigger-happy spacers, so our heroes get to exercise Rule #1 of Zombieland. They eventually end up in the village of Devesham, but the town is abandoned. The pub is full of half-full drinks, those strange coins, and not much else, and Sarah Jane remembers from her days as a journalist that the space center is a short distance away.

Sarah Jane spots the spacers walking with the newly resurrected soldier, and she accidentally breaks a glass, which arouses suspicion. The spacers come close to opening the door when a pickup truck arrives with the villagers. They all stiffly walk about town, some of them filing into the pub and sitting down. An uncomfortable silence follows until the clock strikes eight, at which point everyone acts normally.

Yeah, that’s normal.

The Doctor heads for the space center to contact UNIT, and he leaves Sarah Jane (with the TARDIS key) to investigate the village. She is soon discovered, and the crowd is deathly silent. They ask her to leave, and she does, but encounters one of the spacers by the truck. When he turns, his face is all electronics. She runs away, and a clear theme is established: Running, and lots of it.

The Doctor arrives at the space center, but the place is deserted except for a single unresponsive soldier. Sarah Jane arrives at the TARDIS and places the key in the lock, but gets distracted by a pod nearby. The TARDIS dematerializes on its own and a figure grabs her from the pod. He attempts to strangle her, but she runs (again).

With all this running, I’d be dead by now.

At the space center, a disembodied voice called Styggron tells Crayford, a man with an eyepatch, that something is abnormal. Crayford investigates as the Doctor reaches the Brigadier’s office, which is empty. Crayford soon discovers the Doctor and interrogates him. The Doctor runs, and the UNIT soldiers open fire. He is soon apprehended, and Sarah Jane pursues his captors. She starts to unlock the door when a strange face peers out from the wall. It looks kind of Sontaran, but it’s not.

The mysterious voice hides again, but tells Crayford about the new arrivals. Crayford is excited by the development, but knows that they must be destroyed. Crazy thing: Crayford is supposed to be dead, a victim of an earlier spaceflight that Sarah Jane reported on, but he is clearly moving about. Meanwhile, the travelers run into Warrant Benton, but he pulls a gun on them. He appears to power down when Crayford orders the operation cancelled, and the Doctor and Sarah Jane hide. Soon after, Crayford orders Harry Sullivan to cordon off the perimeter, and the travelers decide to run for the village and attempt to warn London.

With friends like that, who needs enemies to run from?

Sarah Jane twists her ankle so the Doctor stashes her in a tree and distracts the pursuing dogs. The soldiers capture Sarah Jane (who left the tree) shortly thereafter. Sarah Jane wakes up strapped to an alien-looking table and being attended by Harry, who starts an analysis of her. The Doctor reaches the village and tries calling UNIT, but the phone is dead. The phone in the pub is also dead, and the keeper tells him that the lines are down after an overnight gale. The Doctor orders a ginger beer and throws darts, but discovers that the board has never been used. It is a camera for the aliens, who are watching everything.

At this point, we get a good look at the non-Sontaran aliens. They are the Kralls. The makeup is pretty bad. The mouths do not move well at all.

Doctor Who has done better.

Anyway, the pub has other oddities: The horse brass on the wall is plastic and the calendar has only one date. The dead phone rings, revealing that Sarah Jane has escaped. She asks the Doctor to come to the village store, and after he hangs up, the phone once more becomes inoperative. The Doctor follows the clues to the store and Sarah Jane tells her story. He offers her ginger pop to soothe her nerves, something she couldn’t stand before, and she enjoys it. The Doctor puts all the pieces together and takes Sarah Jane back to the TARDIS.

Back in the secret base, the Krall use Crayford’s patterns to create a hostile android, which they use to demonstrate a newly developed weapon used to stop the androids. Meanwhile, the Doctor finally finds out that the TARDIS has dematerialized — presumably continuing on to Earth — and the he reasons that they are not on the real Earth and that Sarah Jane is not the real Sarah Jane. Sure enough, she attacks him, he pushes her away, and her face falls off to reveal an android. The Doctor runs off as the Sarah Jane-droid opens fire.

And just where was she keeping that pistol?

More details emerge about the dastardly plan: The Kralls intend to destroy the village in nine minutes, and plan to use the real Sarah Jane as a test for a virus to kill humans. Sarah Jane listens to the discussion, then sneaks away when the coast is clear. Back at the village, the spacer androids gather up the villagers and drive them back to the Krall ship. In the village, Stryggon restrains the Doctor as he places the bomb. Sarah Jane arrives (her ankle injury having mysteriously vanished) and saves him using the sonic screwdriver. They barely make it back to the base as the bomb explodes, eradicating the entire façade, but are immediately detained by the androids. In detention, the Doctor explains the android situation to Sarah Jane, deducing that they are on Oseidon.

So, not London.

Craydon comes in and explains his story: He’s contacted Earth with an elaborate hoax story, and he plans to return to Earth as a hero with the Kralls by his side. He claims that no humans will be harmed. The Kralls want the Northern Hemisphere, and they will leave the Southern Hemisphere for humanity. The Doctor is not sold on the story, and neither am I. I’m rather partial to the Northern Hemisphere.

Styggron has the Harry-droid spike a water pitcher with the virus and take it to the cell. Meanwhile, the Doctor opens the floor tiles and plans to electrocute the guards. The androids take the Doctor to the scanning room, but he warns Sarah Jane to save the water for the trap. As the Doctor is prepared, Styggron discloses his plans for human genocide.

Sarah Jane sets a small fire to lure the guard, then springs the trap and disables the android. She then rescues the Doctor from the scanner and they race for the rocket as it lifts off. Sarah Jane makes it into a protective pod, but the Doctor does not.

Cliffhanger: Will they survive?

Yes, and in cheap narrative fashion: The Doctor awakens her some time later. No really, that was it. All the race for the pods because they can’t survive the crushing g-forces and hey, by the way, nice nap you had there and by the way we’re going to ride these android pods to the surface but we may not survive re-entry since the pods aren’t designed for us.

On the real Earth, the real Harry, real Benton, and real acting commander Colonel Faraday monitor Crayford’s return. Benton and Harry are concerned since the TARDIS has arrived without the Doctor or Sarah Jane. The pods are sent to Earth, but the Doctor and Sarah Jane are separated on re-entry. Sarah Jane lands in the forest and finds the TARDIS. The Doctor-droid finds her and almost has her convinced that he’s real until a nearby pod opens to reveal a Sarah Jane-droid.

The Doctor reaches the space center and asks the guard (the model for the previously “dead” soldier) to notify him if another Doctor arrives. He asks the technicians to jam the electronics by pointing the radar dishes at the ground. Meanwhile, he figures out that key personnel have already been replaced and makes a run for it with Sarah Jane. The Doctor poses as his duplicate, re-enters the complex, and confers with the technician. The dishes are put in position, but the Doctor-droid stops him from turning on the power. Crayford stops the Doctor-droid from killing the technician and the Doctor, but is flabbergasted by the Krall plan for genocide. Crayford runs for the ship while the Doctor fights the Doctor-droid. The Doctor ends up near the control panel and turns on the jammer, stopping the androids in their tracks.

Sarah Jane reaches the ship and frees Harry and the colonel, but she is ambushed by Styggron. Crayford tries to stop Styggron but is killed. The Doctor-droid arrives and flips Styggron into the virus vial, and then the Doctor-droid is shot. The threat is over. The day is saved.

The Doctor and Sarah Jane arrive at the TARDIS, but Sarah Jane wants to go home, and this time by taxi. The Doctor offers to take her home in the TARDIS, and Sarah Jane relents.

She does know that she’s not going home yet, right?

This was a well-written adventure with a lot of twists and turns. They cheapened cliffhanger between episodes 3 and 4 stole some of the momentum, but I still had fun with it.


Rating: 4/5 – “Would you care for a jelly baby?”


UP NEXT – Doctor Who: The Brain of Morbius


The Timestamps Project is an adventure through the televised universe of Doctor Who, story by story, from the beginning of the franchise. For more reviews like this one, please visit the project’s page at Creative Criticality.


Dragon Con 2016


Dragon Con 2016
Atlanta, GA –  September 2-5, 2016

Logo_no_background


Thirty years of Dragon Con!

It’s an annual tradition for me, and this year will be my eighth time attending. This time around, I’m an attending professional. If you plan to attend, these are the places where you will be able to find me over Labor Day weekend.

NOTE: All Dragon Con schedules are tentative until the convention ends on Monday. Even then, things are a bit suspect. As things change before the convention, I’ll update this post.

Edit for 8/29: Updated the rooms for the American Science Fiction and Fantasy Media panels for Sunday. Also updated the times for the Thursday events.


Thursday (it’s the new Friday)

2:30p-6:30p: Dragon Con Newbies Walking and Rolling Tours/Q&A
Marriott Marquis, Atrium Level, A601-A602
Want to know the best way to get from one con hotel to another? Need to learn where the food court is? If so, come on one of our walking tours and find out. Small group tours will be going out every 10-15 minutes.

8:30pm-11:00pm: Dragon Con 2016 Geek Sing-a-long
Marriott Marquis, Atrium Level, A601-A602
The only thing better than a con full of geeks is a con full of geeks singing theme songs and other geek-centric tunes! The American Sci-Fi & Fantasy Media and the American Sci-Fi Classics tracks present the second annual DragonCon Geek Sing-A-Long!


Friday

10:00a: Classic Sci-Fi Legends: Noel Neill, David Bowie, Alan Rickman
Marriott Marquis, Marquis Level, M103-M105
Talking about classic sci-fi adjacent people who passed away this year: Noel Neill, David Bowie, Alan Rickman… it’s a long list. Thanks, 2016.
Panelists include: Kevin Eldridge, Tegan Hendrickson, Jason De La Torre

1:00p: Rocketeer!: The 25th Anniversary
Marriott Marquis, Marquis Level, M103-M105
Jennifer Connelly. Jetpacks. Nazis. Celebrate the movie that has everything.
Panelists include:  John Hudgens, Gary Mitchel, Mike Faber, Daniel Griffith


Saturday

8:30a: Roll-a-Panel: Classic Sci-Fi Edition
Marriott Marquis, Marquis Level, M103-M105
Too many classic movies & TV to cover means one thing: The crowd decides what we talk about – 20 panels in one lightning-round hour!
Panelists include: Pretty much all of the American Science Fiction Classics Track regulars

10:00a: Fantastic Mullets of Classic Sci-Fi
Marriott Marquis, Marquis Level, M103-M105
Mullet aficionados and color commentary.
Panelists include: Tegan Hendrickson, Gary Mitchel, Michael Bailey

10:00p: The Dirty Dirty Con Con Game Game Show Show
Hyatt Regency, Regency V Ballroom
It’s the triumphant return of Dragon Con’s best-loved adults-only game show! Cum out and partake in dirty pop culture games! Impress your friends! Embarrass your family! Win fabulous prizes!

Miss Lady Flex, Phantom Troublemaker, Rad Ranger, and Popeye the Sailor Moon are returning to the greatest con in all the land to once again present the finest in sexy, dirty entertainment. Ages 18+ only.


Sunday

10:00a: Roll-a-Panel: The 80s
Marriott Marquis, Marquis Level, M103-M105
More specifically: 1981, 1986, and 1991, which was still the 80s, let’s be honest.
Panelists include: Pretty much all of the American Science Fiction Classics Track regulars

11:30a: Batman 1966: Atomic Batteries to 50th Bat-Anniversary
Marriott Marquis, Marquis Level, M103-M105
Precisely, chums! We’re here for the 50th anniversary of the grooviest heroes and villains ever.
Panelists include: Michael Gordon, Michael Bailey, Michael French

1:00p: Marvel Cinematic Universe: Shall This Be Civil War?
Marriott Marquis, Marquis Level, M301-M303
Captain America 3 became Civil War, and we were introduced to Jessica Jones, drama with Agents of Shield/Most Wanted and the MCU. What do we think will happen with all these elements?
Panelists include: Gary Mitchel, Alice Edwards, Will Nix, Bill McIntire

7:00p: Highlander: There Can Be Only One 30th Anniversary
Marriott Marquis, Marquis Level, M103-M105
What to expect: A roomful of people singing Queen’s “Princes of the Universe.”
Panelists include: Tegan Hendrickson, Van Allen Plexico, Scott Viguie, Michael Bailey, Elizabeth Jones, Gary Mitchel, and Jessa Phillips

8:30p: The Flash: Zoom Into the Multiverse
Marriott Marquis, Marquis Level, M301-M303
Season Review – CW and DC introduce us to the Multiverse, with Zoom, Jay Garrick, and some interesting additions and losses.
Panelists include: Ryan Guthrie, Angela Pritchett, Theo Tiedemann

11:30p: The Shape, the Snake, and the Thing: The Sci-Fi Films of John Carpenter
Marriott Marquis, Marquis Level, M103-M105
You got horror in my sci-fi! You got sci-fi in my horror!
Panelists include: El Phantasmas, Gary Mitchel


Monday

Nothing scheduled


Timestamp #82: Pyramids of Mars

Doctor Who: Pyramids of Mars
(4 episodes, s13e09-e12, 1975)

Timestamp 082 Pyramids of Mars


They’re finally back to London, but it’s not really the one Sarah Jane wants.

Professor Scarman is excavating a pyramid which contains what he calls the perfect tomb. There is an Eye of Horus on the door to the inner chamber, which scares away his assistants, but the professor shows no fear as he opens the door… and gets blasted by a ray of green light.

Change scenes to our heroes and the TARDIS travelling through space-time. Sarah Jane gleefully shows off a dress she found in the wardrobe, which a pensive Doctor offhandedly remarks that it belonged to “Vicki” or “Victoria”. That’s either Victoria Waterfield or Vicki Pallister. When Sarah Jane presses the matter, the Doctor explains that he no longer wants to chase after the Brigadier’s whims, and he doesn’t feel quite at home on Earth. His maudlin musings are broken when the TARDIS jolts violently and is redirected to the priory – Professor Scarman’s family home – that existed on the site where UNIT HQ was eventually founded. During the turbulence, Sarah Jane sees an Egyptian jackal face that rapidly disappears.

The priory is occupied by Ibrahim Namin, a mysterious Egyptian gentleman, who is confronted by Dr. Warlock, a friend of the professor who was zapped in the opening scenes. Namin’s butler discovers the Doctor and Sarah Jane, believing that they are agents of Dr. Warlock, and warns them against Namin. As the travelers depart, a sarcophagus opens on its own.

Warlock and Namin are engaged in a heated argument when the butler screams. They rush to the scene and find him strangled, and as Namin nearly kills Warlock with a gun, the Doctor intervenes and saves Warlock before disappearing again. Namin opens the sarcophagus and awakens the mummy within using a special decoder ring. The mummy and Namin pursue the Doctor, Sarah Jane, and a critically wounded Warlock, but are called off as a blast of organ music echoes through the forest. The travelers are found by Laurence Scarman, the professor’s brother, and they hide at his hunting lodge.

The year is 1911 and Scarman has developed a Marconiscope, a predecessor to the radio telescope, which can intercept signals from space. As they switch it on, they receive a signal from Mars that overloads Scarman’s device. The Doctor decodes it: “Beware Sutekh.”

Okay, so we’re talking about Mars. Are the mummies the Ice Warriors?

As the team decides to investigate further, the Doctor claims, “I never carry firearms.” Uh, yes you do. You shot people in Planet of Evil and Day of the Daleks, and you also have a favorite collection.

Anyway, the Doctor and the humans return to the priory as Namin summons a servant of Sutekh through a special sarcophagus carrying a lodestone. Alas, it’s not the Ice Warriors, but it kills Namin as the mighty Sutekh needs no other servants. The servant then morphs into the professor and takes the mummies to set his plan in motion. The Doctor investigates the lodestone and explains that Sutekh is the last of the Osirans. He accidently activates the spacetime tunnel and is nearly drawn through it until he disrupts it and falls unconscious. Sarah Jane and Laurence hide away in a priest hole.

A non sequitur (and likely redshirt) poacher runs into the deflection field set up around the estate by the Sutekh. Professor Scarman, while searching for his brother, finds Warlock and learns about the Doctor. Scarman orders a mummy to kill Warlock. The poacher runs from the death screams and seeks out Laurence. The Doctor decides that his can stop Sutekh by blocking his transmissions to Earth, but he needs Namin’s ring to isolate the frequency. On cue, the professor arrives and almost finds the travelers until the poacher arrives and shoots him. The professor sets the mummies loose on him. True to form, the redshirt’s gonna die.

The travelers locate Namin’s corpse and retrieve the ring, then hide in the TARDIS. The Doctor determines that the mummies, who are really robots, are building rockets to free Sutekh from his imprisonment by destroying the force field generator on Mars. Sarah Jane suggests, since the world didn’t end in 1911, that they should just travel forward to 1980 and be done. The Doctor takes her there, revealing a desolate wasteland, and Sarah Jane realizes that they have to stop Sutekh.

They return to 1911 and take refuge in Laurence’s lodge, planning to build a jamming device. As the mummies kill the poacher, Laurence tries to stop them and the mummies overrun the lodge. The mummies destroy the jamming device, but Sarah Jane drives them off with the ring. The team decides to blow up the missile using blasting gelignite, of which the poacher (of course) had a supply. Laurence stays behind to unwrap the robot as Sarah Jane and the Doctor head for the poacher’s hut. En route, they disrupt part of the barrier, which the professor investigates only to find Laurence. Laurence believes that part of his brother still survives, and he nearly breaks through until the Sutekh persona recovers and tortures Laurence for information.

The Doctor and Sarah Jane take the gelignite to the missile, but do not have detonators or fuses. They return to the lodge to find Laurence’s corpse, and they use the wrappings as a disguise to infiltrate the mummies. The disguised Doctor places the gelignite, but when Sarah Jane shoots it with Laurence’s rifle, the explosion is constrained by Sutekh’s mental power. The Doctor determines that the only way to stop him is to go to Mars and distract him. As the Doctor arrives through the spacetime tunnel, he is stunned by Sutekh, and the action causes the destruction of the rocket.

Sutekh interrogates the Doctor and discovers who he is, and he offers an alliance that the Doctor rejects. Scarman calls and reports that they have captured Sarah Jane, and Sutekh orders her death until the Doctor protests. Sutekh reads the Doctor’s mind and learns of the TARDIS, then transports the key to Scarman. The Doctor saves his life by claiming that the TARDIS controls are isomorphic and will only responds to his touch. He claims allegiance to Sutekh and is supposedly placed under the alien’s command, then returns and pilots the TARDIS to the pyramid so the professor can override the restraining field. The professor enters the chamber and the mummies try to kill the Doctor after he is no longer needed, but that releases Sutekh’s hold on him. He survives due to a respiratory bypass system. It’s convenient, but it’s also science fiction.

The path to the Eye of Horus, the source of the restraining field, is blocked by several logic puzzles which are very reminiscent to a previous story. The professor has Sutekh’s knowledge to help, but the Doctor and Sarah Jane are slower. At one point, Sarah Jane is trapped and the Doctor must face a Knights and Knaves-style challenge: There are two buttons (one is freedom, one is instant death), and the answer lies with two robots (one always lies, one always tells the truth). He successfully answers the riddle, but they are too late since the professor has already destroyed the Eye.

The Doctor realizes that the Time Factor can still save them since the transmission takes two minutes to move from Mars to Earth, and he rushes with Sarah Jane back to the TARDIS and 1911. Using a piece of the TARDIS console, he blocks the spacetime tunnel and traps Sutekh inside, propelling the Osiran forward into the far future until he dies of old age. The sarcophagus explodes, burning the priory to the ground and paving the way for UNIT’s arrival in the future. The Doctor muses about his involvement in the great London fire of 1666, and with that, the pair move on to their next adventure.

Maybe they’ll find London this time?

This was a fun adventure with plenty of twists and turns. It was very engaging. The villain seemed pretty standard until he actually got proactive about the Doctor and tried to kill him, and that small character development pushed it over the top for me. I mean, this villain actually wins until the Doctor stops him at (literally) the very last second.

Looking back, the body count is high in this one. Everyone the Doctor meets is dead at the end. I’d hate to be the CSI lead trying to put this one together.

After reading more about this one, this story also adds to the so-called UNIT Dating Controversy, which isn’t a sticking point on my end yet. That will come up in about seven seasons (or about a year in Timestamps time) with Mawdryn Undead, and, as with most continuity problems in Doctor Who, I’m just going to consider it timey-wimey-wibbly-wobbly and move on.

This one ended up as a high four, and I’ll round up.


Rating: 5/5 – “Fantastic!”


UP NEXT – Doctor Who: The Android Invasion


The Timestamps Project is an adventure through the televised universe of Doctor Who, story by story, from the beginning of the franchise. For more reviews like this one, please visit the project’s page at Creative Criticality.


Timestamp #81: Planet of Evil

Doctor Who: Planet of Evil
(4 episodes, s13e05-e08, 1975)

Timestamp 081 Planet of Evil


This is not London.

On a dark and misty planet in the year 37166, a mining team hits a seventy percent pure vein as another on their team marks another grave in an already crowded graveyard. Professor Sorensen tells his assistant that the planet “knows” and is conspiring against them, but he refuses to leave the vein of ore since the last one inexplicably vanished after their colleague died. The younger spacer leaves the professor and returns to base, but just like Braun (the man who marked the grave), he is vaporized.

Well, that’s a dark start.

I do love the detail in the planet set, though. It beats the socks off of anything from the original Star Trek.

Meanwhile, in the TARDIS Control Room – We haven’t seen that in a while, and it’s the first time for the Fourth Doctor. – our heroes get a distress call and materialize on the evil planet. Sarah Jane is enthralled by something odd, and after she shakes it off, they find the mummified remains of Braun. So, he disappeared at death, but then reappears as a desiccated corpse?

As they investigate the base, a new starship arrives in orbit of the planet, which is now established as Zeta Minor. The ship barely has enough fuel to return home, but Commander Salamar decides to investigate the planet and find the professor’s party. There’s not enough power for a scan, but they transmat down regardless.

The Doctor works on restoring the base’s power while Sarah Jane volunteers to go back to the TARDIS and retrieve the spectromixer, which will determine where they are. Sarah Jane returns to the TARDIS just as the starship’s landing party arrives, and they lock the TARDIS doors with a clamp and transmat it up to the starship. They then encounter the professor and display terrible trigger discipline and muzzle control during their discussion. Seriously, he keeps his weapon pointed at the professor the entire time with his finger on the trigger.

The professor takes the landing party to the base where they all encounter the Doctor, and the spacers take the Time Lord captive as they investigate the strange happenings. Back in the TARDIS, Sarah Jane tries the doors again and finds herself on the starship. She is taken prisoner and interrogated, and the ship commander is skeptical of her story since Zeta Minor is so remote. Salamar decides to land the ship and continue the investigation. The professor explains that the killings started soon after the team arrived and they mostly came at night (mostly). A paranoid Salamar decides that the Doctor and Sarah Jane are to blame, and orders their execution. Luckily, they escape through a window, but they encounter a strange neon semi-transparent creature.

A ship’s sentry tries to shoot the creature, but it deflects the shots and dematerializes the man. A desiccated corpse appears in his place and the creature vanishes. Sarah Jane explains that this is the strange feeling that overwhelmed her before, and the Doctor has a bad feeling about this. The ship’s crew discover that the Doctor and Sarah Jane have escaped and sound the alarm. The travelers run, and the crew open fire and provide their best stormtrooper impersonation by missing every shot.

The commander sends a drone to search for the fugitives. Their analysis of the corpse shows complete dehydration, almost like freeze-drying. Like that astronaut ice cream they sell at Kennedy Space Center, and probably just as tasty. The professor wants to leave since his mission – to find a new source of energy to replace their dying sun – is complete. The commander says that his new mission – to eliminate hostile alien forces – takes precedence. What is he, a Dalek?

The Doctor and Sarah Jane discover a pool of liquid that doesn’t reflect light. The drone finds them, and crewmen arrive to apprehend them. The crewmen roughly search the travelers, and one falls into the pool. There is no splash, and he continues to fall as if the pool were really a bottomless pit.

Sorenson loads his samples as the travelers are returned to the ship and interrogated. The Doctor explains that the planet is the boundary between the universes of matter and anti-matter. By coming to the planet, the boundary has been breached. The travelers are dismissed and rudely shoved into the quarantine chamber with the TARDIS and the ore samples. Sarah Jane suggests leaving, but the Doctor explains that this extends beyond the planet now. It could result in the destruction of the universe.

The Doctor gets all scientific on the ore – I have missed that aspect of the Doctor – and takes a small sample for later. The ship tries to take off, but the engines fail, and the ship is immediately attacked by the neon creature. It picks off guards like redshirts until the commander listens to the Doctor and raises shields. That pushes the creature away and earns him some cachet with the commander and crew. The Doctor explains that the ore is linked to the planet, and that the ship cannot leave without jettisoning the samples and clearly stating an intention to leave without exploiting the planet. The Doctor offers to take that promise to the forces that control the planet, but he must go alone. He goes to the pit (sans scarf) and encounters the neon creature, but the creature pushes him down the hole.

Commander Salamar argues with the professor about leaving the planet, and Sarah Jane goes after the Doctor. As crewmen unload the ore canisters, the professor sneaks into quarantine and sneaks away with a container. The Doctor falls, encounters a large neon creature, and then climbs out of the pit. Sarah Jane finds him, but he is delirious and half-conscious. Salamar see the duo on the drone’s camera feed, and sends crewmen to retrieve them. Meanwhile, the smuggled ore possesses the professor.

The travelers end up in the ship’s sickbay, and as Salamar attempts to lift off, Sarah Jane assures the Doctor – who promised the neon creature as a Time Lord that they would leave the ore behind – that all of the samples are off the ship. The Doctor is assuaged until he remembers that he has some in his toffee tin, and he takes it to the commander. An unfortunate crewman takes the tin to be jettisoned, but he is attacked by the professor. As the ship attempts to reach escape velocity, there is a significant drag, and the Doctor presumes that more antimatter ore is still onboard.

The professor is drinking some kind of fluid to remain in human form. In an attempt to deflect the investigation, he suggests that the travelers are responsible for the deaths, and Salamar demands (at gunpoint) to inspect the TARDIS as a result. As the commander takes the Doctor to quarantine, the professor remains with Sarah Jane. The professor begins to change, sparking that same wave of unease for Sarah Jane, and he leaves sickbay to attack another crewman. Sarah Jane follows the crewman’s screams and discovers yet another desiccated corpse. The same screams distract the commander long enough for the Doctor to sucker punch him and run to the scene. Salamar follows, assumes that the travelers killed the crewman, and shoots the Doctor point blank. The travelers are taken to the ejection chambers – a futuristic walking of the plank – but they are saved by an attack on the bridge.

The professor is trying to maintain control with his serum, but he spills it, leaving no way to stop his transformation. Meanwhile, Salamar is relieved of command by Vishinsky, a senior crewmember who disagrees with the commander’s assessment of the travelers. Sarah Jane explains the strange sensations around the antimatter to the Doctor, and she rushes to the bridge and recommends closing all of the hatches in the passageways to slow Sorensen’s progress. The Doctor breaks into Sorensen’s quarters and finds the antimatter. Sorensen finds him, but the Doctor holds the professor back and explains that the serum has only facilitated the mutation. Sorensen realizes that he must remove the antimatter from the ship.

Meanwhile, Salamar takes the ship’s neutron accelerator and plans to hunt Sorensen with the deadly radiation. After Salamar kills a crewman who tries to stop him, Vishinsky lets the former commander go. Sorensen goes to the ejector room and attempts to eject himself and the sample, but he transforms before he can throw the lever. Vishinsky informs the Doctor of Salamar’s plan, and the Doctor goes to stop him. Salamar finds Sorensen in the ejector room and uses the accelerator, but Sorensen drains him and uses the accelerator’s radiation to increase strength and multiply. The creatures pass through the hatches and kill the crew as the Doctor reaches the bridge. He takes a pistol – noted – and the remaining ore and sets off to find the original Sorensen. The Doctor shoots him – also noted – and drags him into the TARDIS and restrains him, then sets a course for the planet’s surface.

The TARDIS lands at the pit, and the Doctor and Sorensen struggle on the edge. Sorensen falls in, and the Doctor throws the remaining ore in after him. The creatures on the ship vanish, and the ship stops it’s descent toward the planet. Since the Doctor kept his word, a fully human Sorensen is returned to the normal universe, and they return to the ship in the TARDIS. The professor is still returning to his original self and is highly suggestible, so the Doctor plants the idea of using planetary kinetics as an energy source. The travelers then depart for their appointment in London.

This is the standard creature feature with some added twists like the anti-matter universe, a strong environmental message, and the super-guardians of the planet’s balance. I love the detailed planet sets, and enjoyed seeing a more meaty role for the secondary characters as well.

I’m eager to see how the show reconciles the Doctor’s use of firearms in later stories. Part of me holds to the mythos that the Doctor abhors their presence, kind of like MacGyver, and using one is a breach of his character. Day of the Daleks is a good example. The counter-point, as long-time reader Nathan mentioned in a discussion on Facebook, is that the Doctor may be pragmatic enough to realize that firearms are sometimes the lesser of two evils, but always tries to find a better way. Either way, I’m looking forward to how the classic series handles this.

All in all, this was a fun and entertaining story.


Rating: 4/5 – “Would you care for a jelly baby?”


UP NEXT – Doctor Who: Pyramids of Mars


The Timestamps Project is an adventure through the televised universe of Doctor Who, story by story, from the beginning of the franchise. For more reviews like this one, please visit the project’s page at Creative Criticality.


Timestamp #80: Terror of the Zygons

Doctor Who: Terror of the Zygons
(4 episodes, s13e01-e04, 1975)

Timestamp 080 Terror of the Zygons


A peaceful looking oil rig collapses into the ocean after a high-pitched chirping echoes throughout the structure. Welcome to Season 13 and the debut of the Zygons.

After receiving the emergency call from the Brigadier, the Doctor and his companions are back on Earth and walking through the countryside. The Doctor has embraced the Scottish theme of this story with a (unnamed) Tartan scarf and matching Tam O’Shanter hat, while his companions have adopted the typical hat and scarf. They hitch a ride to town with the Duke of Forgill, a local landowner who is upset about Hibernian Oil’s employees trespassing on his land, and meet up with the Brigadier and his Clan Stewart kilt.

You know, I’ve kind of missed him.

The Doctor is upset that he has been called back for a simple oil problem, hardly an emergency in his book, but agrees to help nonetheless. Harry goes to examine the injured rig crew in sickbay, Sarah Jane goes to interview the locals, and the Doctor joins the Brigadier to investigate the oil company. As Sarah Jane interviews Angus, the inn’s landlord, a Zygon eavesdrops on their conversation through an unknown bug. Angus thinks the Tulloch Moor is haunted, but Sarah Jane is not convinced.

While this is their first appearance in the franchise, I have seen the Zygons before in the new series. They really haven’t changed much over the years.

A survivor named Munro stumbles out of the ocean and Harry finds him. Caber, the Duke’s right-hand man, inexplicably shoots Munro and grazes Harry. The Doctor and Sarah Jane visit Harry in sickbay wher the Brigadier informs them of another oil rig collapse — the Zygons summoned a creature from the deep to destroy it — and the Doctor accompanies him as Sarah Jane tends to Harry. The Doctor examines part of the rig’s wreckage and discovers the imprint of a giant tooth.

Sister Lamont, the nurse who is attending to Harry is creepy. At first I thought she was a Ratched, but instead she’s a Zygon who attacks both companions. When the Doctor (who was on the phone with Sarah Jane when the Zygon struck) arrives the hospital, they companions are missing. The Doctor finds Sarah Jane in a decompression chamber and is trapped inside when he attempts to rescue her. He hypnotizes Sarah Jane to slow her breathing, then places himself into a trance as well. Meanwhile, Harry is taken to the Zygon ship, which is deep under the ocean. They crashed on Earth centuries before and waited for rescue, but their world was destroyed. The creature, a cyborg called a Skarasen, is their weapon and means of survival. If it dies, they die.

The Brigadier and his team are knocked out with poison gas, and the Doctor and Sarah Jane are rescued by Warrant Officer Benton. The trance was something he learned from a Tibetan monk. They return to the inn and discover that the same nerve gas that affected the Brigadier’s team also incapacitated the entire village. The Doctor receives a signal device, which controls the Skarasen, and the Zygons are upset by the turn of events. The take Harry to the chamber to become the pattern for one of the Zygon invaders.

The Brigadier’s team recovers and discovers one of the UNIT patrol soldiers who was killed by the creature. The Doctor goes to investigate and leaves Sarah Jane at the inn, much to the Zygon’s delight. Harry’s doppelgänger arrives, steals the device, and runs, leading Sarah Jane and some troops on a chase. She finds him in a barn, and he attacks her, but he falls on his pitchfork and reverts into Zygon form before dying. The Zygons disperse the corpse before Sarah Jane brings UNIT to see it.

Sarah Jane deduces that the Zygons are spying on UNIT, and the Zygons send the Skarasen to destroy them. The Doctor lures the beast away in a truck as the Brigadier tracks the signal’s origin. The Skarasen chases the Doctor, who has to run after the truck runs out of fuel and the tracker attaches itself to his hand. The Brigadier traces the signal to Loch Ness.

Ah, of course: Nessie is an alien cyborg.

Harry bursts into the control room and starts mashing buttons on the console, which conveniently results in the tracker falling off the Doctor’s hand. In a terrible special effects sequence, the Skarasen crushes the tracker, which stops the signal and makes the Zygons assume that the Doctor is dead. Meanwhile, Benton is searching the inn for bugs, and we figure out that the Duke’s prized deer head trophy is the transmitter.

After finding out where the signal came from, the Doctor asks Sarah Jane and the Brigadier to take him to the Duke’s castle. The Duke does not believe their tale, and he refuses to allow UNIT to use depth charges in the loch. Back at the inn, Angus discovers the deer head transmitter, and the nurse goes full Zygon on him and removes the eye. Benton and his team give chase into the woods, shooting at the Zygon as it flees, and report to the Brigadier that they have it cornered. The Doctor and the Brigadier leave Sarah Jane to investigate the Duke’s library as they rendezvous with Benton. The Zygon resumes its form as Sister Lamont, knocks out a UNIT soldier, and escapes. The Doctor discovers the missing eye and concludes that the Duke is a Zygon agent.

At the Duke’s castle, Sarah Jane discovers a hidden passageway behind the bookshelf and follows it straight to the Zygon ship. Shortly afterward, the Duke finds out about her intrusion. He and Caber help the injured Sister Lamont doppelgänger back to the ship, and the Duke orders Caber to find and destroy Sarah Jane.

Sarah Jane rescues Harry and they return to the Doctor and the Brigadier. The Doctor heads to the ship but is intercepted by Zygons and held hostage. The Zygons tell the companions that the oil rigs were only the prelude to the “big event”. UNIT begins shelling the loch and the Zygon ship surfaces and flies away. The Brigadier prepares to follow, but the companions suggest searching the castle for clues. Sarah Jane discovers that the Duke is the President of the Scottish Energy Commission, but Harry dismisses the information and they join the Brigadier for a trip back to London.

The Zygon ship lands at a disused quarry, but UNIT cannot track it due to a jamming signal. Broton, the Zygon leader and Duke doppelgänger, tells the Doctor that a refugee fleet is on its way to Earth, but in the intervening centuries, the planet must be rebuilt to suit them. After Broton leaves, the Doctor rigs some of the technology in his cell, which electrocutes him but broadcasts a tracking signal to UNIT. The Zygons leave the Doctor for dead, but he comes to, infiltrates the body print center, and frees the humans being held there. He then blows up the ship using the self-destruct mechanism, which is a bit bloodthirsty, but he did try negotiating first.

Broton, having left moments before, goes to place a tracker on the target so Skarasen can destroy it. The Brigadier and the companions figure out that the International Energy Conference is the target, and that the Broton can get in using the Duke’s credentials. They all reconvene there, and the Doctor confronts the Zygon. Sarah Jane summons the Brigadier, who shoots and kills Broton.

Hey, firearms finally worked!

The Doctor takes the tracker and rushes outside where he feeds it to the Skarasen. The creature returns to the river and swims back to Loch Ness, and thus we have the legend. The team returns to the TARDIS near the loch, and the Doctor offers them all a ride home, but only Sarah Jane joins him with one proviso: They are to return straight to London.

Yeah, right.

We finally say goodbye to Harry. I can’t say that I’ll miss him, but I can say that he’ll join the ranks of Steven Taylor as one of my least favorite companions.

As far as the story goes, it’s lackluster and all over the map. It’s an unfortunate case of style over substance: The Zygons and their ship were well done for the era, and the story plays on the prevalent oil-politics in the news, but it also heavily leans on Scottish stereotypes to drive the story, and I had a hard time getting around them. From the very first line haggis-laden line of the first episode, the story jumps from kilts to beards to bagpipes to second sight to the Loch Ness Monster, and it finishes on a joke about stingy Scotsmen.

Don’t get me wrong: It’s nice to visit Scotland again, but this doesn’t come close to the spirit of Jamie McCrimmon. It was a fun, but ultimately routine and forgettable romp.


Rating: 3/5 – “Reverse the polarity of the neutron flow.”


UP NEXT – Doctor Who: Planet of Evil


The Timestamps Project is an adventure through the televised universe of Doctor Who, story by story, from the beginning of the franchise. For more reviews like this one, please visit the project’s page at Creative Criticality.