Timestamp #156: Battlefield

Doctor Who: Battlefield
(4 episodes, s26e01-e04, 1989)


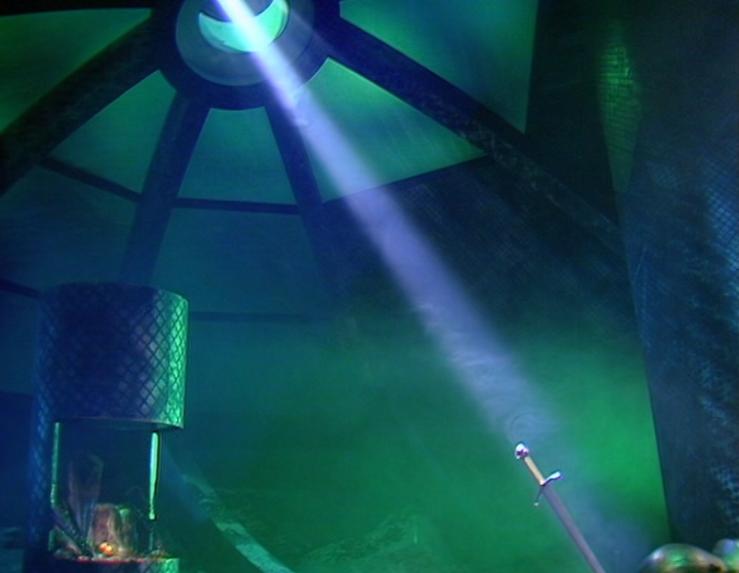
The final classic season begins with an old trope and an old friend. We begin with retired Brigadier Lethbridge-Stewart shopping for trees with his wife, reminiscing on his days with UNIT. Elsewhere, a familiar-looking sword glows with unearthly light as Brigadier Winifred Bambera and her UNIT soldiers conduct military exercises in the country.

On the TARDIS, the Doctor is tracking a distress signal from Earth that has saturated all of time and space, across the boundaries that divide one universe from another. The TARDIS arrives at the source of the signal, three years in Ace’s relative future. Ace and the Doctor hitchhike with archaeologist Peter Warmsly after the new Brigadier bypasses them. As they drive to a nearby battlefield dig, several armored knights crash land from space. The Doctor and Ace infiltrate the UNIT nuclear missile site with old identification cards, one belonging to Liz Shaw. Bambera confiscates the passes, but one soldier remembers the Doctor from Lethbridge-Stewart’s days.

A space knight investigates the TARDIS exterior while the Secretary General calls Lethbridge-Stewart to tell him about the Doctor’s arrival. Bambera takes the Doctor and Ace to a nearby hotel where they can find accommodations. She then spots the TARDIS and walks into the middle of a battle between the space knights.

At the hotel, Ace meets Shou Yuing, a fellow explosives enthusiast, while the Doctor converses with blind psychic innkeeper Elizabeth Rowlinson. Bambera (and Warmsly) end up at the hotel as Lethbridge-Stewart dons his uniform one more time.  The Doctor and Warmsly talk about the scabbard, which has psychic energy and is linked to a strange woman in a crystal ball.

The battle propels the knight into the hotel’s brewery, driving our heroes to investigate. They find the knight, who is a human named Ancelyn who claims that the Doctor is Merlin. The distress call was Excalibur’s Call and placed the planet in the middle of a war that doesn’t belong in this dimension. As the quartet tries to leave, they are ambushed by Bambera (who tries to apprehend them) and the enemy knights (who try to kill them).

The Doctor tries to negotiate, but Bambera is quick to the trigger. The enemy leader is Mordred, and he warns the Doctor of his mother’s (Morgaine, who has waited twelve centuries) coming reckoning. The enemy retreats, the Doctor’s party retires to the hotel, and Bambera and the knight do the ritual dance of dominance.

Using a brother sword to Excalibur, Mordred conducts a ritual to link his home dimension to modern Carbury. The scabbard on the wall launches toward the lake, Mordred is swimming in Highlander-era fantasy, and Morgaine crosses into our dimension. She calls to the Doctor telepathically, and when he refuses her, she declares war on their “last battlefield.”

In the morning, the Doctor and Ace visit Warmsly’s dig, finding a marker that reads “dig hole here” in the Doctor’s handwriting. Ace blows open the hole and they descend into the ground. As Brigadier Lethbridge-Stewart arrives in Carbury, Morgaine attacks his helicopter. The pilot sets it down successfully, although Lieutenant Lavel is injured, and Lethbridge-Stewart sets out for help. He soon encounters Morgaine and her army, and after a discussion, they part ways honorably. Lethbridge-Stewart commandeers Shou’s car.

In the underground tunnel, Ace and the Doctor enter a strange room that obeys the Doctor’s commands. He presumes that the place was built by Merlin, and that he could possibly be Merlin in his own future. The facility is really a spacecraft for traveling between dimensions, and it contains King Arthur (in suspended animation) and Excalibur. Ace accidentally draws Excalibur, releasing an automated defense system. Ace runs the wrong direction and ends up trapped in an airtight chamber that fills with water. The Doctor manipulates some controls and continues to battle the defense system as Ace is ejected to the surface of the lake, echoing the Lady of the Lake legend as she emerges with Excalibur. She passes the sword to Ancelyn, Bambera, and Warmsly as Shou and Lethbridge-Stewart arrive.

In a touching reunion, Lethbridge-Stewart goes into the ship and saves the Doctor, and the duo return to the surface. Meanwhile, Morgaine orders her troops to find Excalibur and kill any who stand in the way. At the inn, Mordred taunts the innkeepers and lusts after Lieutenant Lavel as his mother arrives. Morgaine kills Lavel after extracting military knowledge from her mind, and rewards the innkeepers for their treatment of her son by restoring Elizabeth’s sight.

The hero party returns to the hotel – the women and modern military leaders bristle under Lethbridge-Stewart’s ways – surviving an assault along the way. There, they find that the locals are being evacuated, though Warmsly and the Rowlinsons require a little psychic convincing from the Doctor, but Ace and Shou slip away in the organized chaos. The Doctor and Lethbridge-Stewart hit the road (in Bessie!) to find Ancelyn and Bambera and defend the missile convoy. They leave Ace and Shou at the hotel, armed with a piece of chalk to draw a circle of protection. The former Brigadier also reveals some new hardware from UNIT, including armor-piercing rounds for Daleks, gold rounds for Cybermen, and silver rounds just because. Ace and Shou draw the circle and take refuge as an ethereal darkness falls around them, and Morgaine tries to draw them out with psychic games before summoning a demonic creature.

The missile site is a battlefield with UNIT facing Mordred’s troops. As Ancelyn and Mordred engage each other, the Doctor stops the confrontation but is surprised to learn that the battle was a distraction to allow Morgaine to seek the sword. She stands over Ace and Shou with her summoned creature, the Destroyer. Mordred offers a trade – the captives for Excalibur – but the Doctor succumbs to rage and threatens to decapitate Mordred if Morgaine does not surrender. Morgaine calls his bluff and the Doctor yields, but Lethbridge-Stewart steps up in his stead. Morgaine is unswayed, restarting the battle as the Doctor and Lethbridge-Stewart put Morded in the car and race to the hotel.

Morgaine figures out that she cannot breach the chalk circle, but the Destroyer can. All it needs to is to be freed from its silver shackles. The Destroyer brings the hotel down around the ladies, and Mordred escapes. Morgaine flees with Excalibur and the Destroyer, receiving news that her army has been decimated. The Doctor and Lethbridge-Stewart pursue Morgaine into her portal, and Ace follows with the box of silver bullets shortly afterward. Lethbridge-Stewart is tossed aside by the Destroyer but the Doctor reclaims Excalibur. Morgaine frees the beast as an angry Mordred arrives, and the two return to their realm. The Doctor, Lethbridge-Stewart, and Ace regroup, and the Doctor prepares to face the Destroyer with the silver bullets. Lethbridge-Stewart stuns the Doctor, claiming that he is more disposable than the Time Lord, and faces off with the Destroyer. Three shots of silver later and the creature explodes, but Lethbridge-Stewart escaped with a promise that he is done with all of this.

Morgaine and Mordred kidnap Bambera and attempt to launch the nuclear missile. In the spacecraft, the Doctor, Lethbridge-Stewart, Ace, and Ancelyn restore Excalibur and try to release King Arthur, but a note from the Doctor reveals that the king died in battle. The good news is that they can still stop the missile. The Doctor faces off against Morgaine and appeals to her honor, compelling her to stop the missile’s countdown. She wants to face Arthur in combat, but news of his death devastates her.

Ace jubilantly destroys the spacecraft and the Doctor renders Mordred unconscious. Mordred and Morgaine are turned over to UNIT as our heroes retire to the Lethbridge-Stewart estate. The ladies take Bessie on an adventure while the men are left to chores and cooking supper.


This was a good (if final) adventure in the classic era with the Brig, and I enjoyed the references from his era to tie the legacy together. He’s back in fantastic form here for his finale, and it really buoys up a story that could have otherwise drown in tried and once true but now tired story tropes. I mean, I groaned when I saw that this was an Arthurian myth tale, and some of the obvious symbolism (Ace as the Lady of the Lake, for example) drew more of them from me.

I did love seeing Ace bond with Shou over their common attraction to explosives. I also love McCoy’s flourishes and gags that counter his growing darkness. Finally, in a reach back to near the beginning of the franchise, I did enjoy seeing Jean Marsh back in action once again. This time she was Morgaine, but way back when she was once Sara Kingdom.

I settled around a 3.5 rating for this one, and I look forward, so this story takes advantage of rounding up.


Rating: 4/5 – “Would you care for a jelly baby?”


UP NEXT – Doctor Who: Ghost Light


The Timestamps Project is an adventure through the televised universe of Doctor Who, story by story, from the beginning of the franchise. For more reviews like this one, please visit the project’s page at Creative Criticality.


Timestamp: Twenty-Fifth Series Summary

 Doctor Who: Twenty-Fifth Series Summary


A stunning jump as we race toward the classic finish.

The Seventh Doctor’s second outing was a major step up, which was an important move for the show’s silver anniversary. It has also made me really love Sylvester McCoy’s wit and humor. Remembrance of the Daleks was a great start, and while Silver Nemesis was effectively Remembrance Redux, it was still fun. Even the average stories kept me entertained, and there didn’t seem to be a stinker in the bunch.

The John Nathan-Turner problems remain, and they’re likely to stick around for McCoy’s senior season, but at least the actors and stories were able to enlighten and entertain, overcoming the production.

Overall, this season ends up in a five-way tie for fifth place, joining the ranks of the Seventh, Tenth, Thirteenth, and Fourteenth seasons. The Third and Fourth Doctors are good company to be in.


Remembrance of the Daleks – 5
The Happiness Patrol – 3
Silver Nemesis – 4
The Greatest Show in the Galaxy –  3

Series Twenty-Five Average Rating: 3.8/5


UP NEXT – Doctor Who: Battlefield


The Timestamps Project is an adventure through the televised universe of Doctor Who, story by story, from the beginning of the franchise. For more reviews like this one, please visit the project’s page at Creative Criticality.

Timestamp #155: The Greatest Show in the Galaxy

Doctor Who: The Greatest Show in the Galaxy
(4 episodes, s25e11-e14, 1988-1989)


It’s an awfully meta moment in the late 1980s: The Greatest Show in the Galaxy gets rhythm, and we “ain’t seen nothing yet.”

On the TARDIS, the Doctor is trying to learn how to juggle while Ace (clad in the Fourth Doctor‘s pre-burgundy scarf) looks for her rucksack and Nitro-9. An automated probe materializes in the console room and delivers junk mail: an advertisement for the psychic circus. The Doctor wants to go and the advertising drone goads Ace (who is obviously scared of something) into joining him.

Something sinister is afoot at the circus: Two performers (Flowerchild and Bellboy) are on the run from a clown in a hearse. A rude sandwich eating biker named Nord and our heroes join the mix as well, and the Doctor and Ace are warned away from the circus by a roadside saleswoman. Flowerbell and Bellboy split up, and Flowerbell ends up at an abandoned bus and killed by the robotic conductor. Bellboy is found by the clowns are returned to the circus.

Nord turns down the Doctor’s request to join him, and the travelers are nearly run down by the clown on the road. They encounter Captain Cook and Mags, two more intergalactic travelers questing for the circus, and join them for tea. Ace and Mags find a buried robot, which comes to life and attacks the party, but is defeated by Ace. They carry on to the bus and are attacked by the conductor robot. The Doctor defeats the robot and parts company with the other travelers, disgusted by the captain’s cowardice.

A new player joins the mix: A well-dressed young man on a bicycle.

Nord, Captain Cook and Mags, and the Doctor and Ace arrive at the circus. Mags witnesses Bellboy being punished for his treachery, but her screams are electronically silenced by the ringmaster. Ace can still hear the screams and is hesitant about entering the tent, but the Doctor presses on. Ace’s fear is revealed: She suffers from coulrophobia, the fear of clowns. Based on the ticket-taker’s reaction to the clowns, Ace’s fear may be well-founded.

The Doctor and Ace find a seat in the darkened attraction, which isn’t hard since the place is nearly deserted: The only other party is a family of parents and a single child. The Doctor tries to engage them in small talk, but they’re almost robotic. The show starts with nearly the same rap as before, but one change is that the Ringmaster selects the Doctor to join as a volunteer performer. The Doctor rushes forward in glee and Ace gets trapped by clowns, and the lead clown is intrigued by Flowerbell’s earring, which Ace found at the bus. Ace runs and is pursued by this insane clown posse.

The Doctor is reunited with Captain Cook, Mags, and Nord, but soon realizes that this is a trap and he’s fallen right into it. Captain Cook tricks Nord into performing next. Meanwhile, Ace sneaks back into the circus tent and eavesdrops on the fortune teller and ringmaster talk about the state of the circus. She is given away by the chirping of drone kites and runs from the clowns, encountering a captive Bellboy. It’s revealed that Bellboy built the robotic clowns and only he can repair them. Ace is soon captured again and imprisoned in the clown repair facility.

Nord goes on stage and his performances are judged by the family. When he fails, he is disintegrated, an act that is witnessed by Mags and the Doctor. As the BMX rider, Whizz Kid, is selected to join the captives, the Doctor and Mags escape and find a series of catacombs to explore. They find a deep pit with a large eye (the same eye on the kite drones) at the bottom, but they are captured by the clowns and Captain Cook. Mags notices a symbol that resembles the phases of the moon, and the her reaction provides a distraction for the Doctor to escape.

When the clowns in the repair trailer attack, Ace defends herself until they stop and collapse. Bellboy emerges from the shadows and, noting the earring, learns of Flowerchild’s fate. He tells Ace that Flowerchild made the kites, something of beauty perverted into something sinister, and gives Ace the controller for the robot she defeated earlier. Elsewhere, the Doctor continues to unravel the mystery behind the circus and frees Ace and Bellboy from the trailer. We also discover that Deadbeat, the street sweeper, was once someone named Kingpin.

The clowns return Captain Cook and Mags to their cage, and Captain Cook snaps at Whizz Kid’s admiration of his exploits. He soon turns about and exploits the kid, moving him up in the queue to save the explorer’s own skin. The kid is soon killed for his failure, and the captain is a truly despicable man.

The Doctor, Ace, and Kingpin set out for the pit while Bellboy stays behind the distract the chief clown. Meanwhile, the fortune teller communicates with the eye through her crystal ball, telling it that more will come to feed it and they’ll keep everyone away from the bus. At the pit, the Doctor’s party uncovers the same link. The Doctor sends Ace and Kingpin to investigate the bus while he distracts the circus in the ring. The Doctor suggests that he, the captain, and Mags work together to upset the balance of the game, and Mags coerces the captain into agreeing.

Once in the room, Captain Cook turns the tables by ordering the crew to shine “moonlight” on Mags. The woman transforms into a werewolf, weirdly explaining her reaction to the moon symbols earlier. After a brief show by Cook, during which the Doctor discovers that the audience members are avatars of the eye in the pit, Mags turns on the captain and kills him. Mags and the Doctor are removed from the ring, but as the family demands more entertainment, the ringmaster and fortune teller are forced to perform. They fail and are consumed.

Ace and Kingpin search the bus, not knowing that the clowns have repaired the conductor. Ace tries to open a lockbox and is ambushed by the robot. During the scuffle, the box is broken open and Kingpin finds the rest of his eye pendant inside. His mind restored, he helps Ace defeat the conductor. Together, they head back to the Doctor.

Mags runs off to meet Ace and Kingpin as the Doctor confronts the eye in a psychedelic sequence. He ends up back in the ring, but now it is an ancient arena. The Doctor greets the family as the Gods of Ragnarok, a force he has fought for some time, and the trio demand more entertainment from their captive. The Doctor runs through a series of conjuring tricks to distract them.

Ace, Kingpin, and Mags end up the massive robot and use it to defeat the clowns. They return to the pit as the Doctor continues his performance, pursued by a reanimated Captain Cook. Cook steals the medallion and Ace knocks it into the pit, forcing it to materialize at the Doctor’s feet. The Doctor uses it to deflect attacks from the gods and destroy the arena around them. The Doctor doffs his hat in salute and returns to the circus, calmly strolling out of the tent as it explodes behind him.

He reunites with Ace, leaving Kingpin and Mags to start a new entertainment venture. He politely declines the offer to join them, citing the adventures that ahead. Besides, in a clever plot twist, he finds circuses to be rather sinister.


It was a decent adventure, and while the Doctor’s feelings about circuses are awfully convenient, I did enjoy watching Ace confront her fears to save the day. The werewolf subplot was kind of crazy, as was the Gods of Ragnarok twist, but they both did away with the treacherous Captain Cook. That guy was one of the first characters in this franchise that I have actively despised in a long time.


Rating: 3/5 – “Reverse the polarity of the neutron flow.”


UP NEXT – Twenty-Fifth Series Summary


The Timestamps Project is an adventure through the televised universe of Doctor Who, story by story, from the beginning of the franchise. For more reviews like this one, please visit the project’s page at Creative Criticality.


Timestamp #154: Silver Nemesis

Doctor Who: Silver Nemesis
(3 episodes, s25e08-e10, 1988)


We open in South America, 22 November 1988, on a scene of Nazis trying to kill parrots with arrows. A similar scene plays out in 1638 Windsor, England – though without the Nazis, naturally – as a woman tries to kill a pigeon with a bow and arrow. She retreats to a dark room where a mathematician is working on a calculation while the woman prepares poison-tipped arrows. Back in 1988, the Nazi addresses a room of soldiers, heralding the birth of the Fourth Reich before retrieving a silver bow and leaving on a plane.

In Windsor, the mathematician informs the woman – Lady Peinforte – that according to the calculation, the Nemesis comet will return to Earth and land in the spot where it originated on 23 November 1988.

It seems that the Nazis and Lady Peinforte are on a collision course.

The Doctor and Ace are relaxing to the smooth sounds of Courtney Pine when the Doctor’s alarm goes off, but he can’t remember why. The performance ends, Ace gets an autograph, and the pair is ambushed by snipers.  The travelers escape by diving into the river. Later on, they dry out on the riverbank while the Doctor ponders the alarm, knowing that it means a planet somewhere is about to be destroyed. Moments later, the Doctor finds out that the planet in question is Earth. He remembers that he set the alarm in 1638, and they travel in the TARDIS to Windsor Castle’s basement in search of the silver bow.

Lady Peinforte and her assistant use magic fueled by the mathematician’s blood to travel through time, landing in the present day as the Nemesis crash lands on Earth. The Nazis and Lady Peinforte converge on the crash site, but the Nazis decide to bide their time until the site cools down. At the site, Lady Peinforte watches as the police radios stop working and a mysterious gas chokes the officers.

In the castle’s basement, the Doctor and Ace find an empty case and a prophecy: The bow originally disappeared in 1788, and unless it is kept in its case, the rest of the statue to which it belongs will return and destroy the world. The Doctor and Ace travel to 1638 and Lady Peinforte’s cottage and start to unravel her mystery. The Lady originally sculpted the statue, depicting herself, out of a silver metal that fell to Earth near her home. The travel forward again to Windsor Castle and join a tour group before sneaking away into the royal apartments and encountering Queen Elizabeth II. They are apprehended and escape, finding a painting of Ace that has happened yet for them, and eventually end up in the TARDIS.

The Nazis, Lady Peinforte, and the travelers all converge on the crash site. They are joined by a mysterious spacecraft that reveals a group of Cybermen. The Cybermen recognize the Doctor as the three aggressor parties open fire on each other and our heroes take refuge in the crash site. The Doctor and Ace steal the silver bow and escape, leaving the silver arrow in Lady Peinforte’s hands and the Nemesis statue unguarded.

The Doctor and Ace travel back to 1638 where the mathematician’s corpse has disappeared and the chess pieces have moved. The Doctor burns a note and they leave. As they return to present day, he explains to Ace that the validium metal was created on ancient Gallifrey by Omega and Rassilon as a form of ultimate defense. Some of it escaped from Gallifrey and landed on Earth, which the Doctor returned to space. They use the bow to track the other pieces.

They find the Cybermen and jam their transmissions with Ace’s jazz tape. They later find a pair of muggers who were defeated and strung up by Lady Peinforte. The Lady herself takes her assistant Richard to his own grave, and then into the castle where the Cybermen hold the statue, which is apparently her own grave. The Cybermen engage the Lady and Richard at the tomb as the Doctor and Ace destroy the Cybermen ship. The Nazis find the Cybermen and strike a deal, but they don’t understand that the Cybermen will kill them anyway.

The Doctor and Ace discuss the cyclical nature of the Nemesis comet and how each time it comes around, bad things happen in Earth’s history: In 1913, the First World War was about the erupt; in 1938, Hitler annexed Austria; and in 1963, President Kennedy was assassinated. The double their efforts to scan for a Cybermen fleet in space and they find it.

The Nazis arrive at the tomb and drive Lady Peinforte away through Richard’s cowardice, leaving the Nazis with the arrow and statue. The Nazis try to doublecross the Cybermen, but one of the Nazis betrays his leader (De Flores) and they are captured for processing. Meanwhile, the Doctor and Ace arrive at the tomb as the tape ends, presenting the bow to the Nemesis statue as the Cybermen re-establish contact with their fleet. The Doctor and Ace run with the bow, forcing the statue to follow them.

They travel back to 1638 and the Doctor makes another move on the chess board. Ace asks who originally brought the metal to Earth and what is really going on, but the Doctor remains silent as they leave for the hangar where the comet is stored. The Nemesis statue arrives and the Doctor gives it the bow. Soon enough, the Cybermen arrive and Ace battles them with a slingshot and gold coins from 1638.

The Nazis break free from their processing, revealing it to be a ruse the entire time. Meanwhile, Lady Peinforte and Richard hitch a ride with an American woman to Windsor. The woman descends from the 17th century Remington family, whom Peinforte refers to as thieves and swindlers. In fact, Dorothea Remington was killed by poison.

As Ace singlehandedly decimates the Cyberman army, the Doctor loads the statue back into the comet and sets the rocket’s course to the cyber fleet. At one point, Ace is trapped by three Cybermen and only one shot left, but she ends up forcing them to shoot each other. The Doctor talks with the statue, removing the bow and avoiding its questions about mission and purpose. The Doctor and Ace defeat the remaining Cybermen, but De Flores arrives and takes the bow. He is upset that the Nemesis will not speak to him, but he meets his end as the Cyber Leader guns him down.

Lady Peinforte arrives and faces off with the Doctor and the Cyber Leader, and Peinforte asks Ace a question: “Doctor who?” Who is the Doctor and where does he come from. The Doctor relents and passes the bow to the Cyber Leader, defusing Lady Peinforte’s attempts to reveal the Doctor’s secrets with the Cybermen’s apathy regarding them. All the Cybermen want is to transform Earth into Mondas. The bow ends up in the comet with the statue and the Doctor launches it, but not before Lady Peinforte hurls herself into the capsule with the Nemesis.

The comet races toward the fleet and destroys it, confounding the Cyber Leader and leaving an opening for Richard to stab the remaining Cyberman with the last arrow. Ace and the Doctor return Richard to 1638 where Ace figures out the Doctor’s gambit: He originally placed the statue into orbit to lure out the Cybermen and destroy them. As they listen to an impromptu concert, Ace asks the Doctor about his past, but the Doctor puts a finger to his lips and listens to the music instead.


Overall, this was a fun 25th anniversary adventure with a lot of moving parts. I’m glad they made the callback to Remembrance of the Daleks to keep continuity rolling. I am intrigued by this “Cartmel Masterplan” idea that mystifies and deepens the Doctor, but I’m cautious and hoping that it doesn’t make the Doctor menacing. Not knowing everything about the Doctor is good, but making him have a dark agenda (potentially one of wiping out his enemies rather than simply defeating them) won’t work for me.


Rating: 4/5 – “Would you care for a jelly baby?”


UP NEXT – Doctor Who: The Greatest Show in the Galaxy


The Timestamps Project is an adventure through the televised universe of Doctor Who, story by story, from the beginning of the franchise. For more reviews like this one, please visit the project’s page at Creative Criticality.


Timestamp #153: The Happiness Patrol

Doctor Who: The Happiness Patrol
(3 episodes, s25e05-e07, 1988)


“Happiness is nothing unless it exists side by side with sadness.”

A woman walks down a melancholy corridor and is approached by a man who offers to help with her suffering. He invites her to a secret place where people share their sadness, but when she accepts his offer he reveals himself: Silas P of the Happiness Patrol, Undercover Division. As the “killjoy” is arrested, the Doctor and Ace arrive in the TARDIS, musing about the invasion of the dinosaurs, unimpressed with the “lift music” and artificial happiness filtering through the city.

Silas P is awarded for his stellar work, but his superior is also suspicious about his ambition. Elsewhere, our travelers explore the city and encounter Trevor Sigma, a man thoroughly unimpressed by the Doctor’s college nickname of Theta Sigma. Ace wanders off and finds a bench riddled with bullet holes, prompting the Doctor to get them arrested. They find members of the Happiness Patrol painting the TARDIS pink, and are apprehended for lack of identification. The Doctor is taken away as a spy while Ace is forced to audition for the Patrol.

The Doctor and Ace find a killjoy named Harold V, a terrible joke writer formerly known as Harold F (minion to colony leader Helen A, the superior from before). Their guard warns the Doctor that while this place isn’t a prison, he would be killed if he crosses the perimeter line. I simply love the sight gag here as the Doctor guides his foot away from the line with his umbrella.

Helen A rules a society where sadness is outlawed. Under her rule, any emotion other than happiness (even in clothing) is punished by the Kandy Man, an unseen party who experiments on the captives. As an example, a killjoy is executed by being enclosed in a metal pipe and drown in strawberry-flavored fondant. As Ace and the Doctor plot an escape, planning to take Harold with them, Helen kills her former servant by remote fatal electric shock. They locate a go-kart, disarm the bomb that would have prevented their escape, and use it to (slowly and comedically) drive away. Ace is re-captured, providing a chance for the Doctor to escape.

Ace meets Susan Q, a secretly depressed member of the Patrol. After a heart-to-heart discussion, Susan gives Ace the key to their room, allowing her to escape. Unfortunately, she is captured again soon. On the streets, the Doctor encounters an undercover Silas, but a blues player named Earl Sigma – the appellation “Sigma” means visitor – helps the Time Lord to escape. Unfortunately, the Patrol finds Silas in his dark garb and executes him accordingly. The Doctor and Earl infiltrate the Kandy Man’s lair, but they too are captured.

Ace is marched by gunpoint back to her audition while the Doctor and Earl are strapped down for torture. The Doctor appeals to the Kandy Man’s insecurities, learns about his methods of executions, and traps him in a sticky puddle of lemonade. The Doctor and Earl escape with a quip into the pipelines and encounter a gang of creatures. These creatures, driven underground by human settlers, lead the duo to safety and Trevor Sigma. Earl splits off on his own as Trevor and the Doctor visit Helen. The Doctor learns all about Helen’s population control measures and confronts her.

Ace is reunited with Susan after the Patrol discovers her duplicity. Susan is taken away for execution and one of the pipeline creatures frees Ace. Helen releases her dog-creature Fifi into the pipeline to deal with the annoyance, but Ace subdues the threat with a can of Nitro-9. They then travel through the pipes to Susan’s execution.

The Doctor reunites with Earl and learns of a protest and the snipers that have them pinned down. The Doctor confronts the snipers and disarms them with their own morality. He then returns to the kitchens to deal with the Kandy Man, unsticking the being from the floor in exchange for a flow diversion that saves Susan’s life. The Doctor then resticks the Kandy Man and escapes.

Helen puts Ace back on track for Patrol auditions, and the Doctor is drawn to the show by posters in the streets. The Doctor asks Earl to bring the protestors as a citizen comes to mark another audition poster with “RIP.” It seems that the penalty for failing the audition is death. The Doctor retires to a set of stairs in the Forum with Trevor Sigma (before the auditor leaves the planet) to discuss a list of disappearances under Helen’s rule.

Helen sends a freshly healed Fifi into the pipes to chase the people who live there. Back at the stairs, Ace and the Patrol arrive and the Doctor defeats the Patrol with happiness and joviality among the protestors. The Doctor, Ace, and Susan take the Patrol’s security vehicle, leaving the Patrol to fight among themselves, and enter the pipes to deal with Fifi. The Doctor rallies the pipe-dwellers and lures Fifi with Earl’s harmonica, using the howls and music to stop Fifi with a crystalized sugar collapse.

Helen orders the Kandy Man to find the Doctor, but the odd being reports that the Doctor and Ace have just arrived. Together, they force the Kandy Man into the pipes as Susan and Earl start destroying loudspeakers across the city. The pipe-dwellers infiltrate the kitchen and flood the pipes with fondant, destroying the Kandy Man.

Watching her empire topple, Helen packs a bag and prepares to flee the planet. Unfortunately for her, her shuttle is stolen by her husband Joseph and the Kandy Man’s former assistant Gilbert. Helen tries to escape into the city, but the Doctor confronts her. All Helen wanted was for her people to be happy… for her society to be happy. The Doctor challenges her, explaining that happiness and sadness are two sides of the same coin and must live side-by-side for the health of society. Helen starts to storm off but sees Fifi’s corpse on the bus bench where the whole adventure began. There, she breaks down in tears.

With Earl and Susan in charge, Ace and the Doctor board the freshly repainted TARDIS and depart, knowing that now happiness will truly prevail.


First, we have a fun adventure with good acting from our heroes and a pastiche of villainous tropes from the bad guys. The Kandy Man is, well, something else.

But, let’s carve away the candy coating veneer.

Setting aside the commentary against Margaret Thatcher and her politics – there are a plethora of reviews that discuss this parallel – this is a decent discussion about governments and seats of power trying to quell dissent and unrest. All too often, we see leaders (world, community, religious, etc) trying to head off complaints about social justice by claiming to the public that everything is fine and pressuring protestors into silence.

The lesson we learn here from the Doctor is that happiness is important, but it’s not free. The price is strife through conflict and every emotion that goes with it. Happiness isn’t a guarantee, but rather something we all must work for.


Rating: 3/5 – “Reverse the polarity of the neutron flow.”


UP NEXT – Doctor Who: Silver Nemesis


The Timestamps Project is an adventure through the televised universe of Doctor Who, story by story, from the beginning of the franchise. For more reviews like this one, please visit the project’s page at Creative Criticality.


Timestamp #152: Remembrance of the Daleks

Doctor Who: Remembrance of the Daleks
(4 episodes, s25e01-e04, 1988)


Returning to where it all began.

The opening teaser reveals a large and foreboding spacecraft approaches Earth. Meanwhile, on the planet’s surface, students arrive for classes at Coal Hill School while the Doctor and Ace discuss the anachronisms in Ace’s clothing, boombox, and a nearby van. Ace goes in search of food while the Doctor investigates the motor vehicle (and a strange little girl). The Doctor meets Professor Rachel Jensen, the van’s monitor, and Ace meets up along with Sergeant Mike Smith as the whole group rushes to the local junkyard.

I. M. Foreman’s junkyard, to be precise, at 76 Totter’s Lane.

Group Captain Gilmore shows Jensen and the Doctor to a corpse. The Doctor determines that soldier died after being shot by an energy ray, and he tracks the source to a nearby shed. Gilmore’s hand-picked troops arrive and take up positions. The soldiers engage as the hostile opens fire, but their bullets are no match against an armored Renegade Dalek.

The Doctor is (once again) disgusted by the military mindset while Ace marvels over their explosive firepower. The Doctor uses Ace’s supply of Nitro-9 (on a ten-second fuse) to destroy the Dalek. The military team (including Allison Williams, Professor Jensen’s assistant) investigate the remains while Ace and the Doctor borrow the van for a brief tutorial on the history of the Daleks. The Doctor believes that they are on Earth at this point not to conquer but to acquire the Hand of Omega.

Back at headquarters for the Intrusion Countermeasures Group (presumably the predecessor to UNIT), Gilmore meets with Mr. Ratcliffe while Jensen (the group’s scientific advisor, which makes her the Doctor’s predecessor) confers with Williams. Ratcliffe’s team takes possession of (read: kill the guards and steal) the Dalek’s remains and move it somewhere safe. That “somewhere safe” is exactly where Davros (or someone who looks like him, because Davros leads the Imperials, not the Renegades, right?) is hiding out.

Back at Coal Hill School, the Doctor and Ace investigate and meet the very strange headmaster. In a chemistry classroom (which looks a lot like the Third Doctor‘s lab at UNIT) they find evidence of a spacecraft landing. Ace questions if people would notice and the Doctor reminds her that no one paid attention to the “Yeti in the Underground” or the “Zygon gambit with the Loch Ness Monster.”

This classroom is the same classroom where Ian and Barbara started things with Susan. Note the book on the French Revolution. These two stories must have just barely missed each other.

The Doctor and Ace continue their investigation, eventually ending up in the cellar. They find a transmat device and sabotage it just as a Dalek is materializing. (The effect is pretty neat since we get to see the biological creature first before the shell arrives.) The pair is immediately ambushed by an Imperial Dalek (which can climb stairs!) and Headmaster Parson (who is working with the Imperial Daleks!). The Dalek recognizes the Doctor and nearly exterminates him, but Ace saves him after knocking out Parson.

Does this mean that the Imperial-Renegade Dalek War is coming to a head?

The Doctor and Ace find an army truck outside with anti-tank rockets, and after (fraudulently) signing for the artillery they return inside to destroy the transmat. Instead, they encounter a Dalek and destroy it, then encounter Gilmore’s unit. Ace stays with the Jensen’s team while the Doctor leaves to deal with his past, finding advice at the local deli.

The next morning, the Doctor visits a funeral parlor and inspects a large casket. The funeral director calls “the governor” and reports the Doctor’s arrival, noting that he was expecting an older man with white hair. The Doctor orders the casket to follow him, and it does so by levitating and floating through the building. The Doctor leads the coffin to a local graveyard where his first incarnation has prepared a grave to hide the device. Mike Smith follows the Doctor to the graveyard, and Parson follows Smith before attacking the sergeant and demanding the location of the Renegade Dalek base. Smith defeats Parson, watches the Doctor bury the coffin, and then escorts the Doctor back to the team. The team (sans Ace) return to headquarters and prepare for battle. Ratcliffe and his mysterious Dalek overseer prepare as well. A frustrated Ace defies the Doctor and returns to Coal Hill to find the Imperial Daleks swarming the cellar.

I love how Ace is rejecting some of the more backward philosophies of the era: The sexism (“Back at six. Have dinner ready.”) and the racism (“No coloureds.”) hold no value for her. Also, what a fascinating Easter egg with the premiere of An Unearthly Child inside the Doctor Who universe.

The Doctor and his team return to Coal Hill where Ace (using a supercharged bat) is on the run from the Imperial Daleks. They find her cornered by three Daleks and save her with a combination of plastic explosives and a stunning device based on the Doctor’s adventure on Spiridon. While the soldiers storm the school, the Doctor and the scientists investigate the Imperial remains, noting that the Imperials have continued to evolve. They then head to the cellar and destroy the transmat.

While the team retires to the deli for lunch, Ratcliffe visits the graveyard and find the casket under a less-than-stealthy headstone marked with a lowercase omega (ω). When Ratcliffe meddles with the site, the Imperial Daleks in orbit detect the power signature and report it to the Emperor (who is looking rather goofy with a giant spherical head). Shortly afterward, the creepy girl from Coal Hill skips into the cemetery and watches Ratcliffe’s men unearth the casket.

Ratcliffe returns the casket to his hideout and notifies his agent, who turns out to be Sergeant Smith. After his men move the Hand of Omega into position, the Renegade Daleks execute Ratcliffe’s team, and his overseer reveals himself… or rather herself since she is the creepy girl, better known as the Battle Computer.

Nice!

Meanwhile, the Doctor tells Ace the story of Omega, the advent of time travel and Time Lord society, and the stellar manipulator called the Hand of Omega. With it, the Daleks can harness the power of the Time Lords, and the Doctor wants them to have it to avoid mass casualties, but he didn’t count on there being two factions competing for it. They leave the school and go to Ratcliffe’s yard where the Doctor confers with the Hand. They find the Battle Computer’s chair and the Doctor explains that the Daleks use the chair to harness a child’s creativity as an advantage in war. The Doctor disables the Time Controller and leaves a calling card, forcing the Renegade Daleks to pursue as they run through the streets of Shoreditch. The Doctor is gambling that the Imperial Daleks will destroy the Renegades in their search for the Hand of Omega.

The chase leads them back to Coal Hill, but a slip of the tongue reveals Smith’s role as a double agent. The soldiers engage the Renegades as the Imperials descend on the school. The Imperials engage the Renegades as the Doctor plots a little piracy and Ace confronts Smith. The sergeant is taken into custody shortly afterward, but he manages to escape and return to Ratcliffe’s side. As the fight intensifies, the Imperials deploy a Special Weapons Dalek which wipes out several Renegades in one shot.

The Doctor storms the shuttlecraft, disables the Dalek pilot, and studies the computer to find Skaro. He then repairs the transmat before heading back to Ratcliffe’s yard.

Across town, the Imperials storm the yard, providing the humans a chance to steal the Time Controller. Ratcliffe dies as the little girl channels her inner Emperor Palpatine and zaps him with hand lightning, but Smith carries on. The Imperials seize the Hand of Omega and return it to their shuttle, and Ace follows Smith and the Time Controller. The Battle Computer skips away without a care in the world.

Ace tracks Smith back to his home, but the sergeant gets the upper hand by gunpoint. Soon enough, the little girl arrives, zaps Smith, and confronts Ace.

The Imperials return to their mothership and the Doctor uses the transmat to make contact. After a lofty declaration of his credentials – that explains where the new Doctors get that particular trait – he gets the reveal we’ve all been waiting for: The bubble-headed Emperor Dalek is really Davros. After some imperial speechifying and beautiful verbal jabs from the Doctor, Davros activates the Hand of Omega. But there is a wrinkle in the plan as the Doctor has sabotaged the device to destroy Skaro, the feedback of which destroys the mothership. The Hand returns to Gallifrey and Davros escapes in a lifeboat.

The Doctor finds and confronts the Dalek Supreme. The logic of being defeated overloads the Dalek and its destruction kills the Battle Computer in the little girl’s head. The girl is traumatized but alive, and the planet is safe once again.


We have come a long, long way since Genesis of the Daleks. The Fourth Doctor asked if he had the right to destroy an entire race before they enacted their genocidal agenda across the universe, and here the Seventh Doctor tricks the same race into destroying themselves. I don’t know where the line is… has the Sixth Doctor’s darkness changed the Doctor overall, or since the Daleks pulled the trigger on the altered weapon, does the Doctor not share responsibility for the potential genocide?

Even the Doctor recognizes that he can’t call this act inherently good.

In terms of internal chronology, I wonder if the sabotage of the Hand was performed by the First or Seventh Doctor. It makes more sense that the Seventh did it, but I could see a case for the First Doctor setting things in motion. This also marks the end of the Imperial-Renegade Dalek War, and the Doctor has directly ended the Renegade line by working the Dalek Supreme into self-destruction. Again, a darkness rears its head in this incarnation of the Doctor.

External to the chronology, I love the nods to the franchise and its twenty-fifth anniversary. This was a fun and exciting way to kick off the celebration.


Rating: 5/5 – “Fantastic!”


UP NEXT – Doctor Who: The Happiness Patrol


The Timestamps Project is an adventure through the televised universe of Doctor Who, story by story, from the beginning of the franchise. For more reviews like this one, please visit the project’s page at Creative Criticality.


Timestamp: Twenty-Fourth Series Summary

 Doctor Who: Twenty-Fourth Series Summary


The numbers say average but the emotion says confidence.

The Seventh Doctor’s opening frame was on par with the Sixth Doctor’s closing set. On the five-point scale, it was square in the middle and tied for second-to-last with the Trail of a Time Lord. But there’s some added complexity in the execution and how it resonated with me overall, something that hasn’t happened since the end of the Third Doctor’s run.

Taking a quick trip back in time, the Third Doctor’s Summary presented me with a wrinkle in my scoring system: Jon Pertwee’s run was consistently some of my favorite work in the franchise, but on a character level I was (and still am) more keen on Patrick Troughton’s interpretation of the Doctor. There’s something similar here where Time and the Rani made me really care about the Doctor again, to the point that I was (unbeknownst to me) actually grinning ear-to-ear at Sylvester McCoy’s performance.

In fact, the Seventh Doctor has been a beacon of hope during this introductory season, and I’m hoping that it carries this show forward through the remaining two classic seasons.

McCoy’s Doctor shares a lot of the same qualities from Troughton’s Doctor, mixing disarming tomfoolery with a darker analytical nature. It’s something that we haven’t really seen since the Fourth Doctor‘s era, and it’s refreshing to see back in the mix. The problems, of course, remain from recent John Nathan-Turner-era productions, including high body counts and average (or lower) stories to fill space rather than enlighten and entertain.

I’m actually a little sad that McCoy’s spark came so late in the game.


Time and the Rani – 3
Paradise Towers – 2
Delta and the Bannerman – 4
Dragonfire –  3

Series Twenty-Four Average Rating: 3.0/5


UP NEXT – Doctor Who: Remembrance of the Daleks


The Timestamps Project is an adventure through the televised universe of Doctor Who, story by story, from the beginning of the franchise. For more reviews like this one, please visit the project’s page at Creative Criticality.

Timestamp #151: Dragonfire

Doctor Who: Dragonfire
(3 episodes, s24e12-e14, 1987)


Iceworld: A vacation spot where cliffhangers are literal but dragons are not.

We get our introduction to this planetary freezer section through fog machines, plastic icicles, and frost burns. A group of conscripted men is being processed as foot soldiers for the villain Kane and his reign of terror. One of the men attacks a guard and shoots his way into the facility’s restricted zone. He stumbles, drops his weapon in a vat of liquid nitrogen, and dies at the hands of Kane. Quite literally, in fact, since one touch from the man can kill.

On the TARDIS, the Doctor and Mel approach the colony. They arrive at what could double as the local Costco – anyone who is familiar with that particular warehouse store understands the giant refrigerated rooms where you pay for the “pleasure” of freezing while hunting for good produce, milk, and eggs – and visit a diner where they find Sabalom Glitz. It’s a given that Glitz owes Kane money, but he gambled away his money and ends up with his ship impounded. A waitress named Ace (who uses her pseudonym as an exclamation of pleasure) tells Mel and Glitz of a dragon in the passages beneath Iceworld, and Mel puts the pieces together: The Doctor wanted to stop here to see the dragon.

Ace volunteers to tag along since she’s tired of her job. She calls the Doctor “Professor,” which the Time Lord doesn’t seem to mind. It’s endearing. So is her strong character.

Ace mentions the dragon’s treasure, which piques Glitz’s interest since he has a map that he won in the card game where he lost his shirt. Said card game was fixed by Kane to force Glitz to find the treasure so Kane could steal it. Glitz is old-fashioned (read: sexist) and won’t allow women on the journey, so Mel remains with Ace. The ladies are soon ejected from the diner – Ace gets fired for pouring a milkshake on a rude customer who totally deserved what she got – and retire to Ace’s quarters. Ace shares her story: She’s a student from Earth who was swept up in a time storm and deposited on Iceworld. The women gather up Ace’s homemade explosives and help dislodge an ice jam on the docks.

One of Kane’s lieutenants, Officer Belazs, asks Kane for Glitz’s ship. Kane denies her desire to leave and orders the ship destroyed. When Kane goes into a brief hibernation to recharge, she reverses the order without his knowledge before being dispatched to the ice jam disturbance. When she arrives, she arrests Mel and Ace. Kane takes a liking to Ace and offers her a place in his army, but she and Mel escape into the caverns instead. They encounter the dragon and Mel screams.

Goodness does she… you know.

The Doctor and Glitz explore the caverns and get separated. The Doctor, for reasons better left as an exercise for the blooper reels, climbs over a handrail and slowly slips toward his doom while dangling from his umbrella. Glitz saves the Doctor from death, but not from our eternal laughter at this literal cliffhanger, perhaps one of the worst in Doctor Who history.

The ladies discover that the dragon is not a real dragon since it shoots lasers from its eyes. They find the cliffhangering cliff and use a ladder in Ace’s bag of holding to follow the Doctor’s umbrella as a clue. Meanwhile, Kane dispatches his new soldiers – essentially ice zombies at this point – to deal with Glitz; the conscripted men from the opening are Glitz’s former crewmen whom he sold for seventeen crowns apiece. Belazs also overhears Glitz’s plan to hijack his own ship, a plan that the Doctor reluctantly supports. Glitz gets into the cockpit, but he’s ambushed by Belazs. The Doctor and Glitz learn her backstory and turn the tables, but the Doctor expresses remorse for her situation. They continue their quest.

In Kane’s restricted area, the sculptor who was working on an ice statue finishes his work and is rewarded with death. No one will be allowed to look upon the artwork for it’s supposedly too magnificent for the universe to behold. We, as viewers, are left to assume that it is significant to his backstory. (Spoiler: It is.) When Kane retreats to his chamber to cool off, Belazs and Officer Kracauer attempt to assassinate him and gain their freedom. The plot fails, although it does destroy the statue, and Kane kills both of the traitors in anger.

The Doctor and Glitz encounter the dragon, but it spares them after the Doctor stops Glitz from killing it. Elsewhere, Mel and Ace encounter the ice zombies, escaping after a brief battle while Ace wisely stops Mel from screaming. They bond over a cup of camp coffee and we find out that Ace’s real name is Dorothy, a name of which she’s not fond. They later reunite with the Doctor and Glitz and are saved from one of the zombified crewmen by the dragon. The creature trusts them and leads the explorers into a side cavern and shows them a holographic record. Kane is half of the Kane-Xana criminal organization that was headquartered on Proamon. When security forces found them, Xana – see above, re: ice sculpture – killed herself and Kane was exiled to the permanently frozen world. The Doctor deduces that the dragon, or rather the power source within the mechanical creature, is the treasure. Thanks to the tracker his musings are no secret to Kane, who plans to use the dragonfire crystal to leave the colony and his frozen prison.

The Doctor and the dragon research Proamon while Mel, Ace, and Glitz wait in the control cavern. Two of Kane’s officers ambush the dragon and eventually kill it, but when they attempt to remove the head they are killed by an energy discharge. In the upper levels, Kane dispatches his troops to drive everyone toward Glitz’s ship, the Nosferatu. Once everyone (save a little girl and her mother) are aboard, Kane destroys the ship.

We get it. He’s evil.

The Doctor, Mel, and Ace return to the TARDIS to consult the star charts. Ace goes to her quarters and is captured by Kane while the Doctor and Mel go after the dragon. They find the head and retrieve the crystal, but Kane demands an exchange for Ace. When Mel, Glitz, and the Doctor arrive, Kane confirms that the dragon was his jailer and that he has been on the colony for millennia. The Doctor surrenders the crystal and Kane uses it to power the hidden stardrive in the colony. Unfortunately for Kane, the Doctor confirms that Proamon is long dead after its star went supernova. Distraught, Kane opens a viewport and commits suicide by sunlight, Raiders of the Lost Ark-style.

With the threat over, Glitz takes command of the colony ship and Mel decides to stay in an effort to keep the rogue out of trouble. In her final act on the TARDIS, Mel puts in a good word for Ace. The Doctor offers her a space on the TARDIS and she accepts.


Kane’s motivations make little sense here. Sure, he wants to escape and exact revenge on his jailors, but his suicide doesn’t ring true. Sure, he’s a psychopath, but he was a careful and meticulous planner. Unless personal vengeance was so important to him, I would have thought that he’d scratch Proamon off the list with the supernova and go off to conquer another planet without his rap sheet hanging over his head. This plot glitch aside, I really liked him as a villain, even as a Doctor Who knockoff of Mr. Freeze.

Another part that doesn’t make a lot of sense is Mel’s final decision. So, yes, she and Glitz worked together in The Ultimate Foe, but Mel has expressed displeasure at every turn with the scoundrel’s actions, ranging from sexism and selling his crew into slavery all the way up to his illegal activities. I’d say that Glitz is a knockoff of Han Solo, but Solo was far more developed. The Leia/Han dynamic doesn’t work here and I don’t think Mel is strong enough to change Glitz, particularly since he now owns a portable freezer section with only two shoppers.

I won’t miss Mel much. From her timey-wimey intro in Terror of the Vervoids to this departure, she’s been a decent enough companion but, by far, nowhere near the best. A lot of that has to do with her role as a personality foil for the Doctor rather than as an assistant/companion. She was smart and strong-willed, but just not a great fit for the position.

I also won’t miss the dramatic screaming. Because – and this might be the last time that I can make this joke – goodness, can she scream.

So, with all of that heaped on this story, why did I actually like it?

First, we have Ace, who seems like she might be a pretty fun companion once she settles in. I do hope that the “Ace!” exclamation dies off soon because that’s going to get tiresome, but I’m looking forward to what she brings to the table.

Second, Sylvester McCoy continues to sell me with his portrayal of the Doctor. He has a latent darkness lurking behind his goofy exterior, reminding me of the Second and Fourth Doctors quite often.

Third, this story brought Doctor Who right back to its roots with tight shots, minimal bailing-wire-and-chewing-gum sets, and actors selling even the zaniest and loosest of plots with unwavering confidence. That point alone, hearkening back to the low-budget stageplay-style days of the black and white serials, deserves some credit.


Rating: 3/5 – “Reverse the polarity of the neutron flow.”


UP NEXT – Twenty-Fourth Series Summary


The Timestamps Project is an adventure through the televised universe of Doctor Who, story by story, from the beginning of the franchise. For more reviews like this one, please visit the project’s page at Creative Criticality.

Timestamp #150: Delta and the Bannermen

Doctor Who: Delta and the Bannermen
(3 episodes, s24e09-e11, 1987)


Not quite the Happiest Place on Earth, but Shangri-La nonetheless.

The story drops all of us right into the thick of things with a huge battle on an alien planet. On the high ground is a squad with extensive flags – appropriately known as the Bannermen – and on the losing side is what looks like a group of green toy army men. A woman in white named Delta runs with the last green survivor to a ship, and with his dying breath, he sends her off-planet with a glowing box. Gavrok, the leader of the Bannermen, pursues with gusto.

The opening was actually quite exciting.

The Doctor and Mel land the TARDIS at toll port G715. When they exit, they are met by the Tollmaster with a prize: As the ten billionth customers, they get free parking and a trip to Disneyland circa 1959 with a tour group of aliens disguised to look human. Just as they are ready to leave, Delta lands her ship at the toll port and seeks refuge on the tour bus. The tour bus leaves and, after witnessing the woman’s arrival, the Doctor follows in the TARDIS.

On Earth, a pair of American CIA agents drive up to a legitimate telephone box and call the White House. They are told to track a satellite that was freshly launched from Cape Canaveral. Unfortunately, the tour bus strikes the satellite and falls to Earth, but fortunately, the Doctor is able to use the TARDIS to control the descent and save all of the passengers. Instead of Disneyland, the tour group ends up at the Shangri-La holiday camp in Wales.

The camp’s leader, Burton, mistakes the extra-terrestrial tour group for one of his scheduled arrivals, so they end up with lodging until the bus is fixed. Mel ends up bunking with Delta, and the Doctor and Murray (the intergalactic tour guide) meet with the camp’s mechanic named Billy. Billy, of course, is lost when it comes to the alien bus engine but he does his best with the Doctor’s help. Meanwhile, they meet Rachel (call her Ray), a motorcycle-riding woman in a leather jacket who carries her own tools. They also accidentally break the crystal needed to fix the engine, so the Doctor decides to grow a new one, but the process will take twenty-four hours.

Back at the toll port, Gavrok finds out where the tour group went and then kills the Tollmaster in cold blood. On Earth, Mel and the Doctor discuss Delta as Billy shares lunch with the refugee. Later that night, they all attend the Get-To-Know-You social, dancing the night away to Billy’s singing talent. Sadly, Ray figures out during a performance of Why Do Fools Fall in Love that Billy is falling for Delta. The Doctor ends up consoling Ray in the linen storage room, which works in their favor as one of the tourists transmits Delta’s coordinates to Gavrok. The tourist discovers the Doctor and Ray, threatening to kill them. Back in their shared room, Delta and Mel watch as the mysterious glowing package starts to hatch, revealing one of the green aliens from the opening battle.

Of course, Mel screams. Goodness, can she scream.

The Doctor and Ray are inadvertently saved by Gavrok as the soldier activates a tracer that disintegrates the bounty hunter. The resulting blast knocks the Doctor and Ray unconscious. Billy arrives to see Delta cradling the green baby alien, and he spends the night to learn about Delta. The woman is a princess and the baby (now a painted human infant in a plush green onesie) is the last Chimeron. The pair leaves Mel to sleep and take a trip on the motorcycle.

The two CIA agents arrive nearby asking about the satellite, but the get a lesson on butterflies, metamorphosis, and beauty from a beekeeper. The moral is a bit heavy-handed and these characters are a waste in this story.

The Doctor and Ray recover just in time to see Delta and Billy driving away. They find Mel and decide to coordinate an evacuation. Mel and Murray gather the tourists while the Doctor convinces Burton of the emergency. The Doctor and Ray leave Mel and Murray in charge as they go in search of Delta. They find her and Billy at the lake, where Delta has been telling Billy of her plan to take the rapidly growing hatchling to safety before bringing her case against the Bannermen to the authorities. The whole group packs up and returns to the camp as the Bannermen land, encounter the CIA agents, and take them as prisoners. Shortly thereafter, the Bannermen find the camp and destroy the tour bus just as it is about to take off. Gavrok demands to know if Delta was aboard and Mel lies, but her deception is uncovered as the Doctor’s group approaches. They flee and Burton convinces an incensed Gavrok to use Mel as bait, saving her life.

The Doctor stashes Delta and the child at the nearby beekeeper’s home before returning to the camp and petitioning Gavrok for mercy. Mel and Burton are released, and the Doctor rides away with them. Gavrok shoots a flare, prompting the guards with the CIA agents to restrain them and pursue the Doctor. Ray frees the agents as the Bannerman guards tag the motorcycle with a homing beacon.

At the farm, Delta feeds the child with a special jelly. Billy swipes a sample while Delta is distracted by Ray’s return. The Doctor and his group return shortly thereafter. Back at the camp, Gavrok discovers the TARDIS and booby-traps it with a sonic cone, then trace the homing beacon to the beekeeper’s farm. As the scouts advance on the farm, the child evolves and warns Delta with a cry that shatters windows and eardrums. Delta kills one of the scouts and the group evacuates.

Gavrok lands in a field but comes up empty: The Doctor ditched the homing beacon to lead them astray. The surviving scout leads Gavrok’s army to the abandoned farm as the Doctor’s group arrives at the TARDIS. The Doctor hides everyone at the camp while he works on disarming the sonic trap, and the Bannermen stumble into a bee swarm trap.

Delta finds Billy eating the growth jelly in an attempt to become a Chimeron and leave with her. As the Bannermen arrive, the Doctor and Billy install a speaker on the roof, using it to transmit the child’s sonic alarm across the camp and disable the army. Gavrok stumbles in pain and falls into the sonic cone, dying instantly. The CIA agents restrain the rest of the Bannermen and the threat is over.

Billy packs a bag, now fully transformed into a Chimeron, and the trio flies off into the cosmos. Billy leaves his prize motorcycle with Ray, the Doctor receives a jar of 1928 hibiscus honey as a parting gift, the Americans find their satellite, and our travelers depart for their next adventure.


The positives outweigh the negatives in this story. We have the debut of the Seventh Doctor’s trademark question mark umbrella. We also have a very pleasant atmosphere of authenticity with the vintage music. Series composer Keff McCulloch did a wonderful job with twelve covers of era songs.

On the downside, the humor and light tone served double duty: It was a nice change but I found it to be a bit too much, throwing off the pacing just enough that the transitions from action to comedy and back were jarring instead of fluid. We also have the oddness with Billy stealing the super jelly and changing species on a whim, which made zero sense neither in the story nor against Delta’s character specifically.

All of that balances out to a high three, which gets rounded up.


Rating: 4/5 – “Would you care for a jelly baby?”


UP NEXT – Doctor Who: Dragonfire


The Timestamps Project is an adventure through the televised universe of Doctor Who, story by story, from the beginning of the franchise. For more reviews like this one, please visit the project’s page at Creative Criticality.

Timestamp #149: Paradise Towers

Doctor Who: Paradise Towers
(4 episodes, s24e05-e08, 1987)


“Nothing’s just rubbish if you have an inquiring mind.”

On one hand, we have the typical ’80s grunge-apocalypse sci-fi with a woman on the run. On the other hand, Mel and a swimming pool paradise. The TARDIS arrives at the former, though Mel and the Doctor would rather have the latter after jettisoning the time capsule’s swimming pool to solve a small leaking problem.

Caretaker 345/12 (subsection 3) – I’m going to call him “Dave” because his business pseudonym is far too complicated – reports that he’s investigating possible “wallscrawlers” on Potassium Street. He finds blood and a scrap of fabric similar to the clothes the woman was wearing. Meanwhile, the Doctor and Mel are accosted by a group called the Red Kangs. They are different than the Blue Kangs and the Yellow Kangs – the latter of which there exists only one, presumably the girl from the opening – and they love the Doctor but dislike Mel. The two lead Reds introduce themselves as Fire Escape and Bin Liner.

A Blue Kang follows Dave and reports via telephone that the Yellow Kangs are dead. To reinforce it, a cleaning robot drives by with a yellow-clad foot sticking out of the top. Moving back to the Red Kangs, the Doctor explains that he and Mel are visitors who have just arrived. Fire Escape tells him that there are no visitors by law and that the tower’s inhabitants consist of the Kangs, the old ones, the Caretakers, and another faction that Bin Liner doesn’t want her talking about. The concept of “boys” is completely foreign to the group. Mention of the pool in the sky earns the travelers a one-way ticket to captivity.

Elsewhere, Dave is killed by cleaning robots and the Chief Caretaker orders that all red wallscrawlers in Fountain of Happiness Square are apprehended. The Doctor is apprehended by the Caretakers and Mel ends up in the apartment of Tilda and Tabby, two women living in an ’80s sitcom. They identify as Rezzies and offer Mel tea and cakes.

The Doctor and his escorts, including the Deputy Chief Caretaker, rest for a moment. The Doctor examines the graffiti and interprets a Kang being attacked by an automaton. The Deputy Chief dismisses the idea, but they soon find themselves on the run from a cleaning robot matching the art on the walls.

Tilda and Tabby tell Mel of a great war in which the youth and elderly were sent to the Towers and those who could fight were never seen again, but their story is interrupted by Pex, a refugee from The Terminator, who apparently breaks down the apartment door on the regular in order to “put the world of Paradise Towers to rights.” Mel departs to continue her quest for the pool and Pex (“pecs”) joins her as a protector and guide.

The Doctor is brought before the Chief Caretaker, is mistaken as the original architect of Paradise Towers – someone who will restore the Towers to their utopian glory – and is ordered to be executed.

Seriously now… tell me straight… what in the world am I watching right now?

The Doctor’s execution is delayed as the Chief Caretaker investigates Dave’s death. Meanwhile, Pex shows off for Mel and the Red Kangs discover that No Exit, one of their own, has been “taken to the cleaners.” The Doctor muses over the cleaners as he awaits his fate, eventually securing a copy of the Caretaker rulebook and using it to work his way out of captivity.

What an excellent way to use the authoritarian blind obedience to his advantage.

Mel and the Doctor wander the Towers in search of one another. Mel learns that Pex’s memory of his past is faulty and the Doctor learns something from a particular piece of wall art. Back in the ’80s sitcom nightmare, Tilda and Tabby (who are dining on rats) are visited by Maddie with news of Dave’s death.

The Doctor breaks a telephone and gathers the money within before being chased by cleaning robots (whom he tricks into fighting each other) and falls into the Red Kang headquarters. Mel and Pex are similarly taken by the Blue Kangs. The Doctor uses his money to buy a soda from a vending machine, a move that startles the Reds before amazing them.

The Chief Caretaker (“Daddy”) visits a machine (“my pet”) and chastises it for consuming a Red Kang without his permission. The machine replies that it is hungry. Meanwhile, the Blues tell Mel that Pex is a coward – a deserter? – and Mel is allowed to leave him with the Blues.

That was a bit heartless, Mel.

Mel ends up back with Tilda and Tabby as the Chief Caretaker orders his army to teach the Kangs a lesson for their defiance. The ladies take Mel captive – Mel screams… goodness, does she scream – as the Caretakers begin their assault on the Red stronghold. The Doctor buys the Reds time as they escape the Caretakers, and Mel’s predicament gets more interesting as the ladies are eaten by the robot and Pex rescues our carrot-juice aficionado.

The Doctor is captured by the Caretakers and taken back to the Chief. The Chief interrogates the Doctor, but the Time Lord quickly turns the tables and uncovers the Chief’s involvement in the murders. The Q&A is interrupted by the Deputy who bears news of more deaths, prompting the Chief to leave. Soon enough, the Reds break in and rescue the Doctor, leaving the Caretakers bundled neatly on the floor. They end up back in the Red stronghold, sipping sodas and watching an infomercial on Paradise Towers. He draws the conclusion that the architect, Kroagnon, built Miracle City. The place would be the architect’s oasis, but he was forced out and those who moved in were killed. There was no evidence to link the architect to the murders, so he went free.

Mel and Pex decide to continue to the pool, noting that the basement is restricted to tenants on penalty of death, but they end up trapped in a wayward elevator and dumped into the lair of evil. They escape and end up on the pool deck. The Doctor follows similar logic end convinces both Blue and Red Kangs to accompany him to the basement. Once there, they witness the mastermind robot declare itself to be Kroagnon and encase the Chief in a container before attacking the Doctor. The Doctor and the Kangs escape, but after they leave the Chief is freed, but his mind is now that of Kroagnon. The hybrid goes on a killing spree.

Oh my, the Chief-Kroagnon’s performance is cringe-worthy.

On the pool deck, Pex and Mel rest for a moment, unaware of the cleaning robot hiding underwater. Mel goes in the water, gets attacked, and screams. (We all know how well she can scream!) Pex calls for help to an empty room, and Mel grabs his gun and disables the robot. Shortly afterward, the Doctor appears with his team, and the whole lot are met by the remaining Rezzies who petition for help.

The team hears the story of the hybrid’s crusade and they agree to help. They are surprised when the Deputy Chief arrives and asks to help them, bringing his knowledge of a secret stash of explosives. The Doctor formulates a plan to trap Kroagnon, including a lure to draw the hybrid out. Pex volunteers to help as the Rezzies and Kangs start destroying the cleaners.

Why the Kangs couldn’t aim well enough before now to kill the cleaners with a single shot is an exercise left to the viewer.

The Kangs give Pex gifts in appreciation, and Pex gives Mel his pistol before beginning his task. Pex brings the architect too soon, but he musters enough bravery to execute the plan and destroy Kroagnon by sacrificing himself. Fast-forwarding to the wrap-up, the Kangs memorialize Pex for his sacrifice and induct the Doctor in the newly united Kang faction. The travelers say their farewells and depart, revealing one last wallscrawl as the TARDIS vanishes from sight: Pex Lives.


This story seemed like a parody of Doctor Who. The idea is sound, with a utopia that has fallen into anarchy embodied through factions. They each have basic rules for survival, and all of them must unite under a single banner to defeat a common foe. The problem is in the execution, which was dreadful, laughable, and (dare I say it?) boring.

One thing that brings the serial up is the deep immersion into this microcosm. The Kang gang member names, the factions, and the entirety of the world is never fully explained, and we are expected to accompany the Doctor and Mel as they figure it out and defeat the enemy. The big downside is that it’s so immersive that trying to interpret the vernacular overwhelms the story.

The larger highlight is the Doctor. I love his zaniness and sense of exploration, and the rising undercurrent of darkness is a complex dimension that is both endearing and intriguing. He is the bright spot in this pile of rubbish.


Rating: 2/5 – “Mm? What’s that, my boy?”


UP NEXT – Doctor Who: Delta and the Bannermen


The Timestamps Project is an adventure through the televised universe of Doctor Who, story by story, from the beginning of the franchise. For more reviews like this one, please visit the project’s page at Creative Criticality.