Timestamp #TW16: To the Last Man

Torchwood: To the Last Man
(1 episode, s02e03, 2008)


A story of love and loss across time.

Cardiff, 1918: At the climax of World War I, Gerald Kneale and Harriet Derbyshire of the Torchwood Institute are investigating reports of ghost activity at St. Teilo’s Military Hospital. Heading into the ward, they see a bright light and a glimpse into the future where Tosh and a soldier named Tommy are huddled. Tommy tells the 1918 Torchwood team that they need to take his earlier incarnation from the recovery ward to ensure his existence in the future.

Cardiff, 21st century: Tosh dances about in her home as she gets ready for work, then goes to the Hub where Torchwood Three is about to awaken Tommy Brockless from cryogenic hibernation. Apparently, they have to revive him every twelve months, and Tosh is able to calm him down when he comes back to life.

Tommy settles in for a meal with the team, complimenting Tosh on her dress while he eats. Later on, during his examination, he recites name, rank, regiment, and parents’ death dates. Elsewhere, Jack briefs Gwen on the events from 1918 where time zones were colliding. Agents Kneale and Derbyshire left orders sealed with a temporal lock, and when the time is right, Tommy’s presence will prevent the temporal collision from spreading to the rest of the world.

Tosh takes Tommy outside for a day in the world while Gwen looks into the 1918 Torchwood team. Gwen decides to investigate the hospital. She finds a man with a missing leg who vanishes and a team of firemen who intend to demolish the building. Jack arrives soon after and theorizes that the workers may have released psychic trauma that has charged the Rift. As the workers continue to tear into the building, Jack feels a burst of energy and sees a man being wheeled down the hallway. Gwen sees an injured man in a chair being tended to by a nurse. Unlike all of the other ghost sightings, however, this time the nurse notices her. Gwen’s not supposed to be here, she says as she chases her back.

Tommy and Tosh share drinks over a pool game. Tommy sees news from hostilities in Iraq on the television and laments the fact that there is always a war somewhere. He asks if the human race is worth saving, and Tosh immediately says yes. He feels a bit of the psychic energy from the hospital before the pair head to the boardwalk. Tommy gives Tosh a kiss, but she returns some mixed signals before kissing him back. It’s evident that they’re falling for each other, but before anything else can happen, Jack calls them to the Hub.

Demolishing the hospital is the trigger.

After a briefing, the team heads for the hospital to start setting up rift monitors. Owen cautions Tosh about her relationship with Tommy, telling her that he doesn’t want to see her get hurt. Gwen calls them with a strange note from the 1918 report: “Through a hole in the external wall, we hear the roar of great engines. Outside is a woman in strange armor, ripping a Union Jack, perhaps some future heroine of the Empire.” Owen spots a car advertisement through a hole in the wall matching the description. Today is the day, punctuated by the Rift monitors alarming.

On cue, the temporal lock lifts and Jack reads through his orders from 1918. The instructions are for Tommy and Tosh: Tommy needs to be ready to jump through the fracture when it opens, leaving present Tommy trapped in the past after sealing the fracture with a Rift Manipulator.

Separately, Jack tells Tosh that Tommy will die three weeks after returning. His mind will revert to the way it was before being frozen, shell-shocked from the war, and he will be executed for cowardice. Tosh protests, but she has no choice.

Ianto pulls Tommy’s hospital attire out of storage, preparing him for his trip. Tommy then joins the rest of the team in the Hub and wonders what to do with the rest of his time. Tosh offers to take him to her place for the night. Back at the Hub, Ianto asks if Jack could return to his own time as well, but Jack wouldn’t want to sacrifice all of the amazing things he’s done since leaving home.

Both couples consummate their respective relationships, but Tosh’s is bittersweet.

At 6:30 am, the Rift monitors alarm and ghosts begin to appear. Tommy hears the 1918 Torchwood team speaking to his past self, realizing that Torchwood took him for this purpose, and he begins to question his role in this operation. He says that Torchwood is no better than the Army, knowing that if he goes back, he’ll be headed back to the front.

Tosh comforts him as the fracture begins. They find themselves in 1918 and Tosh tells Tommy that he has to step up and save the universe. He issues his orders to Torchwood 1918. before Tosh kisses him goodbye. Tommy heads to bed like he’d never been away.

Tommy watches as Torchwood 1918 takes his previous self away. As he climbs into bed, he doesn’t trigger the device. Tosh engineers a psychic projection so that someone can remind him to use the key. Tosh volunteers since Tommy trusts her the most. Once projected into the past, she helps him to activate the key and seal the fracture.

Tosh laments Tommy’s sacrifice as she packs his modern era clothes away. Jack thanks her as she leaves. Outside, Owen tells her that she saved the world. Tosh disagrees: Tommy saved the world.

But she wonders if humanity is worth it.


It was great to see Naoko Mori in the spotlight as Tosh. The last episodes with her in a major role were Greeks Bearing Gifts and Captain Jack Harkness (also a time shift episode involving a world war), and they are few and far between. We also get a good look at the Torchwood Institute as it would have functioned closer to its inception.

There was a humorous callback to Doctor Who with Tommy’s remark about how silly it would be to save the world in pajamas. The Tenth Doctor embraced that silliness just after his regeneration.

Overall, this story was a breath of fresh air in a franchise that often deals with darkness and drama. It handled weighty issues like sacrifice and historical approaches to PTSD while letting the sun in for a little bit. That is much appreciated.


Rating: 4/5 – “Would you care for a jelly baby?”


UP NEXT – Torchwood: Meat


The Timestamps Project is an adventure through the televised universe of Doctor Who, story by story, from the beginning of the franchise. For more reviews like this one, please visit the project’s page at Creative Criticality.


Timestamp #TW15: Sleeper

Torchwood: Sleeper
(1 episode, s02e02, 2008)


What is humanity?

Beth and Mike, a happily married couple, are fast asleep when an intruder startles them awake. Mike faces the danger with a cricket bat while Beth calls the police. Two burglars enter the room, knock Mike out, and assault Beth. The criminals scream as the lights grow brighter.

Torchwood Three is called to the scene. One of the burglars is dead but the other is severely injured. Tosh and Jack investigate the bedroom while Gwen and Owen follow the ambulance to the hospital to interview the survivors. Both Jack and Owen suspect Beth in the incident, but Beth remembers nothing. The surviving criminal eventually succumbs to his injuries, but before he dies, he tells Gwen that “the woman” did it.

Beth is taken to the Hub for interrogation. Beth still can’t remember anything, even in the face of crime scene photographs. A power surge occurs, just like one at the hospital, and Gwen takes a more gentle approach. Tosh tries a body scan, but nothing is out of the ordinary. Things get weird when Owen tries to draw blood and two needles break against her flesh. Owen tries a scalpel with the same result. Beth also tells him that she’s never been sick.

Jack immediately believes that she’s an alien.

When Beth says that there’s no such thing, he shows her the captive Weevil, and it cowers before her. Beth, scared out of her mind, begs for a way to prove herself to him, so Jack brings the mind probe out of storage. Ianto objects since the last subject to be probed ended up exploded, but Jack assures him that it won’t happen again. Tosh commences the probe, lights flicker, and Beth passes out before sitting upright and displaying a lighted ridge-like formation on her arm. Beth repeats a series of words in an alien language, and Jack is satisfied when he recognizes them as name, rank, and serial number.

Jack tells the team about this species. It isn’t much since they don’t tend to leave survivors. Cell 114 infiltrate planets by disguising themselves as local inhabitants and relay the information home, leaving their sleeper agents completely unaware and cloaked in false identities. The implant in Beth’s arm is protected by a force field.

Jack shares the results with Beth, leaving her distraught. Gwen assures her that humanity doesn’t just lie in the body but in the mind as well. Jack rebuts, telling Beth that she will transform on invasion day and the Cell 114 inside her will take over.

Beth is in the middle of an identity crisis.

The team debates over what to do with her. Tosh suggests cryogenic storage with an electromagnetic pulse to disable the transmitter. Before she’s sedated, Beth asks for euthanasia if they can’t keep her humanity intact. Unbeknownst to the team, a secondary transmitter activates, waking sleeper agents nearby who kill loved ones and abandon tasks in progress.

The Cell within Beth awakens and breaks out of the vault. She escapes through the tunnels, and the team assumes that she showed them exactly what they wanted to see. Meanwhile, Beth takes advantage of her status off the alien network to visit Mike and say goodbye. The farewells become too much and Beth accidentally impales Mike with an alien blade. Jack and Gwen arrive and drag her away.

Across town, one of the sleeper agents kills Patrick Grainger, a local council leader. Another sleeper agent uses a fuel tanker to destroy a highway and underground fuel pipeline. More and more sleepers are scrambled to seed chaos and prepare the planet for invasion. The demand information from Beth and urge her to connect to the network. She reveals that there is only one agent left.

While the team panics about loss communications, Jack rigs a CB radio to reach them. They track the sleeper to an abandoned farm which was a front for a coalmine housing ten nuclear warheads. The soldiers guarding the arsenal are unable to stop him. When Jack and Gwen arrive, they ram him with the SUV.

The sleeper runs Jack through with the arm-sword while Gwen disables the transmitter. The sleeper tells Jack that they’re too late before committing suicide by bomb: The invasion is already underway.

Beth returns to the Hub for cryogenic freezing. She feels guilty for what she has done, but fears becoming an uncaring murderer. She thanks Gwen for her compassion, asking her to remember who Beth was before holding Gwen hostage with the arm-blade. Gwen begs the team not to kill Beth, realizing that Beth wants to them to kill her while she’s still human. She succeeds by threatening Gwen, falling dead as the team opens fire.

Gwen and Jack talk later, discussing the upcoming wedding and the invasion. Gwen believes that even if they haven’t stopped it, they know enough now to fight when the day comes.


This was a pretty straightforward story that outlined a hidden threat in society. The drama surrounding Beth’s humanity and identity crisis was riveting and engaging, and it kept the episode from becoming another monster-of-the-week bonanza.

The one link back to the continuing Doctor Who mythology was the mind probe, an element mentioned before in Frontier in Space and The Five Doctors. Other than that, this is all-new territory with an all-new threat.


Rating: 4/5 – “Would you care for a jelly baby?”


UP NEXT – Torchwood: To the Last Man


The Timestamps Project is an adventure through the televised universe of Doctor Who, story by story, from the beginning of the franchise. For more reviews like this one, please visit the project’s page at Creative Criticality.


Timestamp #TW14: Kiss Kiss, Bang Bang

Torchwood: Kiss Kiss, Bang Bang
(1 episode, s02e01, 2008)


Nothing good happens at midnight in Cardiff.

As evidence of that claim, a sports car pulls up and motions an elderly lady across the street. When the light turns green, the car speeds off, but Torchwood is in pursuit. After a short chase, the team catches up to the Blowfish and Owen shoots out the car’s tires. They find the Blowfish holding a family hostage. The Blowfish taunts the team and urges Ianto to shoot him, but a mysterious gunman shoots the Blowfish between the eyes.

Yes, Jack, they missed you.

Back at the Hub, Gwen airs her frustrations with Jack’s disappearance. Jack says that he found his Doctor, but came back for the team. The moment is interrupted by Rift activity as a mysterious man appears from thin air and walks into a mugging. This stranger, Captain John Hart, solves the problem by dropping the mugger off the side of the car park. He threatens the victim, vowing that he was never there, and then retires to a nearby club. He tells everyone who he doesn’t find attractive to leave, and when that doesn’t work, he pulls two handguns. The crowd panics.

While Torchwood Three investigates the dead mugger, Jack gets a holographic message from John. After a nod to Star Wars, Jack rushes off to find the new arrival. Inside Bar Reunion, there’s a reunion involving kissing, fighting, and drinking to the sounds of Blur.

Torchwood Three responds to the disturbance, Jack and John catch up. John went to rehab for drink, drugs, sex, and murder. Jack finds out that the Time Agency has been shut down with only seven agents left in the field. John ridicules the team name – “Oh, not Excalibur?” is a nice nod to the original pitch for the show – and explains that they were partners for two weeks. Except that it was two weeks in a time loop, so it was more like five years.

John finally explains that he’s looking for three deadly radiation cluster bombs scattered across Cardiff. They must be found and neutralized or else the Earth is in danger. The team takes John back to the Hub (which is missing a pterodactyl) and scan him for weapons. He has a lot of them.

Gwen takes Jack aside and asks about his time away. Jack talks about seeing the end of the world but tells Gwen that he came back for her. Gwen reveals that she’s engaged to Rhys, mostly because “no one else will have” her. Well, then, back to work.

Tosh finds the bomb locations and Gwen organizes teams to search in pairs: Jack and Ianto, Owen and Tosh, and Gwen and John. Jack takes Gwen aside and they hash out her plan to figure out what John is really up to. Jack relents, but warns her not trust him and not to let John kiss her.

Gwen and John find the first cluster bomb at a container shipping yard. John double-crossed Gwen by kissing her with poisoned lip gloss. Gwen is paralyzed with a time limit of two hours before her organs shut down. John locks her in the container and leaves, disposing of her mobile phone along the way.

Owen and Tosh search through an abandoned building. They find the bomb, but John ambushes them. Tosh is knocked out and Owen takes a bullet to the hip. Elsewhere, Jack and Ianto search an office building and sort through their relationship. Jack goes to the roof while Ianto looks through the office floor. Ianto is ambushed by John and told to help his friends. John goes to the roof, and after Jack throws the final bomb over the side, John pushes the good captain over for good measure.

The murder rehab never worked.

Ianto goes to Owen and Tosh. After dressing the gunshot, they all go to the docks and rescue Gwen.

Meanwhile, John takes Jack’s wrist device and returns to the Hub. He retrieves a pyramid-shaped device from the Blowfish’s corpse but is surprised by the Torchwood team… including a resurrected Jack Harkness. John reveals that there are no cluster bombs, but rather an Arcadian diamond that belonged to a former lover that he killed. The “bombs” were a tracking system to find the diamond, but the loot is a trap. It turns out to be a bomb that locks onto the DNA of her murderer – John Hart – and will kill him in ten minutes.

John cuffs himself to Gwen and swallows the key, forcing the team to find a solution. They take John to the Rift where he first arrived while Jack and Owen develop a DNA plan. They inject John with the DNA of every Torchwood member, forcing the bomb to detach. Jack tosses it into the Rift and the shock wave launches all of them back to the moment when John arrived.

John produces the key and unlocks the handcuffs. Gwen sucker punches him and Jack shows him the door. As John disappears into the Rift, he reveals something: “I found Gray.”

Jack is stunned, but won’t reveal who Gray is. The team gets back to work.


The team is pretty much right where we left them, though the tensions are high due to Jack’s disappearance. James Marsters – Spike of Buffy the Vampire Slayer and Angel fame – amps up that tension with a good dose of chaos thanks to Chris Chibnall’s fast-paced writing.

Otherwise, the threads are laid for the season ahead with John Hart, Gray, Gwen’s pending nuptials, and the team’s distrust of Jack, all starting with this exciting return episode.


Rating: 4/5 – “Would you care for a jelly baby?”


UP NEXT – Torchwood: Sleeper


The Timestamps Project is an adventure through the televised universe of Doctor Who, story by story, from the beginning of the franchise. For more reviews like this one, please visit the project’s page at Creative Criticality.


Timestamp #194: Time Crash & Voyage of the Damned

Doctor Who: Time Crash
Doctor Who: Voyage of the Damned
(Children in Need and Christmas Specials, 2007)

When you look deep into the pockets of the universe, you never know what you find.

Time Crash

Immediately after Martha left the TARDIS and the Doctor once again took flight, the blue box goes haywire. The Doctor stabilizes the time capsule, but he finds himself face-to-face with the Fifth Doctor. The Fifth Doctor is confused but the Tenth Doctor is amused, getting nostalgic about the frowny face, the hat, the coat, the crickety-cricket outfit, the brainy specs, and even the decorative vegetable on his lapel.

The Fifth Doctor is beside himself, but his frustration is interrupted by a warning that two TARDISes have merged and have the potential to blow a hole in the space-time continuum the size of Belgium. The Fifth Doctor thinks that the Tenth Doctor is a fan, possibly from LINDA. The Tenth offers the Fifth a sonic screwdriver but remembers that he went hands-free at this point in his lives.

At the moment of Belgium, the Doctors initiate a supernova and a black hole at the same time and separate their capsules. The Tenth works to send his predecessor home, curious if Nyssa and Tegan were with him, or whether he has encountered the Cybermen, the Mara, or the Master yet. The Tenth Doctor admits that he just faced the Master, prompting the Fifth to ask about “that rubbish beard.” The Tenth replies that the beard is gone, replaced by a wife.

Oh, Steven Moffat and his jokes about homosexuality.

As the Fifth Doctor returns his time, the Tenth takes a moment to say goodbye. After all, the Fifth Doctor was his Doctor.

The moment is broken when a ship crashes through the TARDIS walls.

Her name is Titanic.

Voyage of the Damned

The Doctor uses the TARDIS console to regenerate the capsule’s walls and materialize aboard the cruise liner. He finds a Christmas party in full swing, complete with aliens and seemingly robotic angels, as the starliner Titanic settles into orbit with the planet Earth spinning around below.

The ship’s captain offers his stalwart crew a tot of rum to celebrate the holiday. The bridge crew leaves except for a midshipman who quotes regulation to the captain, and he’s allowed to stay behind.

The Titanic is a Max Capricorn cruiseliner, which the tuxedo-clad Doctor discovers as he views a promotional ad before rejoining the party. He finds that the robotic angels, the Host, are the shipboard information system. The ship was named after the most famous vessel of the planet Earth and is en route from Sto to observe the human holiday. The angel short circuits and is taken below to the engineering section with all of the other malfunctioning robots.

Among all the lovers in the room, the Doctor meets Astrid Peth, a member of the ship’s staff who accidentally drops a drink tray. She wants to travel like the Doctor, and realizing that it’s never too late, he reveals himself as a stowaway. She’s impressed – almost like love at first sight – and offers a drink instead of reporting him. The Doctor joins a table with Morvin and Foon Van Hoff, a couple in sparkly Western-style dress who are being mocked by the black-tie guests. The Doctor uses the sonic screwdriver to pop a champagne bottle and douse the bullies before joining the Van Hoffs for a trip to the planet below. En route, he spins Astrid around and brings her along. After a poorly researched historical brief, the party is joined by a small spiky red-skinned alien before they all transmat down to a deserted city.

The Doctor is perplexed: London should be bustling with people, but there’s not a soul in sight.

He asks Wilfred Mott, a newsstand operator, where everyone is on a night like this. He points to the last two Christmas invasions as examples that drove people to flee the city just in case. Better the devil you know, right? The Doctor and Astrid are beamed back up, mid-sentence, due to irregular power fluctuations on the ship. The Doctor is intrigued.

Meanwhile, the captain has magnetized the hull to draw in nearby passing meteors. The midshipman is perplexed. The Doctor discovers that the shields are down and tries to warn the bridge, but he’s ignored and apprehended. He tries to warn the passengers but is taken away. The captain also shoots the midshipman to prevent him from stopping events. He has been extorted in some way.

The passengers start to come around but everyone is too late to stop the collision. The ship is struck on the starboard side and mayhem erupts. As the Host come back to life in engineering, the Doctor notes that the chaos has stopped for the time being. He also remarks that Titanic is a bad name for a ship and that his tuxedo is awfully unlucky.

One of the crew inadvertently causes a hull breach but the Doctor re-enables the oxygen shield. He also watches as the TARDIS drifts by. Luckily, it locks on to the nearest planet and flies into the blue. Unfortunately, they can’t reach it.

Another bit of bad luck? The Host are now programmed to kill.

The Doctor makes contact with the bridge and Midshipman Frame. They discover that the storm drive engines are spooling down. If ship loses locomotion and plummets into the planet, it will cause a nuclear explosion and a planetwide extinction event. The ship is a timebomb.

The Doctor – “I’m the Doctor. I’m a Time Lord. I’m from the planet Gallifrey in the constellation of Kasterborous. I’m nine hundred and three years old and I’m the man who’s going to save your lives and all six billion people on the planet below. You got a problem with that?” – believes that it’s never too late and asks the survivors to confide in him. He takes charge and rallies them to both escape and save the planet. Astrid really believes in him.

As they move through the ship, Mr. Copper, the historian, keeps getting information about the planet below all wrong. They discover a disabled Host and the Van Hoffs (who are robotics experts) start trying to fix it. Meanwhile, Bannakaffalatta (the small red alien who is really a cyborg) scouts ahead through the wreckage as Astrid and the impossible Rickston Slade try to move enough wreckage to get everyone through. Astrid and Bannakaffalatta develop a special relationship as they go.

Midshipman Frame discovers that the Host are corrupted after they kill survivors in the galley. He warns the Doctor just as the Van Hoffs fix their disabled robot. The group of survivors rush to safety, learning on the way that the Host are being controlled from Deck 31. The Host assault the bridge, forcing Frame to deadlock the hatches and seal himself in without escape.

The survivors take a meal break while they have a chance. The Doctor and Astrid continue building their relationship while Copper reveals that he lied to get his job. The Host banging on a nearby bulkhead force the survivors to press forward, but that leads them to the space above the nuclear engines. The space between bulkheads is spanned by a narrow bridge, and as Morvin declares that he and Foon will go last, the deck gives way and he plummets to his doom. Astrid comforts Foon as Slade crawls across the bridge.

Bannakaffalatta goes next, followed by Astrid and Copper. Foon refuses to cross and the Doctor promises to come back for her. The Host stops banging on the bulkheads, but only because they take flight and start using their halos as deadly discuses. Bannakaffalatta reveals his nature to the survivors with an electromagnetic pulse, disabling the Host but giving his life in the process.

Copper salvages the electromagnetic transmitter as a remaining Host rises. The Doctor stumbles onto a security override that allows him three questions, so he learns that the Host have been instructed by their leader to kill the survivors. The Host raises its halo to strike but Foon wraps it in a rope and jumps over the side, sacrificing herself for the group.

Vowing that no more shall die tonight, the Doctor sets everyone to work. Astrid makes her case to join him on the TARDIS and he agrees that it would be wonderful to have her step back in time with him. He sends the survivors with the EMP unit and his sonic screwdriver, and with a kiss from Astrid, he rushes down to Deck 31.

Astrid, Copper, and Slade successfully defeat a group of the Host while the Doctor reveals himself as a stowaway and negotiates his arrest. The survivors make it back to the ballroom and while Copper and Slade work on the distress signal, Astrid convinces Frame to give her enough power to transmat to Deck 31 and help the Doctor.

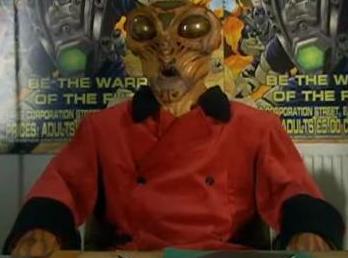
The Doctor arrives on Deck 31 and meets the ultimate authority behind the night’s events: Max Capricorn. Or rather, the disembodied head on a rolling robotic life-support system, running the company by hologram in a culture that distrusts cyborgs. Capricorn is angry that the ship hasn’t crashed yet, and the Doctor takes the time to unravel the plan. Capricorn’s company has failed and he has been pushed out by the board, so if the Titanic destroys the Earth, he gets revenge as the board gets jailed for murder. Capricorn will survive in a special chamber and live out his life far away.

Capricorn reveals that he can remotely shut down the engines, forcing the Titanic to crash. As Capricorn orders the Doctor’s execution, Astrid rushes in with a forklift and drives Capricorn’s robotic body over the side into the engine below. The Doctor, begging inside for just a little more time, watches as she falls to her death.

The resolute Time Lord declares himself as the next highest authority on the ship and orders the Host take him straight to the bridge. They burst through the deck and the Doctor takes the helm from Midshipman Alonso Frame, steering the ship straight into the atmosphere. He calls up Buckingham Palace, ordering the Queen and her corgis to evacuate just in case his calculations are off. On the street below, Wilfred screams at the sky.

The Titanic barely misses the palace (but gets a Christmas greeting from the Queen) and sails into the sky, using the heat of re-entry to restart the auxiliary engines. The Doctor did it again.

He has an epiphany and tries to use the teleport bracelets to restore Astrid using their safety protocol. He’s only partially successful due to the damage in the system, bringing her back as only a fragment of her former self. The Doctor apologizes and kisses her in a bittersweet goodbye before opening a porthole and sending her atoms to fly among the stars forever.

Frame, Copper, and Slade, the only survivors of the starliner Titanic say their farewells to the Doctor. Copper offhandedly remarks that, if someone could decide who lives and who dies, it would make them a monster. The Doctor hands him a bracelet and they teleport to the surface. The Doctor refuses Copper’s request to travel with him, but he does explain that the credit card that Copper carries for Earth incidentals makes him a millionaire.

Copper dances away with the promise he will make the Doctor proud… and that he will always remember Astrid.

The episode closes on a dedication to Verity Lambert, OBE. She was the first producer of Doctor Who, and she died a month before this story was originally aired.

Both of these episodes were pure fun. Starting with Time Crash, we get the first multi-Doctor story of the revival era as well as the first time a classic-era Doctor’s actor was in the opening credits. It was directed by Graeme Harper, whose first credited directorial work in Doctor Who was Peter Davison’s last story.

It’s a better two-Doctor story than The Two Doctors, but that’s not hard to do.

It also marks the return of Steven Moffat to Doctor Who, a name we will see one more time in the Tennant era. The Curse of Fatal Death, The Empty Child/The Doctor Dances, The Girl in the Fireplace, Blink, and this small story are leading to bigger adventures for him in the coming years.

Moving to Voyage of the Damned, we get a rollicking adventure with a celebrity guest star as a one-shot companion. Kylie Minogue is magnetic in this story and it’s a shame that we didn’t get the chance to see her as a regular. She did a magnificent job in driving the contrast between the lonely Time Lord and one who travels with companions. She also indirectly proved the points that the Doctor is not a god and that he is not infallible.

The Host look very similar to the Axons and the Capricorn cyborg is reminiscent of Davros. We also get a couple of cameos with singer Yamit Mamo (including original song “The Stowaway“) and BBC journalist Nicholas Witchell. If you look closely at the Titanic‘s band, you’ll also note Murray Gold and Ben Foster.

The big drawback to this episode was the overuse of the Hans Gruber moment. The slow-motion shot of someone falling while looking up towards the camera happened four times – the steward, Foon, Morvin, and Astrid’s respective deaths – and that count is bordering on comical.

Regardless, this pair of stories was an entertaining adventure and a fantastic lead-in to Series Four.

Rating: 5/5 – “Fantastic!”

UP NEXT – Torchwood: Kiss Kiss, Bang Bang

The Timestamps Project is an adventure through the televised universe of Doctor Who, story by story, from the beginning of the franchise. For more reviews like this one, please visit the project’s page at Creative Criticality.

Timestamp: Sarah Jane Adventures Series One Summary

Sarah Jane Adventures: Series One Summary


This was a pleasant surprise.

I mean, yes, the headline is Elisabeth Sladen reviving her iconic role as Sarah Jane Smith, one of my absolute favorite companions in Doctor Who. But I have also seen so many franchises falter when trying to cater to a younger crowd. All too often they water down the property to make it more – shall we say? – palatable for children, and that tends to carve away the support structure. Everything that made the material strong gets lost in an attempt to gain more eyes.

It’s insulting, really. It’s almost as if creators are asking children not to think or analyze, but just consume.

The Sarah Jane Adventures did not do that. It tackled issues important younger audiences – who could readily identify with the stars of the show – while not pulling any punches with the Doctor Who style. It was refreshing for the genre.

The characters are strong overall, and while I fault the BBC for removing Kelsey Hooper because they thought that there were too many women on the show, Clyde Langer is a decent enough replacement. I’m really enjoying the mentoring relationship between Maria and Sarah Jane, and the evolution of Sarah Jane Smith as she builds a family on Bannerman Road is beautiful.

(Other sources claim that Porsha Lawrence-Mavour was fired due to being rude and difficult to work with, but I haven’t seen anything definitive on that.)

When I was coming up to this show in the Timestamps Project, Michael French of Retroblasting told me that he enjoyed it. That was a strong endorsement, and it’s one that I agree with. I’m also glad that he didn’t spoil the big twist with Mr. Smith because that was fun to watch without knowing about it beforehand.

Series One comes in at an average of 4.3. In comparison to Doctor Who, that’s on par with Series One and Series Three near the top of the stack. This series easily beats the first series of Torchwood.

Invasion of the Bane – 5
Revenge of the Slitheen – 4
Eye of the Gorgon – 3
Warriors of Kudlak – 4
Whatever Happened to Sarah Jane? – 5
The Lost Boy – 5

Sarah Jane Adventures Series One Average Rating: 4.3/5


From here, the path for the Timestamps Project continues on a mostly airdate order. Next up is Time Crash and Voyage of the Damned, followed by the second series of Torchwood and Series Four of Doctor Who.

We’re also on the verge of the holiday season, so Timestamp releases may take a break here and there over the next month or so. Keep an eye on the Facebook page for the most up to date scheduling info.


UP NEXT – Doctor Who: Time Crash & Doctor Who: Voyage of the Damned


The Timestamps Project is an adventure through the televised universe of Doctor Who, story by story, from the beginning of the franchise. For more reviews like this one, please visit the project’s page at Creative Criticality.

Timestamp #SJA6: The Lost Boy

Sarah Jane Adventures: The Lost Boy
(2 episodes, s01e06, 2007)


Mr. Smith, the planet needs you.

After Alan Jackson discovered the truth about the Bannerman Road Gang, he and Maria discuss her adventures. He decides to keep it all secret by putting the house on the market and moving away. Across the street, Sarah Jane and Luke are stargazing when Maria breaks the news. Alan joins the conversation and eventually realizes that staying is the best option for his family. The group watches the Kalazian Lights fly through the night sky.

The next day, the group is startled by a televised press conference about a missing child who looks just like Luke and was last seen boarding the Bubble Shock bus. Sarah Jane has Mr. Smith scan Luke to determine reality and the supercomputer declares that Luke is the missing boy, Ashley Stafford. The lack of bellybutton is credited to the Bane, an egg-born species, being offended by its presence.

Chrissie Jackson calls the police and Sarah Jane reluctantly turns Luke over. The neighborhood watches as Ashley’s parents arrive. Tensions rise – Chrissie gloats at the drama she’s created – and Sarah Jane is taken into custody. She is later released, thanks to UNIT.

Luke is taken to his new home but as trouble fitting in with the expected lifestyle. He’s also dismayed that he’s locked into his room at night. Jay and Heidi Stafford contact a character named Xylok through their television, reporting that they have him in custody. Luke is also prohibited from seeing his friends or even attending school again.

Maria tries to console Sarah Jane but she’s convinced that the only path forward is to dissolve the Bannerman Road Gang, suggesting that Maria should move away. Sarah Jane holes up in the attic and Mr. Smith suggests that she needs a purpose. He points her toward the Pharos Institute, a research center where alien technology is being used to conduct experiments into telekinesis. There she meets an annoying child prodigy named Nathan Goss.

Clyde and Maria decide to skip school to see Luke. Maria is stopped by a teacher, but Clyde is able to sneak out. Unfortunately, Heidi refuses to let him in. She also claims that Ashley is a great skateboarder, which Clyde knows to be a lie. After Clyde leaves, Nathan arrives and tells the supposed parents that they have a problem. Luke tries to escape and is stopped. He learns the truth about his captors: They are the Slitheen from their failed revenge attempt, this time with improved skin suits.

Sarah Jane is directed by Mr. Smith to return to Pharos and steal one of the telekinetic headsets. After she leaves, Clyde heads to the attic and asks Mr. Smith to analyze a photo of Ashley and his parents. Mr. Smith reveals that he is the Xylok and that he faked the photo. He digitizes Clyde, TRON-style, and stores the boy in his memory banks with a fiendish laugh.

I didn’t see that twist coming.

Sarah Jane sneaks into Pharos with her sonic lipstick. She swipes the headset, which triggers an alarm, but escapes with secret agent flair.

Clyde wakes up inside the supercomputer. He watches as Sarah Jane turns the headset over to Mr. Smith and tries to figure out how to make contact. Meanwhile, Maria desperately tries to find Clyde. Alan decides to accompany Maria to the Stafford residence. When they find no one home, they decide to break in. Alan stumbles across a skin suit and Maria discovers what’s going on. They return home to find Chrissie and Maria sneaks away to tell Sarah Jane about the threat.

Clyde uses the internet to warn Alan through his laptop. Alan rushes to tell Sarah Jane just as Mr. Smith reveals himself and tries to kill Alan, Maria, and Sarah Jane. The humans escape and retreat to the Jackson house. Mr. Smith incapacitates Clyde as a result.

Sarah Jane tells the Jacksons about a crystal that she was sent from the Krakatoa volcanic eruption. It turned out to be a Xylok memory crystal, and Sarah Jane used it to build a supercomputer. She puts the pieces together that the Slitheen plan to harvest Luke’s telekinetic energy for sale on the open market, and she knows that they are probably at the Pharos Institute. They head out, stopping for vinegar at a chip shop along the way.

The Slitheen try to harvest the energy but Luke escapes after overloading the system. He dodges the Slitheen and leaves just before Sarah Jane and the Jacksons arrive. The Slitheen take Maria hostage to disarm Alan, then explain how Mr. Smith contacted them with a promise of revenge. Sarah Jane determines that they are all being played by the Xylok to harness Luke’s powers.

Luke returns to Bannerman Road and is coerced into donning the headset. Mr. Smith channels the telekinetic energy to propel the Moon toward Earth in an effort to crack the planet and release the rest of the Xylok.

Sarah Jane strikes a bargain with the Slitheen by asking Alan to stop the supercomputer. She uses the Slitheen teleporter to return to the attic and confront Mr. Smith. He thanks her for helping him to execute his plan, showing mercy by returning Clyde. Sarah Jane distracts the Xylok long enough to release K9 from his black hole mission. K9 fires on the supercomputer while Sarah Jane uploads a virus that wipes Mr. Smith’s memory. The supercomputer shuts down and K9 returns to the safe.

The Bannerman Road Gang, now with a forgiven Chrissie, watch the Slitheen fly away. Mr. Smith reboots with a renewed purpose to safeguard the Earth while Sarah Jane reflects on her newfound family.


The first series of The Sarah Jane Adventures ends with style as this adventure touches on almost the entire lifespan of this family’s story so far. It also throws the audience a nice twist by revealing that a powerful ally has been scheming against our heroes this entire time.

The entire gang gets involved to not only save Luke, but to also save the world.


Rating: 5/5 – “Fantastic!”


UP NEXT – Sarah Jane Adventures: Series One Summary


The Timestamps Project is an adventure through the televised universe of Doctor Who, story by story, from the beginning of the franchise. For more reviews like this one, please visit the project’s page at Creative Criticality.


Timestamp #SJA5: Whatever Happened to Sarah Jane?

Sarah Jane Adventures: Whatever Happened to Sarah Jane?
(2 episodes, s01e05, 2007)


What would the world have been without Sarah Jane Smith.

Clyde introduces Luke to skateboarding, much to Sarah Jane’s chagrin. When Clyde tries and fails to ollie, Alan demonstrates the trick and then shows off his skills. The group takes some photos, prompting Sarah Jane to get the chills before they all head home.

Sarah Jane asks Mr. Smith about a meteorite that is heading straight for Earth, but she’s not worried since she can save the world without alerting a soul. Maria notes that without her the planet would be doomed, and Sarah Jane offers the young woman an alien puzzlebox. It came from a Verron Soothsayer with instructions to give it to the person she trusts the most and just to “remember.”

Maria heads home and works on the puzzle box while a cloaked figure stalks Bannerman Road. The mysterious figure gestures and everything about Sarah Jane disappears. The puzzle box glows blue and Maria jolts awake as if from a nightmare. The next morning, Alan shows off his old skateboard and talks about a woman named Andrea. Maria heads over to Sarah Jane’s house this Andrea in her friend’s place. Alan has no idea who Sarah Jane Smith is either, and she and Luke are missing from the photos from the previous day.

Maria calls Clyde, who doesn’t remember Sarah Jane either, and recalls that the meteorite is still headed for Earth. Maria bursts into 13 Bannerman Road and heads for the attic, but there’s no trace. Even Mr. Smith is gone.

Sarah Jane Smith has apparently been removed from existence along with the history of this entire show outside of Maria’s memory.

Even though Alan doesn’t believe her, Maria searches the internet for traces of Sarah Jane Smith. They eventually head to the library and discover that thirteen-year-old Sarah Jane Smith drowned in 1964 and Andrea Yates, the woman across the street, was her best friend. Maria faintly hears Sarah Jane’s voice as the names in the article flutter, but faced with the threat of being sent to the doctor for her delusions, Maria rolls with the new reality.

Maria apologizes to Andrea before reminding the woman of Sarah Jane Smith. Andrea doesn’t recall any of it until Maria presses the issue, but she then angrily pushes Maria out of the house. Andrea panics and rushes upstairs to find a puzzle box identical to Maria’s. She sees the cloaked figure in the mirror and is reminded of their agreement, and she begs to have Maria forget. The cloaked figure offers to make Maria disappear and Andrea agrees. All she has to do is separate Maria from Alan.

Meanwhile, Maria sees Sarah Jane in the mirror. As Andrea takes Alan to her house, Maria finds her puzzle cube and encounters a creature called the Graske that chases her out of the house. The Graske transmats Maria away and removes her from the timeline, but luckily Alan finds the puzzle cube and remembers her (even though Chrissie cannot).

Maria breaks free of the Graske and is deposited on a pier. The date is July 13, 1964, and Maria meets a young Sarah Jane Smith and Andrea Yates. Maria pleads with the girls not to go down the pier but they ignore her. The Graske arrives and transmats Maria back into captivity where she finds the adult Sarah Jane. They are the only occupants of a misty plane called Limbo.

The mysterious figure summons Sarah Jane and explains that he has removed her from the timeline in order to feed off the chaos that the meteorite will cause. This also removed the Bane, the Slitheen, the Gorgon, and Kudlak from recent history to perfectly craft his plan. He also plans to remove the Doctor in order to prevent any interference and sow an unlimited amount of chaos in the universe.

Alan, Chrissie, and Clyde attend Andrea’s party. Clyde gets word of the meteorite and turns on the news. That triggers Alan’s memory of Maria, and he pulls Andrea aside to get to the truth.

When Andrea and Sarah Jane were on a school trip in July 1964, they left to explore on their own. They went into the construction zone on the pier and Andrea tumbled over the side. Sarah Jane tried to save her friend, but Andrea wasn’t able to hold on. The mysterious figure told Andrea that she could switch places and she agreed, sealing Sarah Jane’s fate. The puzzle box was a gift to help her to forget on the condition that the mysterious figure would be with her forever.

Alan is disgusted, doubly so since Andrea made the deal twice. The mysterious figure offers to send Alan away so Andrea bats the original puzzle box away and the Graske shows up to give chase. Alan outwits the Graske with his skateboard and uses the snare device to rescue Maria.

As the meteor bears down on the planet, Andrea realizes that Sarah Jane can save the world. Maria and Alan run for the attic and find Andrea begging the mysterious figure for help. Andrea sees Sarah Jane in the mirror and Maria tells Andrea to break off the deal. Together, they appeal to Andrea’s humanity in an amazing scene between Elisabeth Sladen and Jane Asher.

Andrea faces the mysterious figure (which Alan calls “The Trickster”) and rescinds the offer. With a final farewell to Sarah Jane, the proper timeline is restored. Without a second to spare, Sarah Jane activates Mr. Smith and stops the meteor from hitting Earth.

Of course, all of it was in full view of Alan Jackson. And he demands an explanation.


What a fun trip! The alternate timeline constructed by this story is a fascinating thought experiment, one that apparently keeps all of Sarah Jane’s victories with the Doctor intact but credits them to this Trickster entity. The Trickster’s threat to remove the Doctor from existence echoes the Master’s plan in The Five Doctors, and his intentions to undo every victory in the Time Lord’s adventures are perfectly clear.

Regarding our characters, the Sarah Jane/Maria friendship continues to grow beautifully, and the introduction of Alan to the Bannerman Road Gang is hilarious and welcome.

There was a nice reference here to the Church of the Tin Vagabond, as well as a clever nod to the Black Guardian and Turlough in Mawdryn Undead: “Waking or sleeping, I am always with you.”


Rating: 5/5 – “Fantastic!”


UP NEXT – Sarah Jane Adventures: The Lost Boy


The Timestamps Project is an adventure through the televised universe of Doctor Who, story by story, from the beginning of the franchise. For more reviews like this one, please visit the project’s page at Creative Criticality.


Timestamp #SJA4: Warriors of Kudlak

Sarah Jane Adventures: Warriors of Kudlak
(2 episodes, s01e04, 2007)


Be all you can be in the Uvodni army.

In a laser tag facility known as Combat 3000, a boy named Lance Metcalf goes down a side corridor and is transmatted away. An alien named Kudlak reports the new arrival to his superior – the Mistress – who then demands more… so many more.

Luke and Maria are sharing a day in London and receive vouchers for half-price admission to Combat 3000 from a shady Mr. Grantham. It seems that he is the human liaison for the child-snatching aliens. Meanwhile, Sarah Jane is investigating Lance’s disappearance starting with his widowed mother Carrie.

The Bannerman Road Gang is “bogging” around in the attic, much to Sarah Jane’s chagrin. She asks them about Lance and learns about his nickname – the Corporal – which infuriates her since Lance’s father was killed in Iraq. Luke unknowingly coined the nickname and therefore takes Lance’s disappearance to heart. Luke storms out and Clyde goes to talk to him while Maria and Sarah Jane look for Lance’s friend Brandon.

Brandon relays a story about a stormy day when the weather was perfectly clear everywhere else. Sarah Jane and Maria are baffled. Back near Bannerman Road, Clyde talks with Luke as Sarah Jane and Maria research the isolated storm. The short-lived storms are linked to disappearing children across the country, prompting the ladies to build a gadget to solve the mystery. The device extracts entanglement shells – terraforming seeds and residue of transmatting – from the atmosphere. With Mr. Smith’s help, they isolate the epicenter of the freak storm to Combat 3000.

Aliens: confirmed!

Luke and Clyde decide to visit Combat 3000 as a distraction (were Kudlak is taking his frustrations out on Grantham). Grantham takes interest in Luke based on his stellar performance during the game. Meanwhile, Sarah Jane and Maria investigate the facility – Maria makes Sarah Jane promise never to use slang again – as Luke and Clyde make their way through the increasingly difficult gaming levels. The ladies break into Grantham’s office and, when caught in the act, confront the man about the missing kids. He pulls a gun (from another planet) on them as a rainstorm begins. Sarah Jane tricks him with the sonic lipstick and they escape, set on finding the transmat device.

Meanwhile, Luke and Clyde make it through a surprise attack and enter what they think is the final room. The boys are trapped and transmatted away as Sarah Jane and Maria watch, finally meeting the mysterious Kudlak. They escape from Kudlak – Sarah Jane lightens the mood by quipping about her UNIT training – and return to Bannerman Road. Mr. Smith identifies Kudlak as an Uvodni, part of a planetary alliance that fought against the Malakh. After being injured, Kudlak was sent to recruit warriors from across the universe.

Luke and Clyde are forcibly placed in a wooden crate and rolled to a storage area. Luke uses the laser tag gear to break them out of the crate and free the other kids as well. Together they break out of the storage area and discover that they are on a spaceship orbiting Earth. They also meet Kudlak when he finds them and introduces them to the Mistress as good warrior stock. When they return to the storage room, Luke wires his mobile phone into the ship’s computer and locates a shuttlecraft. They are soon found by Kudlak and taken into custody.

Sarah Jane and Maria are interrupted by Grantham as he breaks into the house and tries to kill Sarah Jane. Maria uses an electrical circuit from the earlier device to incapacitate Grantham. Once they figure out that Luke and Clyde are in orbit, they take Grantham back to Combat 3000 to find the transmat device. Until the pressure of being sent to prison, Grantham transmats them to the orbiting ship.

Sarah Jane and Maria search for the kids, taking time for Maria’s breathtaking first look at the planet from orbit. They find the room where Kudlak communicates with the Mistress, but their discussion is interrupted by Kudlak and the missing kids. Luke shows Kudlak evidence that the war has ended while the solider was away, and Kudlak discovers that the Mistress is nothing more than a computer subroutine.

Kudlak destroys the computer and frees the humans, offering his life in exchange for his crimes against Earth. Sarah Jane pardons him and Kudlak offers to find the humans he previously sent away in exchange. The Bannerman Road Gang leads the missing kids back to Earth, and Luke gets a kiss from former fellow captive Jen as a reward.

They take Lance home and speculate about his future – perhaps he’ll be the first human man on Mars? – before Luke asks Clyde to explain the mysteries of girls.


This story was a step up with significant character development for Clyde and Luke. The continued friendship and deepening trust between Sarah Jane and Maria is also a great touch for the series. I was also impressed with the twist for Kudlak: The story’s enemy doesn’t die, despite his desire to sacrifice himself for the cause, and ends up seeking redemption in the end. That’s some classic-era-level storytelling.

The in-universe references were fun – background appearances include a Cyberman, Krillitane wings, and the Beast‘s horns – as were the cross-franchise references like Star Trek and Planet of the Apes, but the best one was musical. When Clyde jokingly identified as Luke’s Obi-Wan Kenobi, composer Sam Watts added a quiet nod to John Williams with a slice of the Force Theme.

The big distraction in this episode was Kudlak. Specifically, his eyes. Because they were all over the place. It echoes the classic era’s shoestring-and-ham-sandwich budget, but it really pulled me out of the story with modern television resolution.


Rating: 4/5 – “Would you care for a jelly baby?”


UP NEXT – Sarah Jane Adventures: Whatever Happened to Sarah Jane?


The Timestamps Project is an adventure through the televised universe of Doctor Who, story by story, from the beginning of the franchise. For more reviews like this one, please visit the project’s page at Creative Criticality.


Timestamp #SJA3: Eye of the Gorgon

Sarah Jane Adventures: Eye of the Gorgon
(2 episodes, s01e03, 2007)


That moment when Alan Jackson gets stoned.

At the Lavender Lawns retirement home, a group of women claims to see a mysterious ghostly nun. Clyde tells Sarah Jane and Luke about this phenomenon as they go to investigate. While Sarah Jane interviews Mrs. Randall and the staff, Luke encounters Bea Nelson-Stanley, a woman with Alzheimer’s. She gives Luke a talisman that glows green but is unable to explain what it does or why she has it. Mrs. Gribbins, one of the caregivers, watches the exchange with interest. The trio leave, unaware of a creepy nun skulking amongst the trees.

Meanwhile, at the Jackson home, Chrissie decides to move back in with her ex-husband. In short order, she’s at odds with Maria over the Smiths and being abandoned. Alan tries to talk with Maria, but she storms off to Sarah Jane’s house in anger. Alan confronts Chrissie about her effect on him and Maria.

Sarah Jane and the boys return to her house and consult Mr. Smith about hauntings. The supercomputer detects the talisman and determines that it is an alien device. Sarah Jane takes Maria with her to follow up with Bea, taking the opportunity to have a heart-to-heart.

The nun, Sister Helena, disapproves of Bea passing the talisman to Luke and takes Mrs. Gribbins to a hooded woman in a wheelchair. There’s some screaming and such. Sister Helena then traces Luke and Clyde to Bannerman Road in search of the talisman. She nearly attacks the boys but Alan stumbles by in search of Maria and offers a donation to her cause. Sister Helena leaves and the boys decide to return to Lavender Lawns. While en route, the sisters kidnap Luke and Clyde alerts Sarah Jane.

Bea tells Sarah Jane tales about Sontarans – “the silliest looking race in the galaxy” – and the Gorgon, part of adventures with her archaeologist husband Edgar. He unearthed the talisman in Syria and Bea protected it to keep the Gorgon at bay. Sarah Jane and Maria return to Bannerman Road to research the myths of Medusa and the Gorgons.

Sarah Jane tracks the nuns to St. Agnes Abbey while Clyde and Maria sneak around back. Sarah Jane is reunited with Luke and the kids as the nuns spring their trap, bringing the Gorgon before the team. The Gorgon is the last of an original group of three, and after 3,000 years, she wants to use the talisman to open a portal to her planet and return home. The boys are left at the abbey and the ladies are escorted back to Sarah Jane’s house. Sarah Jane threatens to use her sonic lipstick to destroy the talisman, but Alan arrives at the wrong time and ends up turned to stone as the nuns snatch the talisman.

The nuns retreat to the abbey as Maria lashes out at Sarah Jane in anger. Sarah Jane comforts her and offers a promise that everything will be okay. After consulting with Mr. Smith, it seems that reversal is possible but not entirely realistic. Maria returns to Lavender Lawns to talk to Bea while Sarah Jane returns to the abbey.

Meanwhile, Luke and Clyde do some research at the abbey and find a secret passage. It leads them out to the garden where they find a large collection of statues. The nuns return and start their work to open the portal, intent on allowing the Gorgon species to invade Earth. Luke and Clyde stage a distraction and steal the talisman, soon rescued by Sarah Jane before being surrounded by chanting nuns and tossed into the cellar. The nuns return for Sarah Jane with the intent of making her the new vessel for the Gorgon’s essence.

Faced with a difficult task, Maria eventually breaks through to Bea. The elderly woman was once petrified herself, but was able to survive through the power of the amulet. She offers Maria a mirror for her quest to defeat the Gorgon.

While everyone is away, Chrissie skulks around Sarah Jane’s house and mistakes Alan’s petrified form as an object of obsession over her ex-husband. After Chrissie bares her soul to the “statue,” it sheds a single tear as she walks away.

Luke fashions a lockpick from a garden spade and the boys escape from the cellar. They find Sarah Jane and the nuns as the portal opens and the Gorgon tries to transfer into Sarah Jane. Maria bursts in and uses the mirror to reflect the Gorgon back at its vessel, turning it into stone. She pulls the amulet and closes the portal, and the team rushes back to Bannerman Road to save Maria’s father.

Alan doesn’t remember the incident and Maria makes amends with both of her parents. Chrissie tries to reveal the statue to Alan, but without evidence, she has nothing to claim. Chrissie returns to her own home and bids her daughter farewell, both of them promising to look out for each other.

Maria and Sarah Jane speculate about the power of the amulet and wonder if it can save Bea from her Alzheimer’s. They return to Lavender Lawns and give it a try, but all the device can offer is a last word from Edgar: “I will always love you, Bea.” Bea smiles and thanks Sarah Jane and Maria. They pair leave Lavender Lawns with the knowledge that Bea has found peace, intent on returning home in time to watch the Viszeran Royal Fleet pass through the solar system.

After all, despite taking only a few seconds, it is the most magnificent light show this side of the galaxy.


Purely paint-by-numbers, this adventure was entertaining enough. It introduced a new enemy based on classic myths, as well as calling back to Sarah Jane’s early adventures with the Sontarans. Remember that her first adventure with the Third Doctor introduced everyone to the Sontarans, and she encountered them again in her extended first adventure with the Fourth Doctor.

Otherwise, the characters and story were straight down the middle of the road average. We get a nice bundle of references to Star Trek and 1964’s The Gorgon, but no callbacks to the Medusa-like encounter back in The Mind Robber.


Rating: 3/5 – “Reverse the polarity of the neutron flow.”


UP NEXT – Sarah Jane Adventures: Warriors of Kudlak


The Timestamps Project is an adventure through the televised universe of Doctor Who, story by story, from the beginning of the franchise. For more reviews like this one, please visit the project’s page at Creative Criticality.


Timestamp #SJA2: Revenge of the Slitheen

Sarah Jane Adventures: Revenge of the Slitheen
(2 episodes, s01e02, 2007)


They’re back, and this time they brought a kid.

Maria Jackson offers a brief recap of the characters and their last adventure as she heads to her first day of school. She meets up with Luke Smith – dropped off by Sarah Jane, who doesn’t want to be called “mum” – and they head toward the newly-built school building. Meanwhile, some familiar-looking aliens with familiar gas problems take over a teacher’s body.

Luke and Maria meet with new student Clyde Langer – Kelsey Hooper has conveniently disappeared, but not for reasons pertaining to this plot – and they join the assembled students for an orientation tour by the Slitheen-assimilated headmaster. Clyde notes that the building smells like metal and batteries, and a later lunch also proves strange.

Luke and Maria get a ride home with Sarah Jane. Alan Jackson and Sarah Jane talk for a moment about parenting and other new construction that smells like metal. While the Slitheen run electrical experiments, Sarah Jane does some research and counsels Luke on how to be a kid. The research reveals a company called Coldfire that has been building schools all across London.

Maria’s mother Chrissie stops by for a visit just as the Slitheen cut power to the entire city, including battery sources, Mr. Smith, and Sarah Jane’s wrist analyzer. Even candles refuse to stay lit. The Slitheen stop their experiment due to a faulty stabilizer and energy is restored, leaving the aliens with one step to go before destroying Earth.

The next morning, Sarah Jane talks to Alan as he gardens. She asks him about the school that he worked on – St. Cheldon’s Comprehensive – and investigates the connection. St. Cheldon’s has a new building just like Park Vale does, along with the same problems with electrical systems and spoiling food. All the while, someone is watching Sarah Jane on the school’s security cameras.

Meanwhile, Luke and Clyde bond over science class and the science-teacher-turned-Slitheen, Mr. Jeffery, wants to recruit Luke to help with the stabilizer problem. Luke unwittingly provides the answer while Sarah Jane asks Maria to snoop around the school while she checks out Coldfire Construction.

Luke and Clyde discover an unaccounted for space in the school while Maria is trapped by the Jeffery Slitheen in a computer lab. Sarah Jane encounters her own problems at Coldfire when the receptionist turns into a Slitheen as well. Sarah Jane, Clyde, and Maria are all hunted as Luke figures out how to enter the extra space behind the walls. There he finds the headmaster and the Slitheen science project.

Sarah Jane escapes by dousing her pursuer in perfume and using the sonic lipstick to open the door. She calls Luke and tells them how to escape. Luckily, Clyde has a can of Wolverine – think Axe body spray – and the kids escape with Sarah Jane just in the nick of time.

The Slitheen question how a human has a sonic device, but they determine that it’s too late to worry. Meanwhile, the kids and Sarah Jane convene at Bannerman Road. Sarah Jane learns about the Slitheen (and recalls something a friend once told her about Slitheen in Downing Street) before meeting Clyde and consulting Mr. Smith about Coldfire’s new constructions around the world. All of the ten cities have underground railways to act as a cooling system for the capacitor systems, and Luke reveals that he has provided the Slitheen with the key equation. The city of Los Angeles has just gone dark followed by China, and Washington, DC is up next.

Clyde also has a fascination with military operations.

Mr. Smith provides a biographical report on the Slitheen, but the city goes dark just before the supercomputer can deliver a weakness. Sarah Jane and her team head for the school, armed with Clyde’s information that the Slitheen were offended by his lunch. It seems that vinegar is the secret weapon. They hit the street as the sun goes dark.

The headmaster drops his human skin and greets the team as they arrive. The vinegar works, prompting the headmaster to explode, and the remaining two Slitheen call in reinforcements just in time to capture Sarah Jane and Luke.

Cue the villain exposition on the evil plan. The Slitheen want revenge against the Ninth Doctor.

Luke explains that the system can’t hold that much power. The rest of the team is captured as Luke makes adjustments, which requires a reset of the system. Sarah Jane and Luke use the newly restored sonic lipstick to break the system and the team escapes. Sarah Jane shows mercy on the younger Slitheen, allowing him to escape with the others who transmatted away.

The team arrives back at Bannerman Road as Sarah Jane informs UNIT of the escaped Slitheen with “love to the Brig.” Maria has a moment with her mother (who is skeptical of the events since Maria moved away) and Sarah Jane explains things to Clyde, including her adventures with the Doctor.

She also swears him to secrecy, and he tells her that she should be Luke’s mother. Sarah Jane has Mr. Smith put a rumor into the world to explain the strange happenings. She tells Luke that she’s proud of him and accepts her role as his mother.


Coming back ten months after the first episode, Sarah Jane returns with minor changes. The largest, of course, is changing Kelsey Hooper for Clyde Langer because the BBC thought that there were too many female characters on the show. That is a frustrating decision.

Otherwise, this story was a serviceable sequel to the Ninth Doctor’s adventures with the Slitheen. It was a good introduction to Clyde and a wonderful chance to grow for Sarah Jane. Motherhood looks good with her.


Rating: 4/5 – “Would you care for a jelly baby?”


UP NEXT – Sarah Jane Adventures: Eye of the Gorgon


The Timestamps Project is an adventure through the televised universe of Doctor Who, story by story, from the beginning of the franchise. For more reviews like this one, please visit the project’s page at Creative Criticality.