Timestamp #103: The Armageddon Factor

Doctor Who: The Armageddon Factor
The Key to Time, Part VI
(6 episodes, s16e21-e26, 1979)
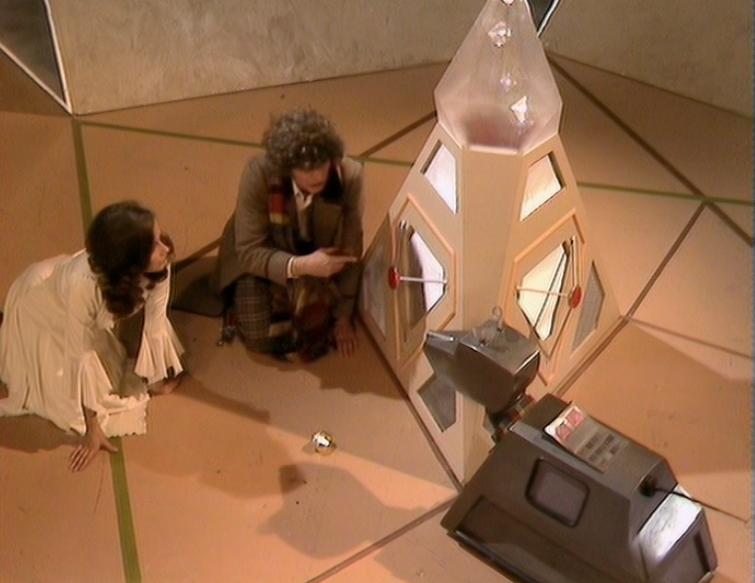
timestamp-103-the-armageddon-factor


The end to the Key to Time arc begins with melodrama in a hospital.

The target for the sixth and final segment of the Key to Time is Atrios, the twin planet to Zeos, which are engaged with each other in a brutal nuclear war. Princess Astra, the leader of Atrios in name only, is appalled at the carnage and the conditions for her people. She is also disturbed by the actions of the Marshal, who holds all of the power because of the hostilities. The Marshal confesses to his aide-de-camp Shapp that they are actually losing the war and is searching for any way to win, and the Marshal leads the princess into a trap. To silence her, perhaps? Or is it something more?

The TARDIS arrives in parking orbit around Atrios, but the Time Lords determine that they are way off course. They take the TARDIS in manually, which provokes the Atrians to launch a nuclear missile to intercept. The TARDIS de-materializes moments before impact to confuse the Atrians, then arrives on the planet.

The Marshal is also communicating with an unseen entity. Are we finally coming to the Black Guardian?

Since the planet is engaged in nuclear war, the Time Lords decide to move quickly. They track the fragment to the room holding Princess Astra, but are soon ambushed by the Marshal. He leads them away as another bombardment buries the TARDIS in rubble. K9 takes the opportunity to hide.

The Marshal declares the Time Lords, along with Merak (the princess’s sort of secret lover), as spies against the government. The Doctor tricks the Marshal into summoning K9, who provides a distraction for Time Lords to escape. The return to the landing site only to discover that the TARDIS is buried, and unbeknownst to them, the princess has been transmatted away by a mysterious masked figure.

Merak follows the Time Lords, and together they breach the room where Astra was being kept. Due to the high radiation, the humanoids leave K9 to stand guard while they continue the investigation. The Marshal uses the opportunity to lure K9 into the recycling complex. He also sends guards to retrieve the trio and bring them back to the command center, intending to treat them as guests. The Marshal asks the Doctor to help Atrios win the war, and he suggests a shield to block Zeons from attacking. The Marshal demands a weapon instead, intent on destroying the enemy. The Doctor says that he’ll need K9 and the Marshal reveals the robotic dog’s fate. The Doctor rushes to the recycling complex and rescues K9 at the last second. In the confusion, the Marshal reveals a small device attached to his neck. Romana tells the Doctor of this device later on as they brainstorm a solution. The Doctor deduces that something is blocking Zeos from Atrios, and the Doctor proposes going to Zeos to investigate.

Princess Astra appears on a transmission from Zeos demanding an Atrian surrender, and the Marshal sends the Doctor to a transmat for transport. Romana and Merak sneak into the room behind the Marshal’s mirror and discover a stone skull and the Marshal’s plot to trap the Doctor. As they arrive with the information, the trap is sprung, and the Doctor is transmatted away with two masked men.

The entity controlling the Marshal ends the Zeon attacks on Atrios, leaving the Marshal open to any course he chooses. Meanwhile, the Doctor is brought before the entity, the Shadow, who reveals that he has the TARDIS. The Shadow demands that the Doctor open the TARDIS and retrieve the segments to the Key to Time. Meanwhile, Romana and Merak discover that the TARDIS is missing, and then decide to follow the Doctor. Merak tricks Romana into surrendering the Key Core before transmatting away.

The Shadow leaves the Doctor, confident that the Time Lord will eventually make a mistake that will lead to the other fragments. The Doctor begins to search for the final segment while the Shadow interrogates Princess Astra. The Shadow reveals Astra is on his ship while Merak is on Zeos. Romana and K9 follow to Zeos, as does the Marshal’s aide Shapp. Shapp finds the Doctor and is convinced to follow K9’s tracks to the rest of the group. K9 has been communicating with the Zeon commander, which is actually a supercomputer named Mentalis. The computer has been instructed to conceal all information about Princess Astra, but reveals that the war is over and obliteration of everything is the next step.

The Marshal launches a plan to destroy Zeos with a missile assault. The computer cannot counterattack since it believes that it has won. If the computer is destroyed, it will implement the Armageddon Factor and destroy both planets. The Time Lords set to work in reprogramming Mentalis, but this triggers the computer to start a self-destruct sequence. Meanwhile, Romana deduces that the Shadow is located on a third planet in the star system. With the self-destruct clock still ticking the Time Lords seek refuge in the TARDIS.

The Shadow returns to Astra and fits her with a control device. He forces her to project an image of herself to distract Merak, and Shapp is stunned by one of the Shadow’s henchmen and transmatted away. Merak ends up falling down a hole after chasing the apparition.

The Doctor and Romana attempt to construct the Key to Time, but without the remaining fragment the artifact is useless. The Doctor constructs an artificial piece to fill the gap which places the Marshall’s ship in a time loop and prevents him from attacking. Since the one segment is artificial, the time loop is steadily degrading.

The real Astra (under the Shadow’s control) rescues Marek. The pair run into K9 and the dog fights off the henchmen as the pair head to the TARDIS. The villains lure K9 into the transmat with a distress call and the pooch is beamed away to the Shadow’s ship where he is reprogrammed. Meanwhile, Astra reveals her allegiances to Marek and he is beamed away as she tries to fool the Doctor. She gains access to the TARDIS and accompanies the Time Lords to the Shadow’s location.

K9, now working for the Shadow, goes to greet the trio. Inside the TARDIS, Astra is directed by the Shadow to take Romana to him. The Doctor finds the distress signal that trapped K9 and follows it, plagued the entire trip by illusions of Romana, Astra, and himself. He eventually confronts the Shadow, who reveals that he is the agent of the Black Guardian, and is captured.

FINALLY! The Black Guardian arrives!

In his cell, the Doctor encounters another Time Lord named Drax (who refers to him as Theta Sigma – that can’t be his real name, can it?). Drax was forced under threat of death to build Mentalis. He has since been trying to tunnel out and find a way to his own TARDIS on Zeos. The Doctor determines if Drax is trustworthy as the Shadow tortures Romana for information. After gaining everything he can from her, the Shadow sends K9 after the Doctor. The Doctor tricks K9 into the cell with Drax where the threat is stopped. The Doctor makes his way out to the upper levels and is captured by a henchman and taken to the Shadow. There, the Doctor is forced to retrieve the Key to Time so the Shadow can add the Sixth Fragment and set the cosmos at war. When he reaches the TARDIS with his henchman escort, the Doctor is surprised by Drax’s arrival. Drax shoots him with a shrink ray, miniaturizing both of the Time Lords. Since the TARDIS doors are open and the time loop is crumbling as the artificial Key Fragment is burning up, they decide to create a distraction.

The Shadow leaves to retrieve the Key, and Romana discovers that Princess Astra is the Sixth Fragment. The Doctor and Drax fix K9 and hitch a ride to the wall outside the Shadow’s chambers. After Merak transmats back to the Shadow’s ship, he joins the group in the chamber where Astra is transformed into the fragment. As K9 blasts in and the Time Lords are restored to normal size, the Doctor retrieves the Key and takes Romana back to the TARDIS. They travel to the computer room where Drax – who rescued K9 – helps them disarm Mentalis. Free of the time loop, the Marshal fires on Zeos, but his missiles are deflected into the Shadow’s ship.

Drax leaves to find his next construction job and the Doctor is briefly enthralled by the power of the Key. As the Shadow dies, the Black Guardian disguises himself as the White Guardian and attempts to trick the Doctor into surrendering the Key. The Black Guardian callously disregards Princess Astra’s sacrifice, and the Doctor figures out who the Guardian truly is. The Doctor disperses the Key Fragments across the universe, thus reuniting the restored Princess Astra with Marek, at the same moment as the TARDIS dematerializes.

To prevent the Black Guardian from following and seeking revenge, the Doctor has installed a randomizer on the TARDIS. Not even the Doctor knows where they are going next.

The ending is iffy. If the White Guardian had successfully restored the balance between good and evil throughout time, then the show would theoretically be over since it relies on the Doctor battling evil. But the dispersal of the key feels like it invalidates the entire journey to assemble it. It’s a hollow victory capped by a last-minute convenience. It’s almost as if the writers had no idea how to put a lid on this whole season’s story.

That said, this episode was mostly solid. Mostly.


Rating: 3/5 – “Reverse the polarity of the neutron flow.”


UP NEXT – Sixteenth Series Summary


The Timestamps Project is an adventure through the televised universe of Doctor Who, story by story, from the beginning of the franchise. For more reviews like this one, please visit the project’s page at Creative Criticality.


Timestamp #102: The Power of Kroll

Doctor Who: The Power of Kroll
The Key to Time, Part V
(4 episodes, s16e17-e20, 1978-79)

timestamp-102-the-power-of-kroll


Before now, I had never seen a squid stumble.

The common thread throughout the serial was the weak story. There was very little meat on the bone, and it shows in how detailed my notes are. The story opens in a methane catalyzing refinery where we’re introduced to the crew and their servant, Mensch. The servant, who they treat like swamp scum until he dies, is a native of the planet.

The planet is really a moon orbiting Delta Magna. Taking a cue from The Empire Strikes Back, the moon is one big swamp. Instead of a single green Jedi, the moon’s inhabitants are a group of green natives called the “swampies.” For the record, that’s the last time I’ll mention that name because the narrative treats it in the ugliest manner for the duration.

The commander is returning from somewhere, and the tracking officer notes that a spacecraft followed in the commander’s shuttle. They presume that it must be Rohm-Dutt, a gun-runner who is supplying the natives with weapons in the name of The Sons of Earth. Who are they? A missed opportunity for the plot.

The refinery workers take up arms in pursuit of the smuggler. Coincidentally, the TARDIS arrives at that same time, and as the Doctor and Romana search for the next Key Fragment, Romana is abducted by the natives and the Doctor is ambushed by the humans. K9 gets to stay in the TARDIS since he cannot navigate the swamp. Lucky dog.

Rohm-Dutt questions Romana about her presence and intentions, and the Doctor gets a similar treatment from the workers. After he convinces them that he’s not a threat, the refinery personnel decide to keep the Doctor at their facility. He accompanies them to watch an orbit shot, the purpose of which is, well, not really explained.

Romana, on the other hand, gets to meet the local god since the natives decide to sacrifice her to the mighty Kroll. She’s tied to a stake, subjected to the local interpretation of Indiana Jones and the Temple of Doom, and gets scared by a native in a squid suit. With the Doctor’s quip that “it probably looked more convincing from the front,” it’s apparent that this serial is mocking itself.

After freeing Romana, the Doctor reveals that he has (somehow) recovered the Key Core. They decide to investigate further for reasons and discover a text that references Kroll, a creature that consumed a previous High Priest, and has made three appearances. It’s due for a fourth, which happens in short order. The refinery workers note that something has caused the moon’s surface to move up briefly and then settle again. They find that the Doctor has left the complex, decide that he’s a sympathizer who is going to warn the natives of a pending human assault on them, and set out in pursuit to kill him. Everything converges as the humans hunt the Time Lords, the natives attack the humans, their weapons explode on use, Kroll eats Mensch, and the natives retreat to settle the score with Rohm-Dutt and seek a blood sacrifice to appease the god.

The god Kroll is a giant squid. How Lovecraftian.

The natives capture the Time Lords, bundling them with Rohm-Dutt as a massive sacrifice under one of the “seven holy rituals.” The Doctor finds it lucky that they get to participate in the seventh, which is the swamp equivalent of torture by the racks. The second episode ends as Kroll seeks out the refinery, which apparently has been harvesting methane produced by the creature when it hibernates and has been drilling right into it, and eats one of the crewmen after breaking through a pipe.

The Doctor questions the native High Priest about Kroll, trying to hypnotize him so the man will free them, but all he gets is some backstory. Rohm-Dutt also admits that the refinery foreman paid him handsomely to sell the faulty weapons to the natives and discredit The Sons of Earth. See above, re: missed opportunity.

Luckily, the captives break free courtesy of two conveniences: The Doctor shatters a window with his singing and the ensuing storm loosens their bonds. Seven really is his lucky number. They make their way across the swamps and encounter the Kroll once again. It eats Rohm-Dutt and a native, leading the Doctor to deduce that it hunts by vibration.

Those two paragraphs were Episode Three. Yes, really.

The refinery commander, who is going insane in his need to eliminate his opposition, decides to aim the next orbital shot (whatever that is) at the Kroll, but his crew afraid that it will ignite the thin atmosphere and kill all of the natives. The Doctor stops the launch and the Kroll escapes, but the Time Lords do not as the commander catches up to them.

The natives invade the refinery, ending the commander’s threat at the surprise end of a spear. Kroll resumes its assault on the refinery, but the Doctor and the remaining refinery worker distract it by engaging all of the platform’s equipment and alarms. The High Priest offers a prayer to the tentacle emerging from the broken pipe. He ends up becoming a sacrament.

The Doctor takes the Key Core topside, testing his theory that the source of the Kroll’s power is the Fragment. After getting a hug from the squid, he transforms it into the Fifth Segment. The story ends with an aborted bang as the Doctor short circuits the computer to prevent the next orbit shot, which would have been into a plugged firing tube.

The Doctor and Romana make their way back to the TARDIS and take off, thankfully ending this adventure.

Why thankfully?

This one is stretched thin across the board. The refinery crew is acted poorly, as are the natives, and they have the extra baggage of the Savage Indian trope. The special effects are bad, and so is the script, especially when thin atmosphere and weak gravity are explicitly called out but neither is readily apparent in the acting. Even the regulars are poorly written with jokes that fail so hard at landing that they reach escape velocity without a push.

This could have easily been turned serious as another Doctor Who allegory on colonialism, capitalism, racism, slavery, and religion. It could have been as deep as The Mutants. Instead, we get a self-effacing farce that doesn’t even take advantage of the groundwork to the Key to Time arc. We’ve had one or two hints, but the warning to beware the Black Guardian hasn’t had any payoff at all.

The tremendous positive here is how the Key Fragment was handled. In the previous four stories, the fragments have all been random objects like a lump of jethrik ore, the remnants of a compressed planet, the Great Seal of Diplos, and a piece of a statue. The rub is that the Key was sold to us as a powerful and legendary artifact that maintains the equilibrium of time. This story treated the Key Fragment like one of the Marvel Cinematic Universe‘s Infinity Stones, making it so powerful that it warped the narrative around it. The Time Lords couldn’t just theoretically arrive, identify and snag the treasure, and then leave. Instead, they had no choice but to literally fight the monster to solve the story’s conflict and earn the reward. In this story, they had to work for it.

Unfortunately, it wasn’t enough.

I’m surprised at how thin and disengaging this story is. Robert Holmes has been the writer behind some of the highest ratings in the Timestamps Project – Spearhead from SpaceTerror of the AutonsThe Time WarriorThe Ark in SpacePyramids of MarsThe Talons of Weng-Chiang, and The Ribos Operation – but this one turned out more like The Krotons and The Space Pirates.


Rating: 1/5 – “EXTERMINATE!”


UP NEXT – Doctor Who: The Armageddon Factor


The Timestamps Project is an adventure through the televised universe of Doctor Who, story by story, from the beginning of the franchise. For more reviews like this one, please visit the project’s page at Creative Criticality.


Timestamp #101: The Androids of Tara

Doctor Who: The Androids of Tara
The Key to Time, Part IV
(4 episodes, s16e13-e16, 1978)

timestamp-101-the-androids-of-tara


As a bookend to the fifteenth anniversary, it could have been so much more.

With the TARDIS in transit, the Doctor challenges K9 to a game of chess. Romana uses the Key’s tracker to steer their course to Tara. While the Doctor goes fishing, Romana hunts for the next fragment. As she locates it, she is attacked by a wood beast and rescued by a knight with a electrified sword. He identifies himself as Count Grendel of Gracht, and he confiscates the fragment under the law for identification. To compensate her, the count takes Romana to his castle to tend after her twisted ankle.

The Doctor, asleep on the riverbank, is found by Zadek and Farrah, two swordsmen, and they recruit him to fix their android. The Doctor is taken to Prince Reynart who offers him a reward for his services fixing the android, which looks like the androids from a different Fourth Doctor adventure. After a face is attached, it is designed to look like the prince and act as a (life model) decoy for his coronation the next day.

Upon arriving at the Count’s castle, Romana is tended to an engineer named Lamia. The engineer and count admire her “construction” and decide to disassemble her. The swelling in her ankle convinces them that she’s not an android after all. Instead of being disassembled, she is drugged. Similarly, he ends up drugging the retinue and kidnapping the prince.

When they come to, the Doctor and the retinue develop a plan to use the android decoy to stand in until the prince is rescued. The Doctor calls in K9 for support and learns that Romana has not yet returned. In Grendel’s castle, Romana awakens and is taken to see Princess Strella and Prince Reynart. Both are Grendel’s captives, and Romana is physically identical to the princess. If Reynart is not crowned as king at the proper time, Grendel may be chosen to ascend in his stead. The count leaves Romana and the prince in their cell and heads to the coronation.

The Doctor sends K9 to Count Grendel’s castle to search for Romana and the prince while he and the rest of the retinue carry on with the decoy plot. As they journey, the retinue explains how a plague attacked ninety percent of the population and the androids were built to keep the civilization moving. The culture has become a mix of feudal and futuristic elements. They are attacked by Grendel’s men, but still manage to arrive in time for the ceremony. In a somewhat Weekend at Bernie’s sequence, the android is crowned, but as Princess Strella approaches to pledge her fealty, the Doctor grabs the royal scepter and strikes her dead.

This really isn’t a very good cliffhanger since we know that Romana and Princess Strella are still in captivity.

The princess is really an android. Count Grendel convinces Zardek to postpone the oath-taking until the next day on the premise that other android assassins may be in the court. Grendel retreats to his castle and orders Lamia (who is experimenting with the Key Fragment) to build a Romana android that will assassinate the Doctor. Grendel then offers the Doctor a chance to collect Romana, which he knows is a trap, but chooses to spring anyway. The real Romana escapes and makes her way on horseback to the Doctor, but arrives to find Lamia dead after the Doctor and K9 have thwarted the assassination attempt.  She escapes with the Doctor to the prince’s home, with Grendel in hot pursuit. In private discussion, the count stalls by offering the throne to the Doctor, but then destroys the decoy prince and escapes with Romana.

Count Grendel explains his new plan for usurping power: Romana will marry the king, who will then die as a matter of convenience so Grendel can marry the widow and assume the throne. The Doctor knows that a full siege of the castle would take too long, so he and K9 sneak in through the moat and tunnel system to disrupt the wedding. After a sword duel, during which the gates are opened and the prince’s forces storm the castle, Count Grendel escapes by diving into the moat and swimming away, presumably into exile. Meanwhile, Romana rescues Princess Strella from captivity.

Putting the wrap on the adventure, Prince Reynart reunites with Princess Strella, the Doctor reunites with Romana, and the Time Lords reunite with the Key Fragment. On their way back to the TARDIS, they make one more stop: They must retrieve K9 from the boat in the middle of the moat.

The positives: Mary Tamm and her four distinct roles (Romana, Romana-bot, Princess Strella, and Princess-bot). I mean, it was fun to see her range and skill beyond being a snarky foil for the Doctor.

The negatives: Pretty much everything else. It was a lackluster story, and while the rest of the season hasn’t been exactly stellar, at least the other tales were fun. This one felt paint-by-the-numbers and, dare I say, boring. I wasn’t horrible, but it wasn’t great either.

Remember how I said that Louise Jameson saved Underworld from joining the ranks of failing grades for me?

Thank Mary Tamm for this one.


Rating: 3/5 – “Reverse the polarity of the neutron flow.”


UP NEXT – Doctor Who: The Power of Kroll


The Timestamps Project is an adventure through the televised universe of Doctor Who, story by story, from the beginning of the franchise. For more reviews like this one, please visit the project’s page at Creative Criticality.


Timestamp #100: The Stones of Blood

Doctor Who: The Stones of Blood
The Key to Time, Part III
(4 episodes, s16e09-e12, 1978)

timestamp-100-the-stones-of-blood


It’s a time of milestones: The 100th adventure, the dawn of the franchise’s 15th anniversary, and the 100th (regular) Timestamp.

This adventure begins as the Doctor and Romana assemble the first two pieces of the Key to Time, with Romana one-upping the Doctor repeatedly. The Doctor determines that the next stop is Earth, where a druidic sect is pouring blood on the stones of a cromlech. As he pilots the TARDIS to their destination, they duo receive a warning to beware of the Black Guardian. This prompts the Doctor to finally explain the mission to Romana.

The TARDIS lands and the Time Lords set out, soon coming across the stone circle and an archaeologist named Amelia Rumford. The professor introduces the stone circle as the Nine Travellers, and explains the blood as it relates to deVries and his sect, worshippers of Cailleach. The Doctor heads out to meet deVries while Romana (and her impractical shoes) keeps an eye on Professor Rumford and her assistant, Vivien Fay.

Mr. deVries and his maid, Martha, are in the middle of an incantation when the Doctor arrives, and deVries entertains the Doctor as he stalls for time. During the tour, the Doctor notes that the portraits of the previous owners have been taken down. That may be important later. Meanwhile, the survey team wrap up their work and retire to their cottage for tea. Crows have been circling the site all afternoon, but as the team leaves, the birds depart. DeVries explains to the Doctor that the crows and ravens are the eyes of the Cailleach, and as a figure appears in a rather ridiculous bird costume to draw the Doctor’s attention, deVries knocks him out. Back at the stone circle, Romana hears the Doctor’s voice calling, and she investigates in her bare feet. She approaches a cliff and is startled by something unseen, toppling backward off the edge toward the ocean below.

The Doctor awakens on a sacrificial altar inside the Nine Travellers, but as the professor approaches on a bicycle, the druids scatter. Rumford had returned to offer Romana a flask of tea, and together (with the help of K9’s nose) they save Romana from her state as a literal cliffhanger. Romana claims that the Doctor pushed her over the edge, but after K9 verifies the Doctor’s identity, Romana determines that it must be the third Segment’s power at play. After a brief respite in the TARDIS, they return to the cromlech and continue tracking the Segment. Between the camera angles and the acting, it’s no longer a mystery that Vivien has something to do with the use of the Segment’s power.

As Romana accompanies the women to the cottage, the Doctor and K9 visit deVries. Just before they arrive, deVries and Martha are crushed by giant sentient stones. The stone returns to attack the Doctor and is repelled by K9, however the pup is critically damaged. At the cottage, Romana reviews the professor’s notes, noting that the owners of Boscombe Hall, the headquarters of the druids and the site of the Convent of the Little Sisters of Saint Gudula, have all been women. Romana and Rumford head to the Hall to investigate further where they find the Doctor working on K9. Romana takes K9 back to the TARDIS to rebuild him while the Doctor pursues the lead that the stone creature feeds on blood.

The next few minutes are a rapid series of back and forths. At the stone circle, a woman in the crow costume summons another stone creature with a bowl of blood. At the Hall, the Doctor puts his investigative skills to use and discovers a priest hole. Inside, he discovers the portraits of the Hall’s previous owners: They all share the likeness of Vivien Fay. At the TARDIS, Romana starts the process of restoring K9, but as she leaves she notes a raven and a crow watching her. Vivien intercepts her at the stone circle and operates a scepter, causing Romana to disappear.

The Doctor and Rumford are chased out of the Hall by one of the stone creatures. They lead it to Romana’s cliff and the Doctor plays matador, tricking the beast into a late night swim where it sinks to its death. The pair meet up with Vivien at the stone circle where she offers Romana’s safety if he leaves her alone. She then vanishes in the same manner as Romana, telling the Doctor to count the stones. He notes the missing stones and links their sentience to the Ogri, a race from Ogros in the Tau Ceti system.

The Doctor (and a fully recovered K9) determine that Romana and Vivien are hiding in hyperspace, so the Time Lord builds a device to jump into hyperspace. While he is away, Rumford and K9 defend the device against two attacking Ogri. The Doctor materializes on a spaceship, a prison vessel of some sort, and frees Romana. The ship is physically hovering just over the Nine Travellers, but cannot be seen because it is in an additional dimension to our own. The Time Lords search the ship and discover two sparkling globes called the Megara. They are justice machines who act as judge, jury, and executioner when the law is violated. The Doctor and Romana sneak away as the Megara deliberate.

As K9’s power packs expire, his force field fails, but the Ogri retreat to recharge. They quickly come across two unfortunate campers who are consumed tout de suite. Professor Rumford reactivates the machine on schedule, but the gateway summons a silver-colored Vivien instead of the Time Lords. She destroys the machine, then returns to the ship with the two Ogri to break the news to the Doctor and Romana. Vivien sics the Ogri on the Time Lords, but the Megara interrupt to dispense justice. Since they have deliberated in his absence, he petitions for an appeal and is granted a two hour reprieve to state his case. He calls Romana and Vivien to the witness stand, constructing his defense that they only released the Megara in concern for their welfare.

Romana continues to search the ship while Vivien is testifying – the Megara kill one of the Ogri after Vivien tries to summon them to her defense, and the Doctor petitions for her to be attached to the truth assessor, a Megara lie detector – and both she and the remaining Ogri are teleported back to the stone circle thanks to Rumford’s repair of the hyperspace device. They escape, and eventually discover a potential weakness in Vivien. They run from the Ogri, and Romana and the Ogri return to the ship.

As the Doctor continues his trial, he uncovers that Vivien is the Cessair of Diplos, a criminal wanted by the Megara for murder and misappropriation of the Great Seal of Diplos. The Megara are not convinced and pass sentence on the Doctor, however when they attempt to execute him, he pulls Vivien into the beam with him. The beam is short-circuited, and the Megara are convinced to scan Vivien to learn the truth. When all is said and done, the Ogri is returned home, Vivien is imprisoned in a stone at the cromlech for fifteen hundred years, and the Great Seal of Diplos – the third Segment to the Key of Time – is taken by the Time Lords. As the Megara turn their attention to the Doctor’s sentence, he uses the Seal to send them back to hyperspace.

With their epic quest halfway completed, the Doctor and Romana leave in the TARDIS and continue to their next stop.

This story was a fun one overall with some incredible chemistry between Tom Baker’s Doctor and Beatrix Lehmann’s Amelia Rumford. It also showcased a costuming choice for Vivien’s Cessair of Diplos role that would have been right at home on Star Trek. Her somewhat risqué (for this franchise so far, at any rate) low-cut silver-gray gown called back to William Ware Theiss and his famous theory of titillation.

This serial wasn’t perfect by any stretch: The “Time Lord on trial” angle of the story was a bit rough, and while it worked out in the end, it felt kind of wedged in between the more supernatural elements of the plot. The start of the second episode was also a bit jarring since it was the only one not to contain the standard “last week on Doctor Who” cliffhanger-refresher segment.

One final note is another Star Trek link: Tau Ceti appears to be a galactic crossroads in both franchises. In Doctor Who, it is home to Diplos, Ogros, and Zygor. On a larger scale, Star Trek references the star system on the order of ten times in over fifty years, including as the home of the Traveler and the Kobayashi Maru. These franchises aren’t unique in this regard, since Tau Ceti is a staple of modern science fiction.

It only makes sense, almost as a rite of passage, that this franchise would take advantage of the second closest main sequence star to our own.

Rating: 4/5 – “Would you care for a jelly baby?”


UP NEXT – Doctor Who: The Androids of Tara


The Timestamps Project is an adventure through the televised universe of Doctor Who, story by story, from the beginning of the franchise. For more reviews like this one, please visit the project’s page at Creative Criticality.


Timestamp #99: The Pirate Planet

Doctor Who: The Pirate Planet
The Key to Time, Part II
(4 episodes, s16e05-e08, 1978)

timestamp-099-the-pirate-planet


I’m ushering out the double digits with Douglas Adams. There’s no better way to go.

The story begins with the impatient and flamboyant captain of a mining operation taking out his frustrations on a nervous Mr. Fibuli. The vacillating scientist informs him that a new source of vasilium has been located, and the captain orders it mined before making an announcement to the city about their potential promised prosperity. The citizens are comically overjoyed, but one stands out as underwhelmed. Unbeknownst to him, that man is being watched as a selectee by a local cult. Because it’s Doctor Who, and cults are standard operating procedure.

On the TARDIS, the Doctor cleans and stores the first segment of the Key of Time before joining Romana in the console room as she studies the obsolete time capsule that is her current home. The Doctor inserts the core into the console and is, shall we say, less than enthralled about the next destination: Calufrax. The TARDIS is unable to materialize – Romana thinks that the Doctor doesn’t drive properly, but the Doctor believes that this was a natural aberration – and the event damages the mining operation’s engines and the Doctor’s face. Romana takes the helm and pilots the TARDIS by the book, and they materialize without any further incident. Well, except that they aren’t on Calufrax and K9 has starting spinning out of control.

The dissident from the earlier celebrations, Pralix, is having some sort of episode, and just like K9, the cult is chanting and spinning in their headquarters/temple/lair. It’s probably not a coincidence that Pralix is repeating the chant: “Life force dying! Life force dying!”

The Doctor, Romana, and K9 leave the TARDIS to investigate, and while the citizens ignore the Doctor, they readily engage with Romana. In typical Adams fashion, K9 speculates that it’s because she’s prettier. One of the citizens exchanges diamonds and rubies for jelly babies, and proclaims that they are in a new age of prosperity. The man leaves with a warning to avoid the Mentiads, and the Time Lords find that the streets are littered with precious stones. The citizen inadvertently tips off the guards, who eventually encounter and arrest Romana.

Romana has become much more humorous in this episode, and she’s very much the Doctor’s equal in personality. Perhaps that’s why they clash so much more than other companions.

Turns out that the cult members are the Mentiads, and they set out to collect Pralix as the Doctor arrives, drawn by the young man’s cries. Mr. Fibuli informs the captain that the Mentiads are marching, and they link it to a rogue telepath in their bailiwick. The captain sends his guards to intercept the cult, but their weapons are useless, so the leader orders his troops to break contact, locate the telepath, and kill him. The guards arrive at Pralix’s house and K9 stuns them, but the Mentiads are right on their heels. They are impervious to K9’s stun ray, but they quite effectively stun the Doctor with their powers.

The captain discovers that his officers failed and that the telepath is now with the Mentiads, and he executes one of them as an example with his robotic parrot. He’s a pirate captain, you see, so he has to have a parrot. Back in the city, the Doctor comes to and makes a plan to find Pralix and Romana, settling on seeking the Time Lady first since she’s likely to be in more danger. Pralix’s friend Mula sets out to find Pralix as the Doctor and a man named Kimus head to the bridge, which is the captain’s headquarters. It’s a pirate ship, you see, so it has to have a bridge. En route, Kimus explains how their economy works: The mines are automated and refill when the captain announces a new age of prosperity. Coincidentally, the stars in the sky change as well.

Fibuli reports that the macromat field integrator is burned out, and they don’t have a replacement. After listening to Romana’s tale of how the TARDIS works, the captain has her inspect the integrator, and she learns that the planet itself travels through space to each mining location. She asks for the Doctor’s help, and he arrives on cue. They are escorted to the engine room to affect repairs, but after receiving another strange signal from the Key core, the Doctor comes to a conclusion. He convinces the captain to allow them to return to the TARDIS, but then escape (thanks to Kimus) and head for the mines.

The captain is fearful of the Time Lords discovering the secrets at the bottom of the mines: The planet is hollow, and it travels through hyperspace, materializes around a target, absorbs all of the valuable minerals, and destroys the rest. The guards pursue the Doctor’s group through the mines and run straight into the Mentiads, led by Pralix. They erect a telepathic force field to block guards, and the entire group returns to the cult’s headquarters where K9 and Mula are waiting.

The target on Calufrax is a crystal that, when refined, can block the Mentiad psychic energy. Though dangerous, the captain orders the mine to operate at excessive capacity to complete this task. Meanwhile, the Mentiads explain the history of the planet, which was prosperous until the reign of Queen Xanaxia. They also discuss the life force, which spikes as each planet is consumed and causes great psychic pain in the telepaths as it is destroyed.

The Doctor and Kimus attempt to steal an air car but fail, and are taken back to the bridge. While they are on the way, Fibuli finds another source of crystals: Earth. After he is restrained, the Doctor grills the captain about his true goals. The Doctor is released and shown to the captain’s trophy room, where the remains of each consumed world is on display. Each display is a supercompressed mass of stone, kept on the very edge of becoming a black hole. If the system were to fail, the pirate planet would be destroyed in a gravitational whirlpool. Disgusted and appalled by this grotesque museum, the Doctor demands to know the end goal, but the captain is pulled away as the Mentiads approach the bridge. The captain attempts to kill the Doctor and Kimus, but K9 arrives and distracts the captain’s assassin robot while the heroes escape. They duck into a room where they find Queen Xanaxia, held in a series of time dams at the last seconds of her life, which are powered by the energy extracted from each planet.

I loved the scene with K9 returning to the Doctor with his own trophy, the dead robotic parrot assassin, in the equivalent of his mouth.

The Doctor returns to the bridge, ready to expose the secrets he’s discovered, and is made to walk the plank – It’s a pirate ship, you see, so it has to have a plank – however the real Doctor appears with a projector. The one who was thrown overboard was a hologram, and so is the captain’s nurse, the latter being powered by the Queen. The Queen’s image is nearly corporeal, almost resurrecting her. She also is in control of the captain. The downside is that the time dams require an exponentially increasing amount of energy, and there is not enough power in the universe to keep her alive indefinitely.

Fibuli completes his crystal-powered psychic jammer, which removes the Mentiad advantage, and the Queen’s avatar and the captain prepare to jump to Earth. The Doctor escapes and encounters the group, and he tasks K9 with establishing an inference wave to counteract the psychic jammer. Meanwhile, the Time Lords remember what happened with the TARDIS upon arrival – both the TARDIS and the planet were trying to materialize at the same time, cancelling each action – and they return to the TARDIS with a plan.

The Doctor dropped the apple on Newton’s head? That made me laugh.

The Time Lords repeat the circumstances, effectively jamming the planet’s materialization, while the Doctor communicates telepathically with the Mentiads. As the TARDIS nearly comes apart around him, the Doctor guides the Mentiads on destroying a component in the engine room. The end result is that the bridge is in shambles, Fibuli is dead, and the captain mourns him. The captain attempts to kill the nurse avatar, but she turns on him. Kimus fires on the avatar, and she is destroyed.

When the TARDIS materializes, the Doctor and Romana return to the trophy room and discover that the remains of Calufrax are the second fragment of the Key. After the captain and the nurse are killed, the Doctor develops a plan to restore the planets (though the status of their valuable minerals is unknown) and retrieve the Key fragment. He wraps up the adventure by helping the Zanak natives destroy the bridge and seal their new freedom in a nice spatial neighborhood.

This was fun adventure that kept clipping along. It had the whimsy of recent stories, but it took the extra step of ratcheting up the humor to match the fantastic plots. That places it in a better position than the rest of the more fanciful serials since Sarah Jane’s departure.

I’m also a fan of Douglas Adams. There are a lot of parallels between works like The Hitchhiker’s Guide to the Galaxy and this franchise, so his touch on the Doctor Who mythos didn’t hurt a bit.


Rating: 4/5 – “Would you care for a jelly baby?”


UP NEXT – Doctor Who: The Stones of Blood


The Timestamps Project is an adventure through the televised universe of Doctor Who, story by story, from the beginning of the franchise. For more reviews like this one, please visit the project’s page at Creative Criticality.


Timestamp #98: The Ribos Operation

Doctor Who: The Ribos Operation
The Key to Time, Part I
(4 episodes, s16e01-e04, 1978)

timestamp-098-the-ribos-operation


Our Odd Couple meets an intergalactic Butch Cassidy and the Sundance Kid. Sorta kinda.

The Doctor is training K9 to respond to a dog whistle, and then promises him a holiday. It is not meant to be as the TARDIS loses power and materializes in a bright white light. The doors open and the Doctor is summoned by the White Guardian, a being that the Doctor appears to deeply respect. The White Guardian tasks the Time Lord with locating and assembling the Key to Time, a powerful cube that controls the equilibrium of time. A Black Guardian, the counter to the White Guardian, is also seeking the Key. The Doctor is given a locator to find the pieces, as well as an assistant in the Time Lady Romanadvoratrelundar. For simplicity, let’s call her Romana. Or Fred. Nah, Romana is better.

Romana, a new graduate the Time Lord Academy, gives the Doctor the core to the Key. The core acts as a homing beacon for the pieces of the Key, and it takes them Cyrrenhis Minima, and then immediately to Ribos. Coincidentally, on Ribos, two men are sneaking onto a castle’s parapet. In the room below, the guards extinguish the lights and secure the treasure room. One of the shady figures, Unstoffe, slips the guard dragon a Mickey, drop into the room, and set to work. Instead of stealing anything, he leaves a large blue stone in the display case. Meanwhile, Garron, the other rogue, meets up with the Graff Vynda-K, and exiled tyrant.

The Doctor and Romana arrive on Ribos, and as he is warning her to expect the unexpected, he gets trapped in an unexpected snare.

The Graff is astounded by the supply of jethrik, a very valuable mineral, on the planet. Garron eavesdrops on the conversation, but is interrupted by the Time Lords. Garron escapes, and the duo continue on to the treasure room. They trace Key fragment to the Crown Jewels, but Unstoffe drugs the guard and sounds the alarm, causing the rest of the guards to converge and lower the door to the waking dragon as part of their morning ritual. The Time Lords hide as the guards enter and open the room. Garron follows, petitioning the guards to store a large sum of money for him in the vault. The Doctor presumes that the rogue is also after the Key segment.

The money is intended as a deposit by the Graff for the purchase of the planet, which Vynda-K intends to use as a base for an army and navy. Together, Garron and Unstoffe weave a con about a lost mine of jethrik, which intrigues the Graff. The Doctor and Romana investigate the jethrik that Unstoffe smuggled into the vault, and they deduce that it is the Key fragment. Meanwhile, the Graff finds a bug in his chambers and determines that Garron is trying to swindle him. If true, the Graff intends to kill the conman.

The Doctor unravels the con and sneaks into the vault from below as Unstoffe sneaks in from above, both targeting the jethrik. Unstoffe is one step ahead, however, and gives the Time Lord the slip. The Doctor escapes through the dragon’s den and attempts to run with Romana and Garron, but is intercepted by the Graff. He takes them into custody as he attempts to recover his money and discovers that the story of the lost mine was part of the con. From the cell, the Doctor signals K9 with the dog whistle.

The Ribos guards use the Seeker, a local religious shaman who uncovers Unstoffe’s hideout. The guards prepare a raid, but the Graff plots to kill the guards and take the stone for himself. Unstoffe takes refuge with an outcast named Binro, a heretic who eschews the mythology of two battling titans for a more scientific explanation of the seasons, which the rogue validates.

The captives use the listening device in Graff’s quarters to warn Unstoffe of the pending raid, and Binro offers refuge in the city’s catacombs. Meanwhile, K9 frees the captives, and they follow the Key’s core to the catacombs and the jethrik. The trifecta is completed when the Seeker sends the guards to the labyrinths (home of the ice gods) in pursuit of Unstoffe.

Convenient plot point: The catacombs also house wild shrivenzales, just like the one that guards the vault. As the Graff and the guards search for everyone, the Doctor inadvertently gives away their position by knocking loose a skull. The creatures come to the rescue, scattering the guards, and the Graff resolves to use the Seeker’s talents to find the fugitives.

Outside the catacombs, the Graff waits impatiently for the Seeker, killing a guard to prove his might. The Seeker reveals that if the Graff’s platoon enters the catacombs, all but one of them will die. They proceed regardless.

Binro offers to help find Garron for Unstoffe, but the rogue finds Unstoffe on his own with help from the recently stolen Key core.  Binro, on the other hand, is apprehended by the Graff. The Seeker leads the Graff to the rouges, but Binro sacrifices himself for them. Unstoffe is wounded as he charges the Graff, and Garron tries to bluff his way out. As the Doctor, disguised as a guard, signals for K9, a shrivenzale attacks. Romana and K9 follow the sounds of combat, and the guards outside the catacombs seal the labyrinth with cannon fire. In the resulting cave-in, Sholak is crushed and the Graff vows revenge.

Romana and K9 free Garron and Unstoffe. Elsewhere, the Graff kills the Seeker before turning on the disguised Doctor, determined to be the last one standing as the Seeker’s prophecy comes to pass. He hands the Doctor a timed explosive and leaves, but not before the Doctor exchanges it for the jethrik. The Graff is killed in the explosion.

The Doctor and Romana head for the TARDIS, avoiding an attempt by the rogues to pick the Doctor’s pocket, and leaving them to commandeer the former Graff’s ship. The Time Lords depart with only five segments remaining in their quest.

I really liked the dynamic between the two pairs. Garron and Unstoffe are evidently very close friends and colleagues, and the contrast between them and the Time Lord team helped drive the character drama. Placing the Doctor and Romana into an Odd Couple dynamic – newcomer Romana takes the role of Felix while the Doctor and his increasingly ratty scarf is our Oscar – added some humor to this already madcap con artist story. Even more interesting is how the reluctant mentor is evoking some of the grumpiness from regenerations past.

I settled at a 3.5, and I round up.
Rating: 4/5 – “Would you care for a jelly baby?”


UP NEXT – Doctor Who: The Pirate Planet


The Timestamps Project is an adventure through the televised universe of Doctor Who, story by story, from the beginning of the franchise. For more reviews like this one, please visit the project’s page at Creative Criticality.



Timestamp: Fifteenth Series Summary

Doctor Who: Fifteenth Series Summary

Timestamp Logo Third 2


The Fifteenth Series was a stumble.

It’s hard to watch the series take a tumble, especially one so severe as this. The first two episodes were strong with Horror of Fang Rock and The Invisible Enemy turning in fantastic performances. The next three, however, were exercises in great moments immersed in terrible execution. Image of the Fendahl – a title that still gives me issues when I try to type it out – took the show to a bleaker, darker place than it had previously been, which was a shock. The highlight was Louise Jameson’s acting, which seemed to blossom when she stopped wearing contact lenses.

After that, The Sun Makers and Underworld both did what science fiction does best: They each explored elements of the human condition through existential metaphor. Sadly, they used the metaphor as a mallet to bonk the viewers on the head with the message. The Sun Makers built a soapbox to expound on Robert Holmes’s anger about the tax system, and Underworld basically retold The Face of Evil with a veneer of the Greek myths and a lot of terrible blue screen work.

Once again, the only thing that really saved those stories for me was Louise Jameson’s performance.

And that’s why The Invasion of Time was shocking. The story was smart and the performances were sharp, but the ending stole the perfect score by creating a “Leela falls in love and wants to remain on Gallifrey” subplot in about thirty seconds, and it made no sense. She helped save the planet, but she’s still an alien, and the Doctor’s tenure as president was (supposedly) lost in the de-mat gun’s explosion.

But the franchise has never been strong on writing out companions, has it?

Looking at the numbers, the last time a series scored this low the Sixth, which was the final regular season for the Second Doctor. It’s also the second to worst, just ahead of the Third Series.


Horror of Fang Rock – 4
The Invisible Enemy – 5
Image of the Fendahl – 2
The Sun Makers – 3
Underworld – 2
The Invasion of Time – 4


Series Fifteen Average Rating: 3.3/5


UP NEXT – Doctor Who: The Ribos Operation


The Timestamps Project is an adventure through the televised universe of Doctor Who, story by story, from the beginning of the franchise. For more reviews like this one, please visit the project’s page at Creative Criticality.

Timestamp #97: The Invasion of Time

Doctor Who: The Invasion of Time
(6 episodes, s15e21-e26, 1978)

timestamp-097-the-invasion-of-time


Duplicitous Doctor is delightful.

Somewhere in deep space, the TARDIS is parked on an alien ship. The Doctor negotiates with the ship’s crew as Leela and K9 keep the TARDIS running. Leela tries to use the scanner, but the Doctor disabled it to prevent her interfering. The Doctor signs a contract granting him complete control over the Time Lords, returns to the TARDIS, and departs. Leela takes a dip in the TARDIS swimming pool to pass the time.

On Gallifrey, the Time Lords detect the incoming TARDIS, but they cannot determine who it is, so they increase security. The TARDIS materializes and the guards, led by Commander Andred, arrive with orders to arrest the pilot and destroy the capsule. The Doctor emerges and demands to be taken to Chancellor Borusa.

Leela is on Gallifrey? How can she be there but Sarah Jane could not?

Upon meeting with Borusa, the Doctor claims his legal right as President of the Council of Time Lords. He is very gruff and brusque with the Time Lords, who are unaware that every interaction is being watched by the mysterious aliens. The Doctor selects his Presidential chamber, including 20th century décor and lead-lined walls, and orders that Leela be given proper accommodations.

Once the Doctor in inaugurated, he will be connected to the Matrix, the repository of Time Lord knowledge and history. The ceremony proceeds, but once the circlet is placed on his head, the Doctor collapses in pain. He is attended to by the surgeon general, although Borusa wants him arrested (which cannot happen to the President under law), and taken to the Chancellory to rest. Leela is taken away for questioning in the matter, and when she arrives at the Chancellory, the Doctor recovers and has her expelled from the Citadel since aliens are not allowed there. Leela runs to evade capture.

At this point, everything’s playing out as if the Doctor is completely betraying Leela.

Borusa tries to call the Doctor’s bluff, but the Doctor tells him that as long as Leela remains at large, Gallifrey is in danger. Borusa leaves the Doctor rest, after which the Doctor dons his normal attire and escapes the Chancellory. He hopscotches his way to the TARDIS with Leela in pursuit, but he locks her out and then shares a secret plan with K9. While on the run, Leela stumbles into the space traffic control room and meets the operator, Rodan. Together, they note that a massive warship is approaching the planet, but Rodan assures Leela that it cannot harm them so long as the planetary transduction barrier remains in place.

The Doctor leaves the TARDIS and returns to the Chancellory just in time to meet with Castellan Kelner, who has been watching the Doctor’s adventure the entire time. Meanwhile, a guard unlocks the TARDIS, releasing K9 who stuns the guard for his trouble. K9 disables the transduction barrier, allowing the warship to approach and three aliens to materialize in the Citadel as the Doctor laughs an evil laugh.

The aliens are called the Vardans, and the Doctor entered into an alliance with them some time ago. He asks Borusa to meet him in his chambers later, and tells the Vardans that it is only a matter of time until he retrieves the Great Key. When he reaches his quarters, he explains everything to Borusa, their secret maintained by the lead-lined walls of the room. Leela was banished to protect both her and the secret. Leela convinces Rodan to join her in the Wastelands, which she believes to be part of the Doctor’s plan. The run into Andred, who lets them go but stays behind to face the invasion and keep tabs on Castellan Kelner. In the Wastelands, the duo encounters a tribe of Gallifreyan outsiders led by Nesbin. These tribe has rejected Time Lord society and live in the wild.

The Doctor and Borusa leave the chambers and meet with Kelner and the Vardans. The Doctor begins his act: He has Borusa placed under house arrest and directs Kelner with tracking and expelling trouble-making (potentially rebellious) Time Lords. The Doctor returns to the TARDIS where K9 is interfacing with the control panel. He places the circlet on the robot dog’s head, giving him access to the Matrix. Andred, in an attempt to defend his home, enters the TARDIS and corners the Doctor, threatening to assassinate him.

K9 stuns Andred before continuing his analysis. When the guardsman comes to, he realizes that his weapon is ineffective. The Doctor leaves Andred with K9 and discovers that Kelner’s men have eliminated Andred’s force. He returns to the TARDIS and explains things to Andred: The TARDIS shields them from the Vardans, and the Matrix has been invaded. The Doctor modifies Andred’s helmet to shield the guardsman from the Vardans, then constructs a plot to disable the remaining force field around Gallifrey. The downside is that only Rassilon has the power to do so, but the upside is that his being lives on in the Matrix.

Kelner and the Vardans discuss the Doctor’s erratic behavior and begin to plot against him. Meanwhile, Leela organizes the rebel tribe to stage an assault on the Citadel. The Doctor returns the Vardans and tries to earn back their trust by opening the planet to attack. He opens a hole in the shield directly above the Citadel, and a spacecraft approaches as three humanoids materialize in the Panopticon. As the hole opens, K9 leads Andred to the Presidential chambers and Leela leads the tribe to the Citadel. The Doctor returns to his chambers, prompting the Vardans to place Kelner in charge and order the Doctor’s execution, but K9 traces the Vardan signal back to its source and places their planet in a time loop.

Presuming that they have won, the Doctor, Leela, Andred, and the tribesmen converge on the Panopticon and being to celebrate, but their joy is short-lived as three Sontaran soldiers appear and take aim on the group. Well, that escalated quickly.

I did like how the Doctor immediately surrendered to save the assembled innocents.

The Sontarans used the Vardans as pawns to dismantle Gallifrey’s defenses. The Doctor hides his true identity as the Sontarans search for him, and Borusa works behind the scenes to provide a distraction. The Doctor’s group scatters while Kelner remains behind to polish boots with his tongue. The Doctor, Leela, Rodan, Andred, and Nesbin – basically, the power players in this plot – run to the Presidential Chambers and find Borusa. Hot on their heels, the Sontarans begin to assault the door, which Borusa had previously reinforced with titanium. Escaping through a secret exit, the group (now including K9) moves to Borusa’s office. The Doctor sends everyone onward to the TARDIS, then asks Borusa for the Great Key of Rassilon, the literal key to ultimate Time Lord knowledge. Borusa attempts to deceive him, but in the end surrenders the key to the Doctor, making him the first president since Rassilon to hold it.

On the way back to the TARDIS, Nesbin is killed, but with his last ounce of strength he takes down a Sontaran. The Doctor and Borusa retreat to the TARDIS with Sontarans in pursuit, and the Doctor entrusts the Great Key to Leela’s protection. As the Sontaran commander forces Kelner to widen the hole in the planetary shield, the Doctor works with Rodan to seal it. The overrides for the shield are controlled from the TARDIS, so Kelner sabotages the stabilizer banks and sends the time capsule hurtling toward a black star. The Doctor overrides the stabilizers, but that leaves the TARDIS stuck in state until the override can be, well, overridden.

Kelner gains access to the TARDIS, and the Sontarans pursue the Doctor’s group through her labyrinthine interiors. Which, in this incarnation, appear to be a series of industrial tunnels and eclectic rooms. In the workshop, the Doctor tasks a hypnotized Rodan as K9’s assistant, including possession of the Great Key, while he distracts the invaders. The Doctor’s group finds Borusa at the swimming pool, and he joins the running distraction. When Andred is inadvertently wounded, Leela takes him and Borusa back to the workshop. The Doctor meets up with them, and finds that Rodan and K9 have constructed a de-mat gun, the ultimate weapon of the Time Lords that erases its targets from all of time. The Doctor pursues the Sontaran commander to the Panopticon, where the warrior plans to destroy the Eye of Harmony, which will destroy Gallifrey. The Doctor uses the de-mat gun on the explosion, which removes the commander from time, destroys the gun, and wipes the Doctor’s memory of the entire event.

The Doctor used two different guns in this story. I really need to start a tracker of some sort.

With the day won, the now resigned President gets ready to depart, but Leela and K9 decline to follow. Leela has fallen in love with Andred, even though aliens are not welcome on Gallifrey, and K9 remains to look after her. As the Doctor flies on to his next adventure, his former companions mourning his newfound loneliness, he pulls a box out of storage: K9 Mark II.

This serial had some really good plotting and acting. It was great to see the Doctor playing such a powerful role in saving his home. I really wish that he hadn’t had the entire thing erased from his brain since the important part to forget was the de-mat gun.

It’s also time to say goodbye to Leela. Louise Jameson is a great actress, but Leela wasn’t my favorite companion. Granted, Sarah Jane is a hard act to follow, and Leela saved a couple of stories in her run. I will miss her.

The big downside to this story: The patched-in love story for Leela. It just appears as a quick method to eject her from the TARDIS, and that drags the grade down from a glowing top score to a solid four.


Rating: 4/5 – “Would you care for a jelly baby?”


UP NEXT – Fifteenth Series Summary


The Timestamps Project is an adventure through the televised universe of Doctor Who, story by story, from the beginning of the franchise. For more reviews like this one, please visit the project’s page at Creative Criticality.


Timestamp #96: Underworld

Doctor Who: Underworld
(4 episodes, s15e17-e20, 1978)

timestamp-096-underworld


There’s so much blue screen that, after this, the Star Wars prequels are gold.

The TARDIS is putzing about in deep space. The Doctor channels his inner da Vinci as Leela plays with the control console. We still haven’t answered the question as to whether or not she can actually pilot the blue box, but she flips a switch and the TARDIS stops. Coincidence? Fate? Sixth sense? Whatever the cause, she thinks she broke something, but the Doctor says that the TARDIS stopped because it reached the edge of the cosmos. K9 chimes in that they are not alone, which is accurate since a ship is falling into a nearby spiral nebula. The Doctor sets a course and they materialize inside the wayward craft.

At this point, I have seen so much Doctor Who that sets are starting to blend together. I know that I’ve seen this bridge before, but I can’t exactly place it.

The crew of the ship, the R1C, recognize the materialization sound as the technology of the gods. The TARDIS and her crew are in the ship’s cargo hold, and the Doctor determines that this is a ship from Minyos, a planet from the other side of the universe. The Time Lords once tried to help the Minyan society, but were rejected when the Minyans destroyed their world 100,000 years before this story. This led to the Time Lords developing their non-interference policy – the source of much Gallifreyan hypocrisy – and the Minyan survivors revile them for the catastrophe.

I’m trying really hard to avoid a Despicable Me franchise reference here. If there were bananas in this story, however, I’d be over the top.

The travelers escape the cargo bay and head for the bridge. Their arrival upsets the crew, and a “pacifier” is used to quell the hostility. Captain Jackson explains to the Doctor that the R1C has been searching for a missing ship that holds their genetic banks, the P7E, for 100 centuries. They have been surviving by regenerating like the Time Lords, but their ship is failing after so long underway. The Minyans ask if the Doctor understands how that feels, and he remarks that it is unpleasant.

Did the Time Lords alter the Minyan people somehow to give them regeneration? There was a technological component to it, almost like an impulse to start it, but the last time the Doctor regenerated, he needed the same push from K’anpo. Either the Time Lords gifted them the power, or I’m seriously beginning to wonder if the Gallifreyans are a future evolution of humanity. Not canon, I know, but still.

The Doctor hooks K9 into the helm, and the robot dog pilots them out of the spiral nebula. The detect the P7E and follow her track back into the nebula. They survive the journey, but become buried as the ship attracts a large amount of debris. They use the ship’s weapons to punch through the accumulating rock, but it damages their own ship.

And this makes no sense. But that doesn’t stop the plot (as it is) from moving on.

They break free and follow the signal to a soft planet that is forming from the debris. They crash into the planet and the shock causes a tunnel to collapse, disrupting some slave workers called Trogs. Guards are dispatched to pacify the slaves, lording over them with claims of heresy. The accused heretic’s son, Idas, runs from the guards.

Have I mentioned how much blue screen work there is in this one?

The Minyans open the airlock and blast through the rock into the tunnels, detecting signs of intelligent life. The crew leaves the ship after telling the travelers to stay behind, so the Doctor and Leela naturally follow and explore. They find Idas and lead the guards away before doubling back to find the boy inside the R1C‘s airlock. The ship’s crew explore the tunnels, and one of them, Herrick,  encounters a guard. The guard shoots, but the crewman reflects it with his shield and kills the guard. The overseer blocks the tunnel and fumigates it, effectively reducing the Trogs to the level of cockroaches.

The Doctor learns about the Trog myths from Idas, including legends of the Sky Gods (the Minyans have those too!) and the Seers who rule on behalf of the Oracle. They soon detect the fumigation gas, and the Doctor goes out to stop it, but he is overcome in short order. Nevertheless, he was successful as the gas recedes and back-flushes the system, overcoming the guards at the brig. Meanwhile, the crew frees Herrick.

When the Doctor returns, Idas tells him about sacrifices at the Citadel, which is the punishment his father Idmon will endure for heresy. The Doctor tells K9 to find Captain Jackson while they save Idmon. Idas warns them of dragons at the entrance, but Leela makes short work of these automated defenses. They enter the planet’s core, which has null gravity, and descend to the Citadel. They are soon captured.

The sacrifice is to be accomplished by using the flame from the (ironically named) Lamp of Life to burn a rope and drop a sword (of Damocles, despite the incorrect usage) onto the victim. The Oracle, a disembodied mechanical voice, begins the ceremony. The Doctor’s group is brought to the sacrificial altar and are sentenced to death, but Idas sparks a rebellion by moving his father at the last second. Jackson and the crew arrive as the Doctor’s group flees. Herrick remains to guard their escape and is captured.

So. Much. Blue. Screen.

Such. Terrible. Special. Effects.

The free slaves explain their lives of labor, and the Doctor determines that the Trogs are really the descendants of the P7E‘s crew. They decide to seek out the Oracle by hiding in mine carts, but they accidentally fall into a rock crusher. The Doctor and Leela hold on to the edge by their fingertips – a literal cliffhanger look how clever – and the R1C crew rescues them, holding back the guards while the travelers continue their quest.

The Seers torture Herrick, but do not believe his story despite the scanners indicating that he is telling the truth. They remove their masks, revealing mechanical faces. The Seers determine that the Oracle is worth more than the genetic bank, and offer them to the R1C crew if they agree to leave. Captain Jackson concurs.

The Doctor, Leela, and Idas locate the Oracle, which is yet another megalomaniacal computer (which sounds like Gozer from Ghostbusters).  The Doctor deduces that the Oracle is programmed to protect the genetic banks at all costs, so he steals them, which brings the might of the Oracle’s guards upon them as they flee. They are trapped in a deliberate “skyfall” cave-in, but are rescued by K9.

“Gratitude is unnecessary. Speed is vital.” Nice.

K9 stops the R1C‘s departure as he detects the trap: Herrick’s prize is really a pair of fission grenades capable of destroying a small planet. It’s a bit late for Chekhov’s gun, but there it is. The Doctor takes the grenades back into the tunnels and hands them over to the guards. After Leela frees the Doctor, the travelers return to the R1C with all of the Trogs in tow. As the ship departs, the grenades explode and destroy the planet, causing a shockwave that pushes the ship out of the nebula. The ship sets course for the new Minyan homeworld as the TARDIS departs for the next adventure.

Doctor, if I may: Speaking from an era where pop culture references permeate pretty much everything, if you have to explain the reference, the effect is ruined.

The story’s premise is decent enough – it should be since it’s effectively a rehash of The Face of Evil – but the execution is terrible. The Oracle computer was a lackluster and impotent villain (particularly when compared to WOTAN, BOSS, and Xoanan), the villain’s mechanical minions (sorry) were never explained, and the plethora of parallels to the Greek myths (mostly Jason and the Argonauts) was a bit (or a lot, really) heavy-handed. At least it gave the writers a reason to reach way back into Doctor Who history with the Trojan Horse. Finally, all of that badly executed blue-screening was painful on the eyes. It was probably a great technical achievement for the time and the budget, but it was hard to watch because there was just so much of it.

Louise Jameson added a little bit of saving grace with her humorous recovery from the pacifier ray — “Who did it? I’ll kill them!” — but, sadly, it was really the only humor to be found in this story. The rest of the jokes and gags fell flat.

I give the dodgy science a pass because, over the duration of the Timestamps Project, the science in Doctor Who has been dodgy more times than I can count. It’s a hallmark of science-fiction in this era.

I was tempted to give this one the lowest possible grade, but this one was still better than both The Web Planet and The Celestial Toymaker.

Though not by much.

Thank Louise Jameson.


Rating: 2/5 – “Mm? What’s that, my boy?”


UP NEXT – Doctor Who: The Invasion of Time


The Timestamps Project is an adventure through the televised universe of Doctor Who, story by story, from the beginning of the franchise. For more reviews like this one, please visit the project’s page at Creative Criticality.


Timestamp #95: The Sun Makers

Doctor Who: The Sun Makers
(4 episodes, s15e13-e16, 1977)

timestamp-095-the-sun-makers


This story is an allegory about something. It seems almost as certain as death, but paid annually. I just can’t put my finger on it. I suppose it will come to me eventually.

On Pluto, a man named Cordo receives word that his father has died. Strangely, he is relieved, and has his “death taxes” ready for payment to Gatherer Hade. Cordo discovers that death taxes have been raised, and unfortunately, he has nothing more to give. The gatherer increases Cordo’s working hours to compensate, leaving him with no time to sleep.

In the TARDIS, the Doctor is playing chess against K9 and Leela. They land on Pluto, and the Doctor is amazed to see that it has been terraformed with vast cities and breathable atmosphere. Leela spots Cordo about to jump off one of the buildings, and together they stop him.

Hade is informed of an airspace violation and illegal landing. Overjoyed at the revenues, he heads out to arrest the perpetrators and discovers the TARDIS. The Doctor, Leela, and Cordo run to avoid the gatherer and avoid being sent to the correction centers, which are apparently very bad. Cordo mentions the “undercity” and rumors of tax evaders and outlaws live, and the travelers offer to accompany him. In short order, they find the outlaws.

Trivia: Pluto has six suns, which the Doctor determines are in-station fusion satellites. This title inspiration never really comes to bear on the plot again.

Meanwhile, K9 gives up on waiting for the Doctor and leaves the TARDIS. The dog makes his way through the city, and Hade and his aide Marn watch the progress. The outlaws give the Doctor a task by Mandrel, the outlaw leader: He is to take a Consumcard to the Consum Bank with Cordo. If he doesn’t return by a certain time, they’ll kill Leela. As the Doctor and Cordo set out, they encounter K9. Since Hade and Marn are watching K9 on the tracker, they also discover the Doctor, who they presume is an arms smuggler. Hade decides to go to the palace and warn the Collector.

The Doctor and Cordo reach the bank and attempt to deposit the Consumcard. Unfortunately, the Doctor is trapped in the booth which fills with gas. He is apprehended, but Cordo escapes. The Doctor wakes up in the Correction Center with another prisoner, Bisham, who inadvertently shares just how much freedom is restricted in this civilization, including the use of a gas in the atmosphere to increase anxiety and decrease will. During their discussion, the Doctor sabotages the circuitry, which electrocutes their guard. As the Doctor’s time runs out, Mandrel orders Leela to be seized, but she fights back. Cordo returns with news of the Doctor’s capture, and Leela tries to rouse the rebels to fight with her. In the end, only Cordo accompanies her to rescue the Doctor. The duo find K9, and the dog accompanies them on their journey.

Hade and the Collector discuss how to suppress the supposed uprising. The Collector promises half of his guard to assist in exchange for a five percent increase in taxes to cover the cost. As workers fix the reprogramming circuitry, the Doctor is freed by Marn. He leaves his bag of jelly babies with Bisham, and Marn escorts the Time Lord to see Hade. The gatherer pays him the value of the forged Consumcard and forgives the offense, obviously in an attempt to instill a false sense of security in the rebels. Marn also places a tracker on the Doctor as he leaves.

Leela, Cordo, and K9 break into the Correction Center and find Bisham. They all leave to continue tracking the Doctor, who has returned to the undercity and Mandrel’s gang. Mandrel is convinced that the Doctor is a spy for the gatherer, and Leela’s group is maneuvered into a trap. Leela has K9 spring a trap of their own and the group escapes, but Leela is shot and apprehended in the attempt. She is taken to the Correction Center for medical attention, and the Collector orders her to be brought to him when she has recovered.

Mandrel attempts to torture the Doctor for information, but he is rescued by Bisham and Cordo. The three of them plan an insurrection with Mandrel’s gang against the Company. Strangely, they have no idea what the Company does or where their money goes. The Doctor tricks the trackers with a footage loop of him walking the same path.

Leela is brought before the Collector, who learns of the Sevateem and the TARDIS. He dismisses Leela and researches the Time Lords, then informs Hade of the Doctor’s true identity. The Collector orders Leela to be publicly executed, and issues a bounty on the Doctor, dead or alive, to be paid out by Hade. The commander of the guard visits Leela in the Correction Center and taunts her with news of her execution. That guy’s gonna get a taste of her knife, isn’t he?

Marn and Hade follow the false scanner trail and discover the trick. Meanwhile, the Doctor’s team takes control of the vapor towers, the nerve center for the city’s power. They learn of Leela’s pending execution by steaming, a particularly gruesome death, and K9 offers to traverse the pipes and disable the system. The Doctor then crawls to the condenser and rescues Leela, but his efforts are betrayed by an inadvertent call from Mandrel.

The rebels are clearing the atmosphere of the mind-altering gas, and the Doctor decides to take over the Collector’s public video system and announce the rebellion to the world. The Collector is informed that some of the workers are refusing to work, a side-effect of the atmosphere purification, sending the leader into a fervor.

The Doctor and Leela break into the palace and, after a rather humorous hypnotism sequence, begin to explore the Collector’s systems. They discover the Company vault and crack it, but as Leela rushes in, she is knocked unconscious by a security field. The public video system broadcasts a message that the rebellion has taken over, and in the face of a mob, Marn joins the rebels. On the roof, Hade confronts a group of workers and is tossed over the side for his trouble.

The Collector returns to the palace and the Doctor sits down for the typical fourth episode exposition. The Collector is an Usurian, and his species made a deal with the humans: In exchange for a colony on Mars to save humanity, the Usurians taxed them to the extreme. Once Mars was exhausted, they moved the operation to Pluto, and once this operation is over, the Collector plans to abandon them and move on. It’s a plan of galactic domination through business instead of war.

The Doctor inadvertently awakens the hypnotized guard who provides a distraction for the Collector to unveil his Doomsday contingency plan: A sprinkler system filled with poison that will kill every human almost instantly. Luckily, Leela distracts the guard with a knife to his shoulder, then stops the Collector from throwing the switch. As the rebels storm the palace, the Collector reverts to his natural form (a lump of seaweed) that is easily stopped.

With the threat stopped and the day saved, the travelers head back to the TARDIS. Leela and K9 pick up their chess game once again, and the Doctor flips the board by throwing the TARDIS for a loop. With mock sincerity, he apologizes and offers to start the match again.

It was a simplistic but straightforward story, but a little too on the nose with the commentary.

Rating: 3/5 – “Reverse the polarity of the neutron flow.”


UP NEXT – Doctor Who: Underworld


The Timestamps Project is an adventure through the televised universe of Doctor Who, story by story, from the beginning of the franchise. For more reviews like this one, please visit the project’s page at Creative Criticality.